Complete initializing, Initialize color temp.calibration, Color temperature adjustment – Marantz VP-10S1 User Manual
Page 42
38
ENGLISH
After replacing the lamp or otherwise when the lighting changes,
you can adjust the color temperature using the included color
temperature sensor. In the adjustment procedure, you must first
initialize the sensor itself before adjusting color temperature. It
takes about 10 minutes from when power to the projector is
activated for the lamp’s brightness to stabilize. Wait for lamp
brightness to stabilize before adjusting color temperature.
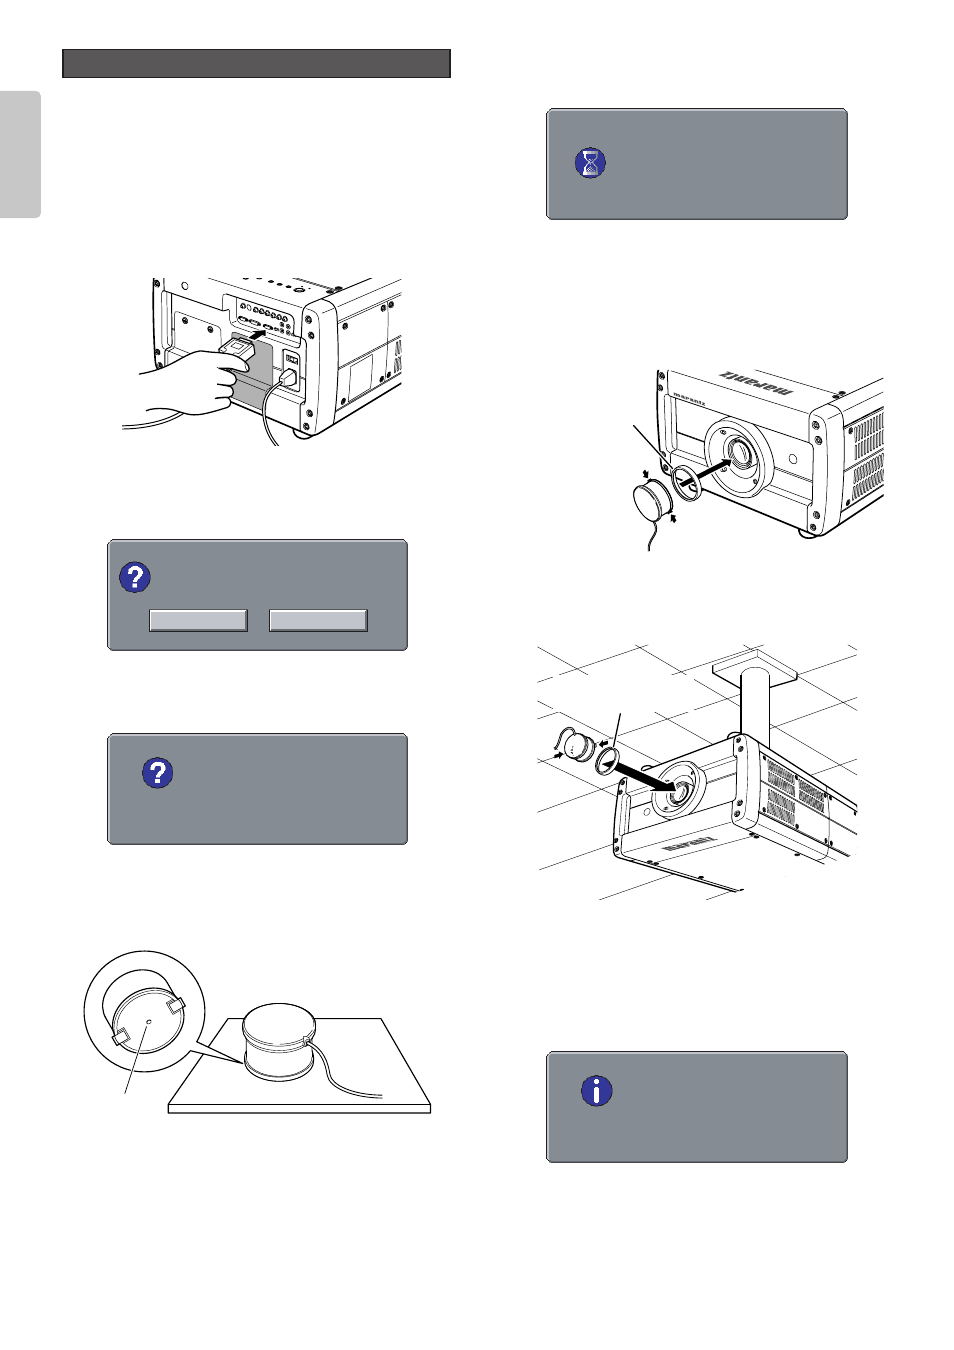
1.
Connect the cable of the color temperature sensor to the
RS-232C port.
2.
Press the MENU button, select “Color Temp. Calibration”
from the menu and press the
2
button. The below
message appears on the screen.
3.
Use
1
and
2
buttons to select "Yes" and press the
ENTER button. The below message appears on the
screen.
Before pressing the ENTER button, turn the color
temperature sensor over on its dark side as shown in the
below figure, to prevent outside light from penetrating to
the sensor’s receptacle.
4.
Press the ENTER button. The below message appears
on the screen for a few seconds as the sensor itself is
being initialized.
5.
Fit the color temperature sensor onto the lens and press
the ENTER button. The lens automatically shifts to the best
position for performing color temperature adjustment. Color
temperature adjustment then starts and the projector’s
WARNING and STANDBY indicators begin flashing
simultaneously.
When installed on a flat surface
When mounted on a ceiling
6.
When the WARNING and STANDBY indicators go out,
color temperature adjustment is complete. Adjustment
takes about 4 to 5 min. When the color temperature
sensor is detached from the lens, the below message
appears on the screen.
Press "ENTER" to exit
Complete
Initializing...
Press "ENTER" to start
Initialize
Color Temp.Calibration ?
Yes
No
Color Temperature Adjustment
Receptacle
Attach the color temperature sensor so
that the cable is to the bottom side of the
projector as shown in the figure.
Attach the color temperature sensor so that
the cable is to the bottom side of the projector
(now upside-down) as shown in the figure.
Attachment for Color
temperature sensor
Attachment for Color
temperature sensor