Step 5: install the mounting plate – Maytag MMV5207ACQ Installation User Manual
Page 16
STEP 5: Install The Mounting Plate
16
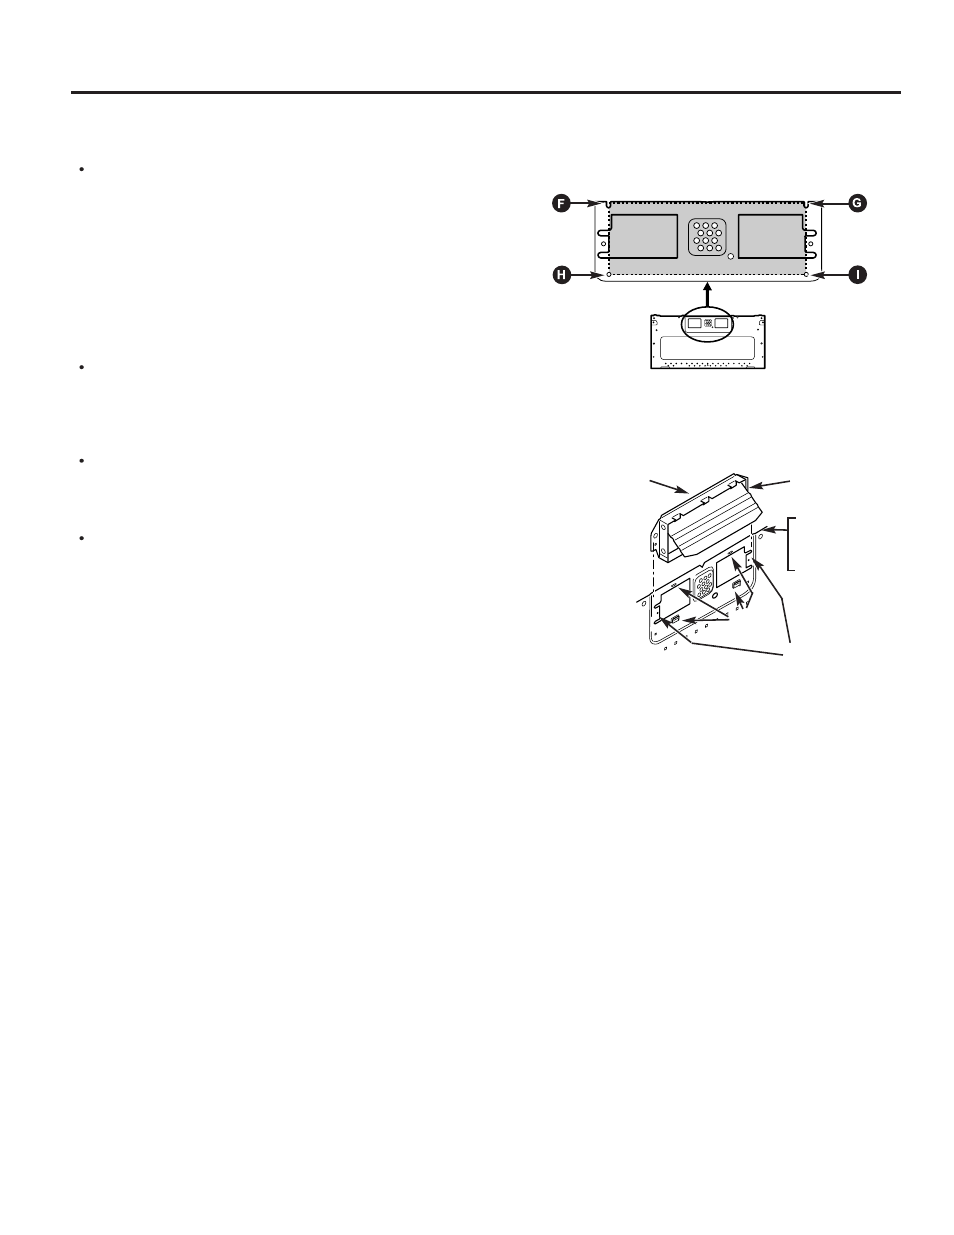
Slide exhaust
adaptor into
guides on
rear panel.
Exhaust Adaptor
Damper
(hinge side up)
Locking
Tabs
Guides
Mounting Plate
Back Plate
(1 piece
mounting plate)
(3 pieces
mounting plate)
For Wall-Vented
Make the box cutout for the rear wall duct.
– 1 piece mounting plate:
Us ing a pencil, put dots through slots F and G, and
through holes H and I. Remove the mounting plate and
draw lines extending through the points. This will give
the location and size of the box cutout for the rear wall
duct. (Figure 29)
– 3 pieces mounting plate:
Use the wall template to determine the location and
size of the box cutout for the rear wall duct.
Attach the exhaust adaptor to the rear mounting plate
(back plate) wall side. Push in securely until it is past the
top locking tabs and in the lower locking tabs. Take care
to assure the damper hinge is installed so that it is at the
top and that the damper swings freely.
Carefully guide the exhaust adaptor, now attached to the
mounting plate, into the house duct. Before using the
screws to attach the plate to the wall. This will assure
proper alignment for installation.
Return to step 5, item 3 to continue. After completing the
installation of the mounting plate, again check the rear
damper for free movement to assure it will operate
properly.
Figure 29
Figure 30