Piezas, herramientas, materiales – Maytag MMV5207ACQ Installation User Manual
Page 24
Piezas, herramientas, materiales
24
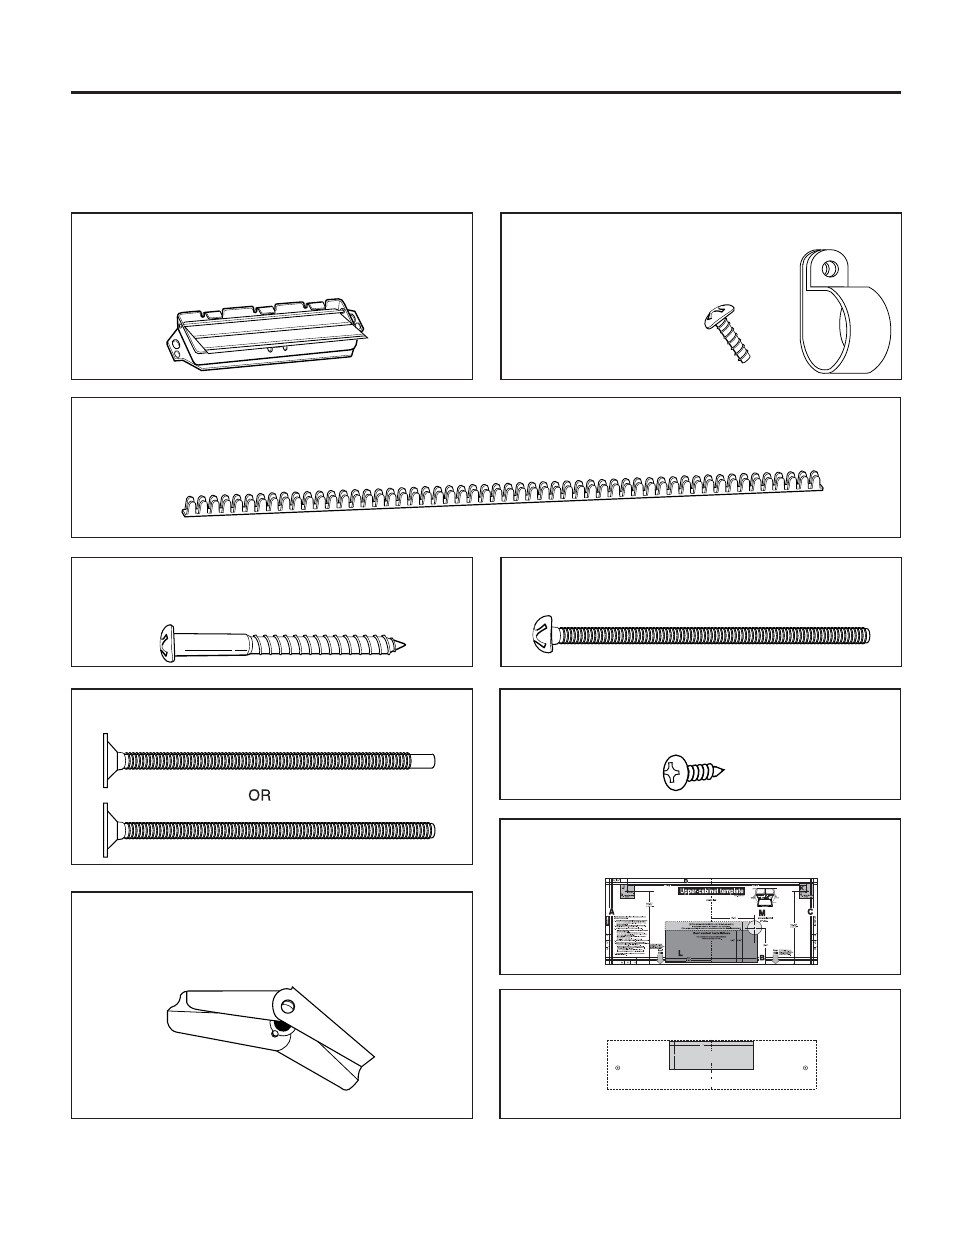
LAS SIGUIENTES PIEZAS SE SUMINISTRAN CON EL HORNO:
NOTA: Dependiendo de los requisitos de ventilación, puede ser que no necesite usar todas estas piezas.
Puerta de tiro invertido, conector del ducto
(para una instalación con ventilación por el techo o la pared)
No es el tamaño real (las 2 piezas deben ensamblarse
como se indica)
Una abrazadera de cordón eléctrico
y un tornillo de color oscuro para
montaje (para sostener el cordón
eléctrico)
Tamaño real
Dos tornillos para madera autorroscantes -
Tamaño real
(para sujetar el conector del ducto de la puerta)
Una boquilla de sujeción de cordón eléctrico - Tamaño real
(para el orificio del cordón en un gabinete superior de metal)
NOTA: Necesita instalar cuando menos dos tornillos de rosca en el poste de 2" x 4" y cuatro pernos de sujeción a la
pared. El área de montaje debe cumplir con el requisito de peso de 150 libras (68 Kg).
Cuatro tornillos con cabeza cuadrada de 1/4" x 2" -
Tamaño real
(para los orificios de los postes de la pared)
Cuatro pernos acodillados de 1/4" x 3" - Tamaño real
(para los orificios de las paredes de cartón de yeso)
Dos pernos de 1/4" x 3" - Tamaño real
(para asegurar en el gabinete superior)
Cuatro cabeza con articulador de muelle -
Tamaño real
(para los pernos acodillado)
Un gabarit pour armoire supérieure -
Dimensions réduites
Un gabarit pour le mur arrière - Dimensions réduites
(Plaque de montage à (3) trois pièces seulement)
12
4
REAR WALL TEMPLATE
CAUTION — IF EXHAUST ADAPTOR IS POSITIONED OUTSIDE
RECOMMENDED DIMENSION, GREASE LADEN AIR WILL
DISCHARGE INTO HOUSE STRUCTURE.
LINE UP WITH
PREVIOUSLY
DRILLED HOLE
B.
LINE UP WITH
PREVIOUSLY
DRILLED HOLE
A.
Printed in Korea
NOTE: IT IS VERY IMPORTANT TO
READ AND FOLLOW THE DIRECTIONS
IN THE INSTALLATION INSTRUCTIONS
BEFORE PROCEEDING WITH THIS
REAR WALL TEMPLATE.
This template is for locating the wall venting
cutout. Do not use this template for roof
or room venting.
1. Place the template flat against the rear
wall, aligning circles A and B with the
corresponding holes previously drilled in the
rear wall for holes A and B of the wall plate.
2. With the template aligned to the holes, tape the
template to the rear wall.
3. Use a saber or keyhole saw to cut out the shaded
area F through the rear wall.
4. Remove the template from the rear wall.
5.
RETURN TO AND PROCEED WITH THE
INSTALLATION INSTRUCTIONS.
1/4
P/N. 4922W5A060A
F. CUT OUT FOR WALL
VENTED ONLY
CUT HOLE THROUGH REAR WALL FOR EXHAUST ADAPTOR