Chapter 2: basic operation – Microcom 466 User Manual
Page 13
466 Operators Manual
7
CHAPTER 2: BASIC OPERATION
2.1
UNPACKING THE 466 PRINTER
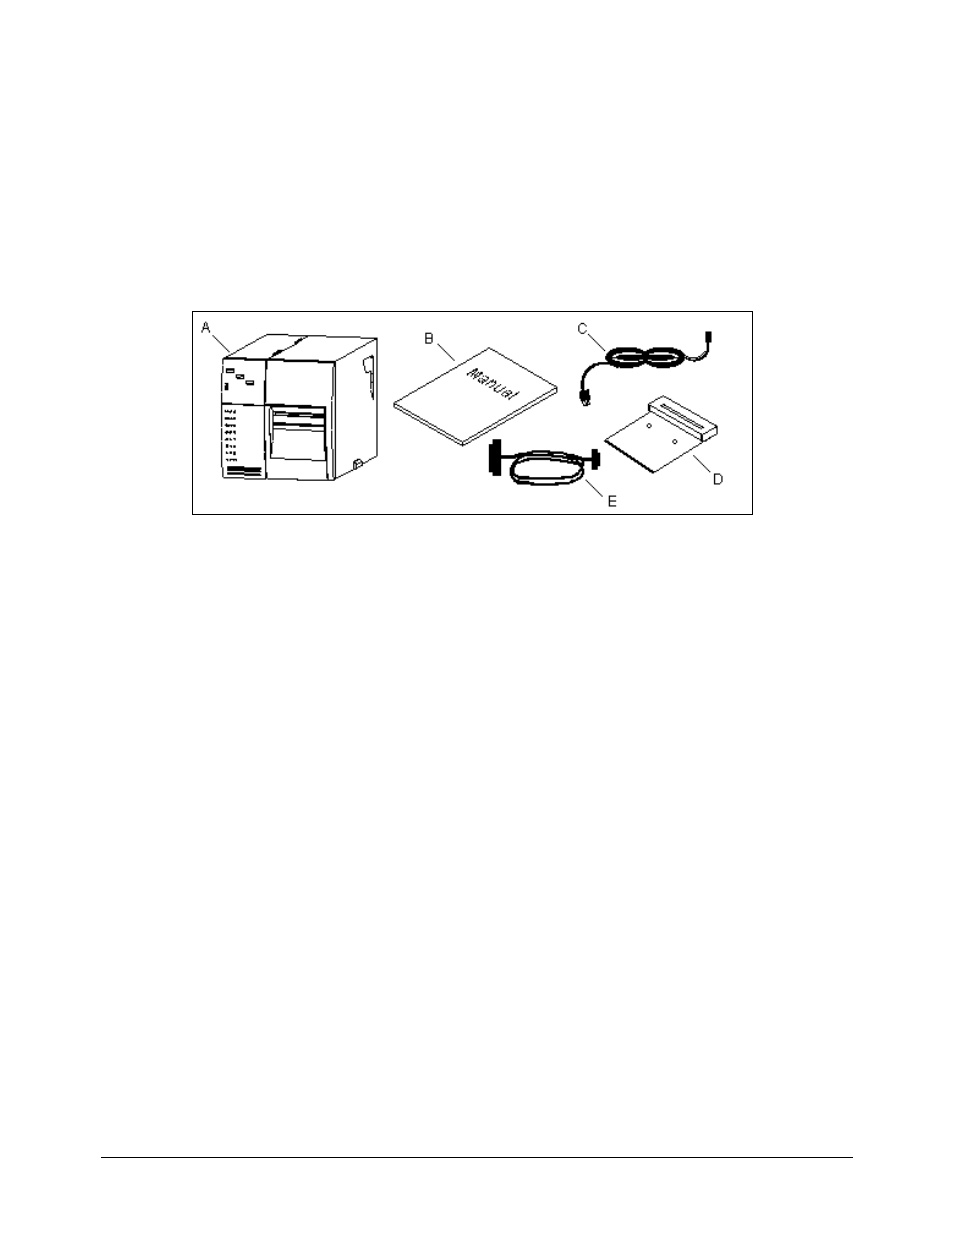
While unpacking the printer, please check all packing materials closely to avoid misplacing any
necessary parts. After the printer is removed from the box, verify that all parts are present and
in good condition (see Figure 3). All packaging material should be kept and used if the printer
is to be shipped. (Some parts shown are optional. Please refer to the packing list or order.)
Printer Parts
Figure 3
A.) Printer
B.) Operators Manual
C.) Power Cord
D.) Optional Cutter
E.) Optional Communications Cable
2.2
INITIAL POWER UP
Before connecting the printer to a power source, verify that the voltage printed on the rear
panel correctly matches the supply.
Plug the printer in and turn the power switch on. The front panel power LED should turn green.
If this does not occur, check the power source and if necessary call your service organization.
2.3
FRONT PANEL SWITCHES AND STATUS LIGHTS
The front panel switches perform several different functions depending on the printer mode:
2.3.1 NORMAL MODE
The "Label Print" button is used to issue a label request. If the button is pressed while the
printer is idle, the unit will print a label using the current label format. If the button is pressed
while a label is printing, the printer will enter pause mode.
2.3.2 STATUS LABEL MODE
To print a status label, hold the print button while turning on the printer. Release the button and
a test pattern with statistical information will be printed (see Figure 4). When a status label is