Nevion DAC-AVA-DMUX User Manual
Page 8
DAC-AVA-DMUX
Rev. A
nevion.com | 8
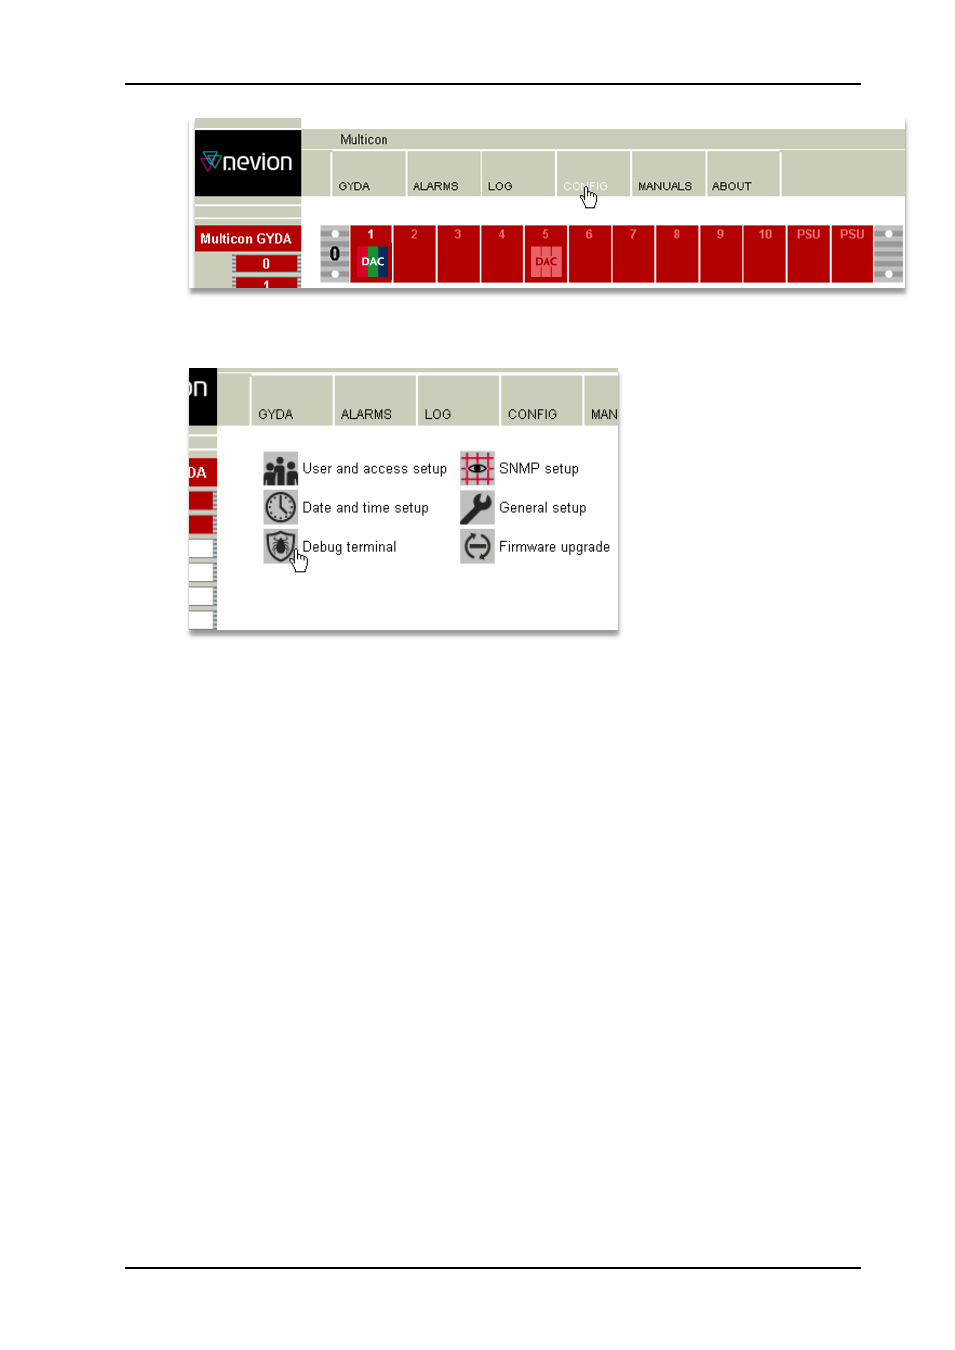
Figure 7: Step one to access the Debug terminal in the previous Multicon version
Figure 8: Step two to access the Debug terminal in the previous Multicon version
5) Now comes the only tricky part of the procedure: To address a particular module
through the debug terminal, one has to take the frame number and slot number and
make a unique two-digit address from them. To do this, multiply the frame number
from the Multicon GUI with 10, then add the slot number from the Multicon GUI, and
finally subtract 1.
Another way of saying this is that the left digit of the address is the frame number,
and the right digit is the slot number minus one, i.e. slots counted from 0 to 9,
instead of 1 to 10 as they are displayed in the Multicon user interface.
The two modules in our example were both in frame 0, but in slots 1 and 5
respectively. T
his gives us the addresses “00” (0*10 + 1 - 1) and “04” (0*10 + 5 - 1).
Before trying to send the software key it could be wise to check that the addressing
is indeed correct. That can be done by sending a single question mark (“?”) to the
m
odule. In the Flashlink protocol this is known as the “hello” command, and is
basically a who-are-you command. The module should identify itself with the module
type, version information, and serial number. In the example below the hello
command has been sent to the module in frame 0/slot 5
(that is, address “04”), and
the module has replied.
Then the software key “optn 0 123456 123 …” has been
copy-pasted into the command field and is ready to be sent to the module. The
command will be sent when
the “Ok” button is pressed. The module will then reply
with “ok”, and restart with the new features enabled. It will take a few seconds
before Multicon Gyda rediscovers the module after the restart.