Advanced usb diagnosis – NIStune Type 1 Diagnostics User Manual
Page 10
4.
Advanced USB Diagnosis
If Nistune does not connect with the above steps then try checking the connection directly to the ECU without Nistune
software. Note that this step is advanced and not normally required as Nistune debug logs are sufficient for diagnosis of
communications issues.
File > Configuration > Debug logging will generate a log file which we can look at
Steps for advanced diagnosis are as follows:
1. Check you can talk to the board outside of Nistune. Download DLPtest.exe from
http://www.dlpdesign.com/usb/io8.shtml
2. Copy DLPtest.exe to a spare folder and execute it
3. In the DLP Design Test Application program select
a. Select Driver = DLL
b. DLL Drivers = Description
4. Click ‘Search’ and you should see ‘Nistune USB communications device’. So select this
5. Then this should show in the field next to ‘Search’ so now click ‘Open’ and Port Status should change to
‘open’
6. If the above did not work then your driver is not installed correctly or FTD2XX.DLL cannot be found. If
the DLL is not found then the ‘Search’ button will not function.
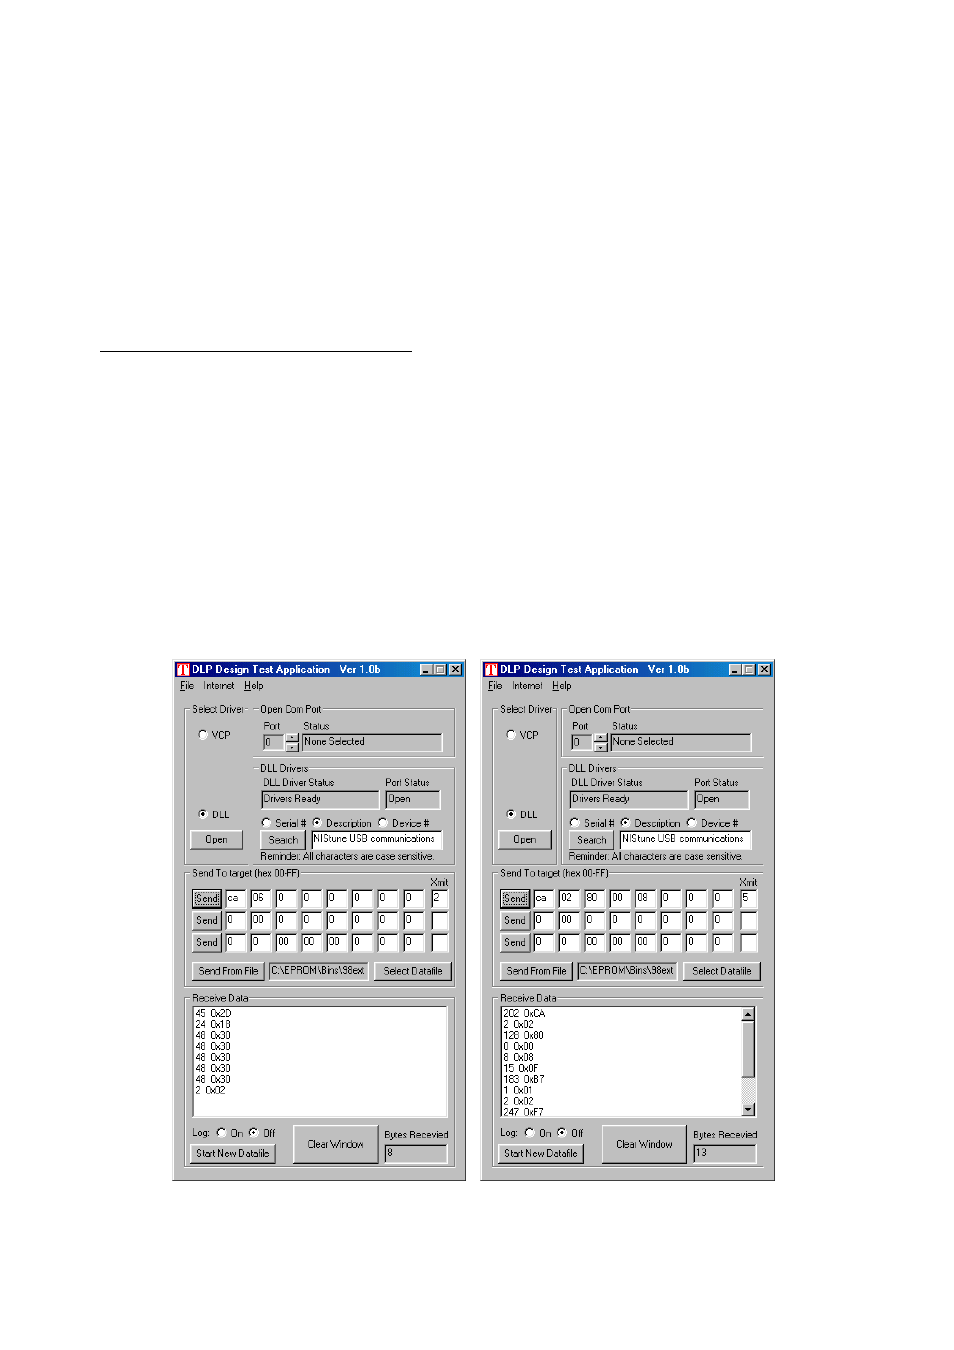
7. Send bytes CA 06 with ‘Xmit’ length field set to 2 and press SEND as per picture below
You should receive the ECU ID field data (older patch revisions only return 0x69)
8. Next check you can receive streamed data. Streamed data is done by CA 06 80 00 08 with 5 bytes in the
transmit field. This should retrieve from address 8000, 8 bytes as displayed below
If the above does not work then recheck your CPU connections and correct Nistune firmware loaded on your
board or emulator (for early boards only)