Electrical connections hardware installation – Obvius A7801 User Manual
Page 6
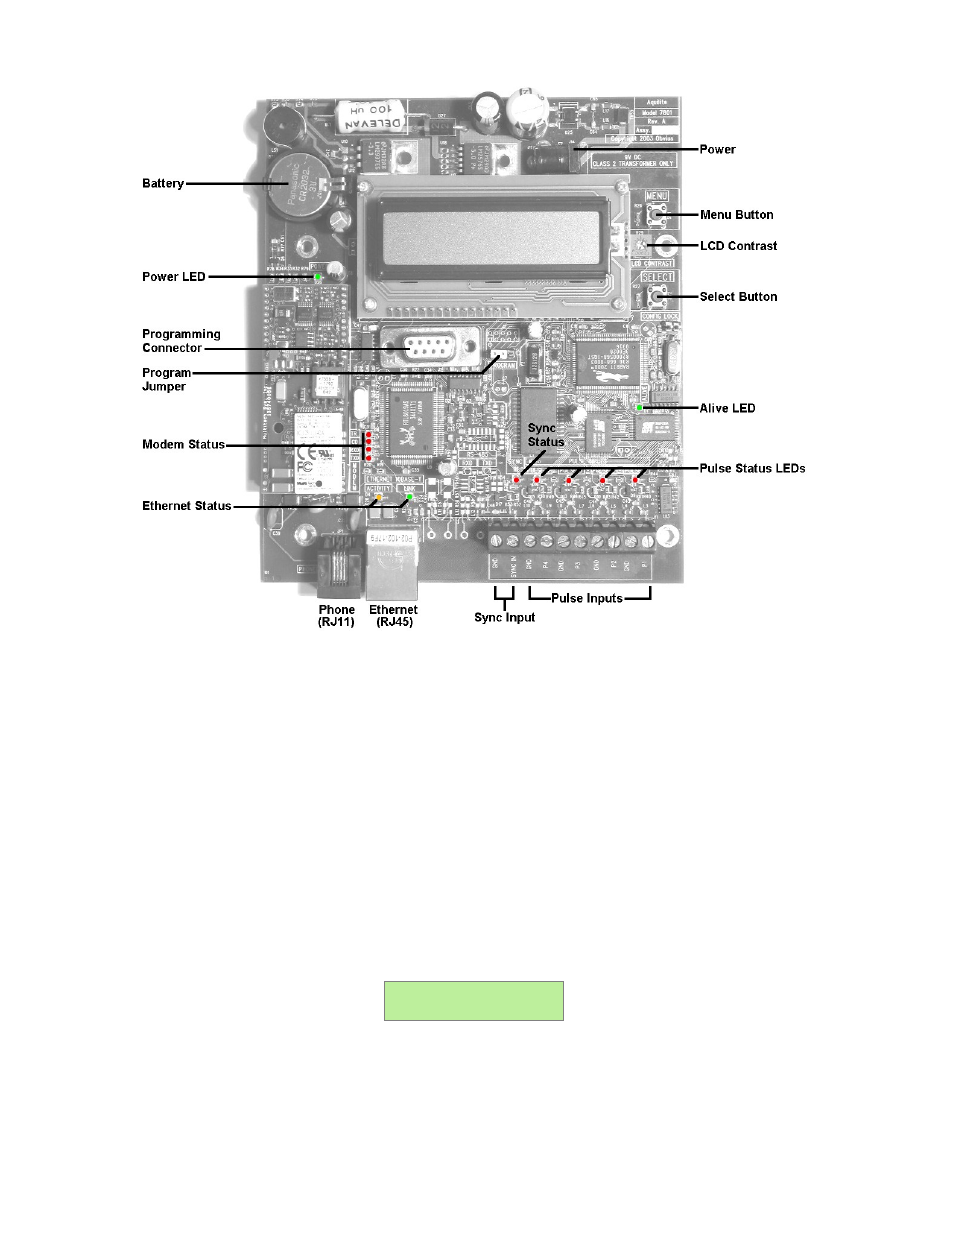
Electrical Connections
Hardware Installation
Step 1 - Unpack materials: Remove all materials from shipping box and verify all required components are available
Step 2 - Mount the AcquiLite on the wall or other appropriate location.
Step 3 - Connect the pulse output devices. For KYZ pulse output meters, attach the normally-open circuit to the
AcquiLite. These are usually the K and Z terminals. Note: if the meter is a true KYZ meter (form C) you must check the kyz
checkbox in the pulse input configuration page. Please refer to the pulse input section of this document for further details.
A special Sync Input contact closure input is provided for "End of demand interval" signal from the utility or other source.
When this contact is closed, the AcquiLite will immediately begin a log cycle and record data for each meter. Using this
pulse input will override the log cycle period option in the logger/setup configuration page. The terminal block and LED are
labeled "Sync Input" in the electrical connections illustration above. The Sync Input status LED will blink whenever a
contact closure is detected on this input.
Step 4 - Power-up and diagnostics: After power is applied, the green power light on the AcquiLite should come on and the
LCD display will display a series of diagnostic screens ending with the following message on the LCD display (this boot
sequence may require up to 10 seconds to complete):
AcquiLite Ready
192.168.40.44
This indicates that the AcquiLite has loaded properly and is ready for configuration and connection to the network and
sensors. If the “power” light does not come on or the LCD display does not cycle to the above screen, verify that the power
cord is plugged in. If after cycling the power the unit still does not power up (or if an error message appears in the LCD
display) contact technical support.
Page 6
A7801 AcquiLite – Data Acquisition Server