Quintum Technologies Tenor AX Quick Start User Manual
Page 2
4. Click Ok.
5. Choose the serial port on your PC from the Connect Using drop down list box (i.e., Direct to Com 1). Click Ok.
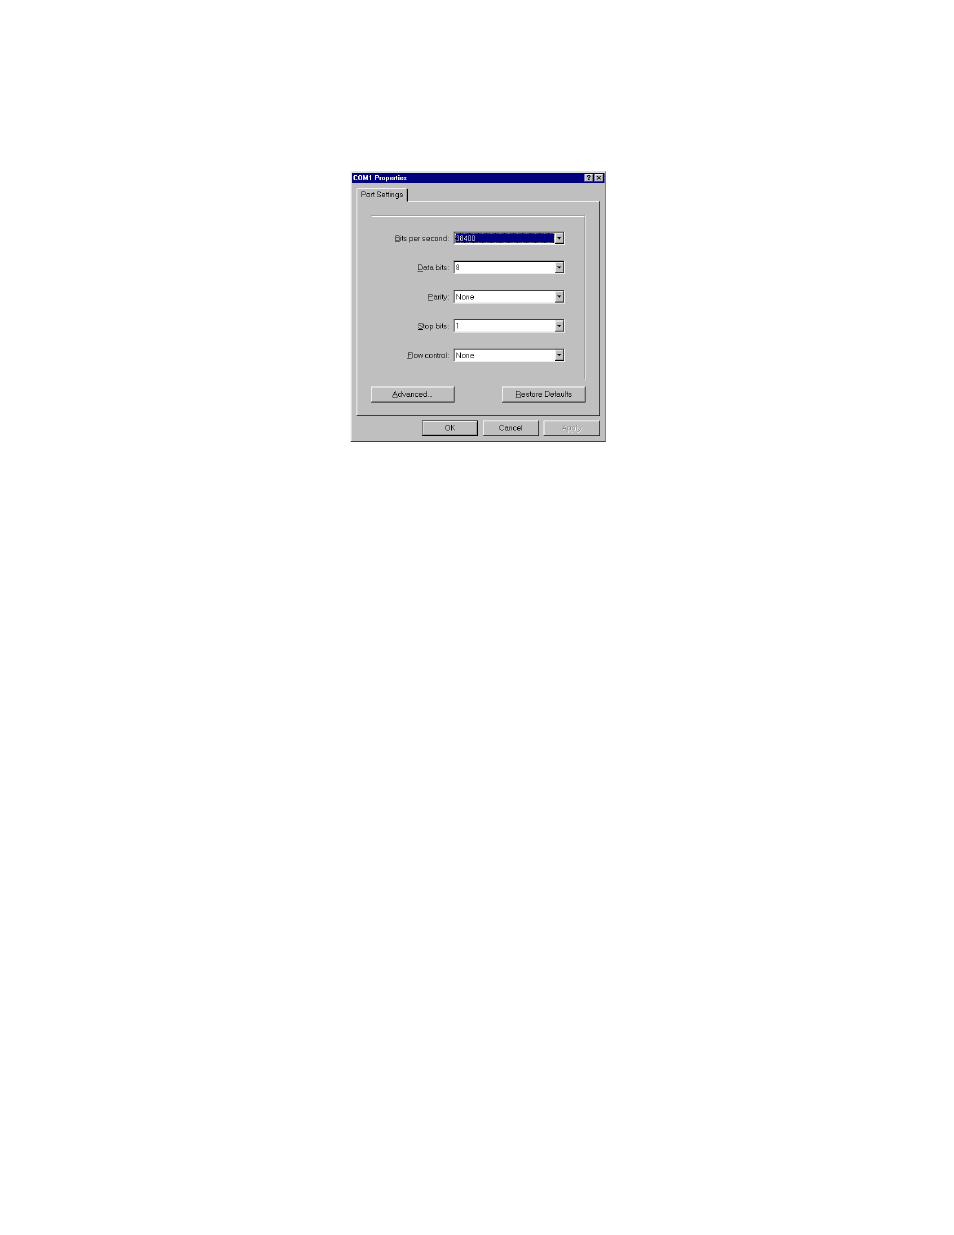
The Com1 Properties window will be displayed. See Figure 3-2.
Figure 3-2 Port Settings Window
6. From the Bits Per Second drop down list box, choose 38400.
7. From the Data Bits drop down list box, choose 8.
8. From the Parity drop down list box, choose None.
9. From the Stop bits drop down list box, choose 1.
10. From the Flow control drop down list box, choose None.
11. Click Ok and a connection to the Tenor will be established. Information about the unit will scroll on the screen.
12. Enter login and password. Both are admin by default.
13. A message will appear on the screen “Tenor Analog does not have an Ethernet interface configured. Would you
like to configure an Ethernet Interface?” (y/n).
14. Type y.
15. For IP Address, enter the IP address for the Tenor unit.
16. For Subnet Mask, enter the subnet mask. This address is used to differentiate the network portion of the IP address
from the host portion of the IP address.
17. For Default Gateway, choose whether there should be a default gateway (router) which routes packet data outside
of your LAN and enter its IP address.
18. A message will appear on the screen “Tenor Analog Ethernet Interface successfully configured.” The Tenor will
restart using the new Ethernet settings.
Tenor will restart using the new Ethernet settings.Once the IP information is set, you are ready to configure the unit
and make the first call. See the Tenor AX User’s Guide (included on your CD ROM) for details.