1 – internal effects on the dm-24, Patching and setting up effects – Teac DM-24 Effects Manual User Manual
Page 3
TASCAM DM-24 Effects
3
1 – Internal Effects on the DM-24
The DM-24 contains a number of high-quality effects
that you can use within your project, either while
recording, or on mixdown.
The effects available include:
• Microphone modelling (single-channel)
• Speaker modelling (two channels)
• Chorus (two channels)
• Delay (two channels)
• Distortion (single-channel)
• Guitar compression (single-channel)
• Soft compression (two channel)
• Phaser (two channels)
• Pitch shifter (two channels)
• Flanger (two channels)
• De-esser (two channels)
• Exciter (two channels)
• Reverb (two channels)
Out of these, the two effects are available at any one
time in 44.1 k or 48 k sampling frequency mode. In
high sampling frequency modes (88.2k or 96k), only
one effect is available.
NOTE
The following combinations cannot be used: reverb +
reverb, reverb + speaker modeler.
In high sampling frequency mode, the reverb, micro-
phone modeler and speaker modeler are unavailable.
Patching and setting up effects
All effect settings are managed using the
EFFECT
key. This allows the assignment of sends and returns,
as well as the selection and parameter setting for the
effects.
There are two primary options, to use the effects
independently in loop or insert mode, or to use the
two effects in series, with the output of effect 1 feed-
ing the input of effect 2 (similar to some multi-effect
units).
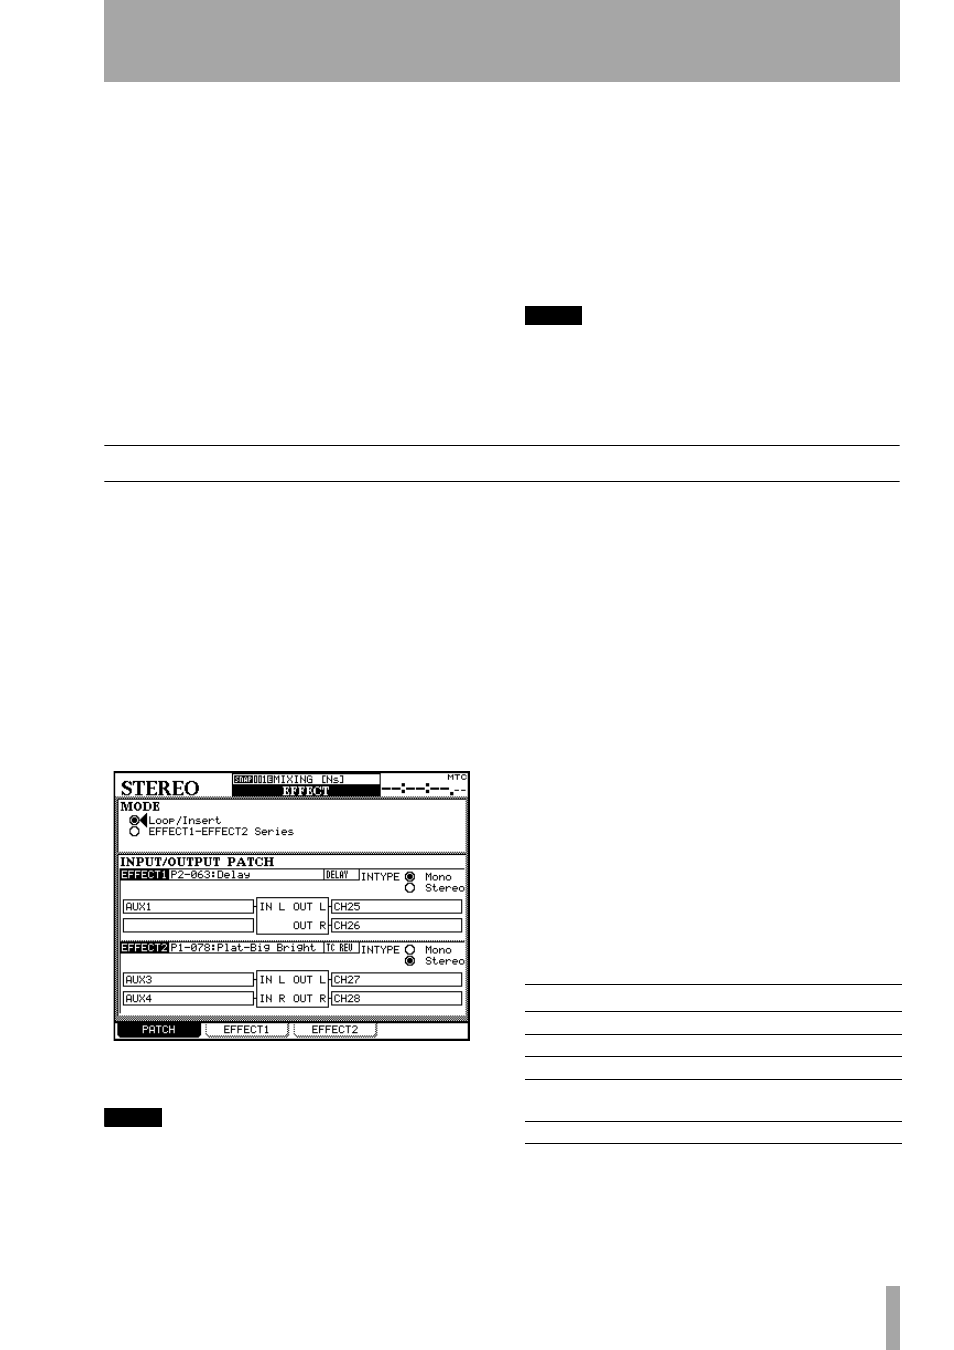
The first of these modes is known as the
Loop/Insert
mode, and the second as the
EFFECT1 EFFECT2 Series
mode.
Press the
EFFECT
key followed by soft key 1
(
PATCH
) to bring up the patch screen as shown here.
NOTE
When using the DM-24 in high sampling frequency
mode, only one effect is available, and only one effect
(EFFECT 1) is shown on this screen.
Use the cursor keys to select the mode (either
Loop/
Insert
or
EFFECT1 EFFECT2 Series
), and the
ENTER
key
to confirm the choice.
The lower part of the screen contains a representation
of the two internal effect inputs and outputs. An
effect may have two inputs (
L
and
R
) and two outputs
(
L
and
R
). See “Mono and stereo inputs” on page 4
for more information.
However, this does not mean that there are two sepa-
rate effect processors in each effect. It is possible to
use the two inputs of the effect processor “creatively”
(that is, have two completely separate feeds for the
left and the right inputs of the effect), but this is not
recommended.
We strongly suggest that only pairs of inputs (e.g.
stereo inserts, odd-even pair buss and aux inserts and
odd/even pairs of aux sends) are selected as stereo
inputs for the effects.
Use this screen to select the input sources for the
internal effects.
The choices available are:
Use the cursor keys, dial and
ENTER
key to set the
value for each input.
Effect source
Display shows
Aux sends 1 through 6
AUXx
Buss 1 through 8 insert
BUSS1 INS SEND
Aux 1 through 6 insert
AUXx INS SEND
Stereo L, R insert
ST-L PRESEND,
STR-R PRE SEND
Assignable insert 1 through 4
ASGN INSx SEND