Watson-Marlow PD/40 User Manual
Page 15
15
5. Remove the mounting bolts from both flanges. Lift the pulsation damper onto a suitable
workbench. Adhere to the instructions for lifting and moving as mentioned in paragraph 5.4 Lifting
and moving the pulsation damper.
6. Loosen the hose clamps (pos. 8) from both ends.
7. Unscrew the bolts (pos. 11 and 12) from both flanges (pos. 9).
8. Unscrew the locknut (pos. 7) on both sides until the compression on the pulsation damper hose
has relieved.
9. Remove both inserts (pos. 10) from the pulsation damper hose.
10. Remove both metal rings (pos. 5 + 6), O-rings (pos. 4) and neck-rings (pos. 3)
11. Remove the mounting bolts from both flange supports (pos. 9) together with the inserts (pos. 10).
12. Remove the pulsation damper hose from the housing.
6.3
Replacing the pulsation damper hose
After the pulsation damper hose has been removed, as described in “Removing the pulsation damper
hose”, the (new) hose can be installed in the pulsation damper.
CAUTION
If you are installing a new pulsation damper hose, and you wish to
continue pumping the same product, ensure that the colour code of the
new hose matches the colour code of the old, used hose.
1. Check all parts to be installed for any damage and replace when necessary.
2. Grease all metal parts which are not corrosion-protected and O-rings with Molykote
®
55M or
equivalent.
3.
Place one of the collar bushes (pos. 3) in the damper housing. Install the pulsation damper hose
(pos. 2). Place the second collar bush (pos. 3).
4.
Slide both O-rings (pos. 4) at both ends over the pulsation damper hose.
5.
Place both metal rings (pos. 5 + 6) and hand-tighten both pressing rings (pos. 7).
6.
Loosely place the hose clamps (pos. 8) at both ends.
7.
Loosely place the flanges on both sides (pos. 9) and place the inserts. (pos. 10)
8.
Tighten the pressing rings (pos. 7) (see also paragraph 8.2 Torque values).
9.
Tighten both flanges (pos. 9) using the corresponding bolts and spring washers. (pos. 11 and 12)
10.
Lift the pulsation damper from the work bench and place it back into the pipe work. Observe the
instructions for lifting and moving as mentioned in paragraph 5.4 Lifting and moving the pulsation
damper. Mount and tighten the mounting bolts to the flanges at both ends.
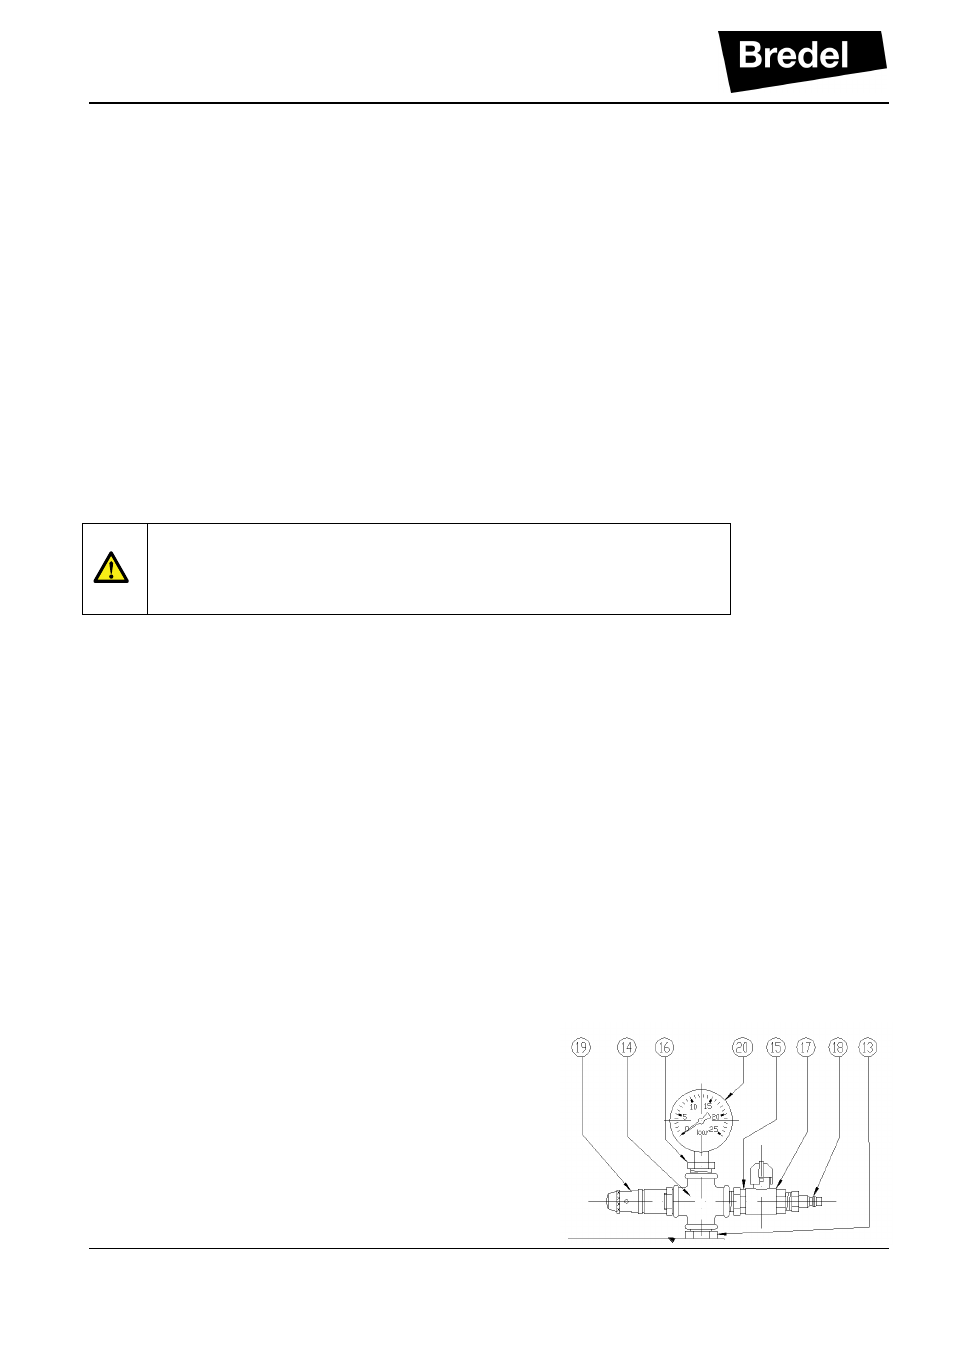
11. Shut the ball valve (pos. 17) on the pulsation damper.
12. Connect the filling medium to the filling nipple.
13. Apply pressure to the pulsation damper by the filling
medium.
14. Open the ball valve (pos. 17) gently. Filling medium
will now enter and pressurize the vessel. Check the
pressure gauge (pos. 20) for the actual pressure
inside the vessel.