Set up data collection – Wavetronix SmartSensor HD (101-0415) - Quick-reference Guide (User) User Manual
Page 3
The Data link on the SSMHD main screen lets you configure data collection.
6
Set up data collection
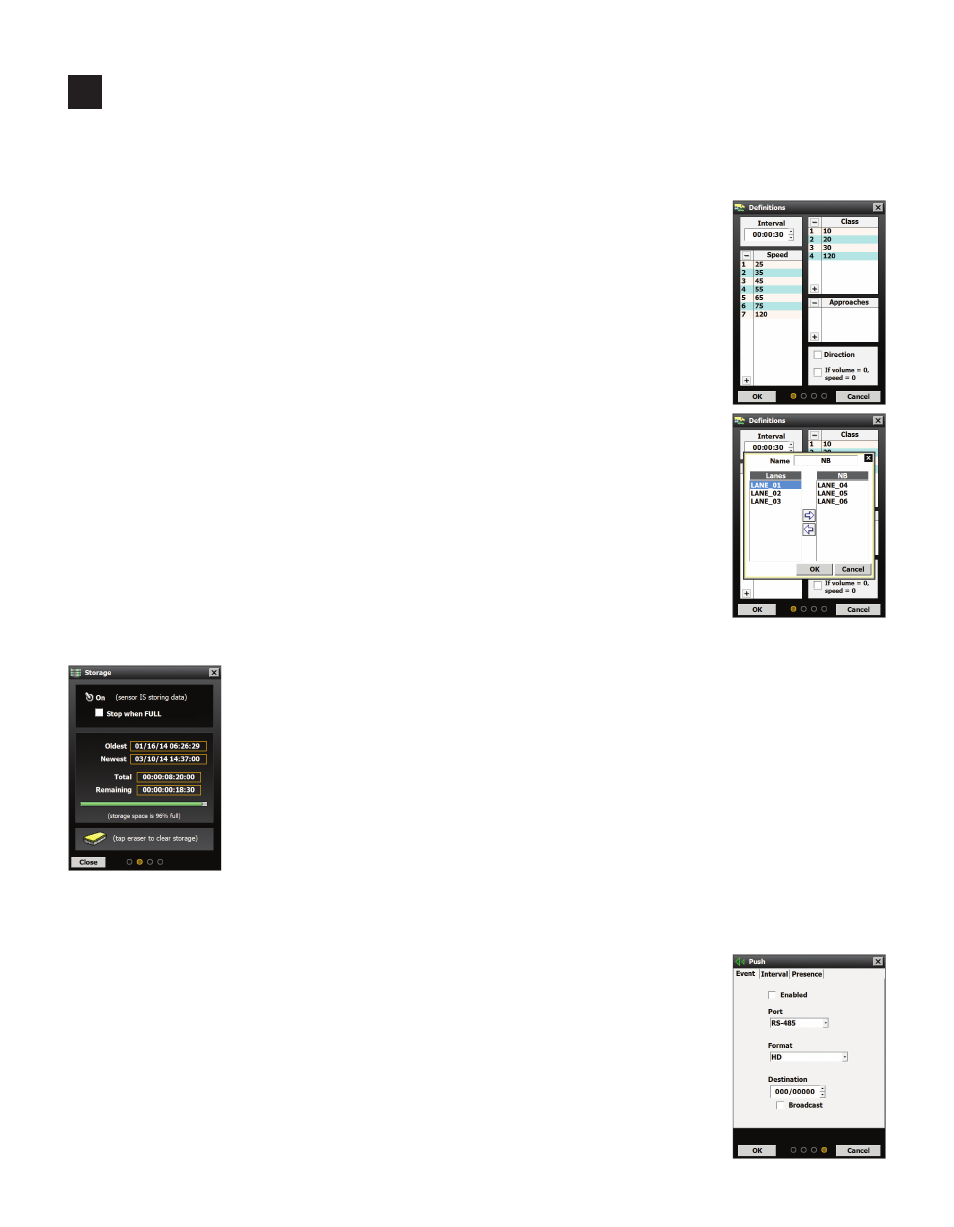
Definitions
In this section you will define classifications of vehicles based on length, speed or
direction; once bins are set, data can be collected for these groups of vehicles.
˽
For class or speed, use the - / + buttons to add or remove bins. For any given bin,
click on it and type or use the - / + buttons that appear to change the definitions.
˽
For direction, click the Direction checkbox. Vehicles will be sorted into Right
and Wrong bins, based on whether the vehicles are traveling in the direction that
the lane is configured to go.
Use the Interval option to set the length of the interval (a stretch of time in which
data is collected about all vehicles that pass the sensor).
Approaches are lane groupings used in data collection. To create approaches:
1 Click the + in the Approaches area; the window shown at right will appear.
2 Select the lanes for the approach from the Lanes list on the left.
3 Click the right-facing arrow to assign them to the approach.
4 Enter a name for your approach in the text field at the top of the window.
5 Click OK to save the approaches.
Push
Use the Push option to set your sensor to periodically push data to your computer
without waiting for a request for that data.
1 Choose the tabs at the top that corresponds to the kind of data you want to
push; check the Enabled checkbox.
2 Select the port you wish to push data over, and the format the data should be in,
from their drop-down lists.
3 If you’re using the SS125 format, set the destination subnet/ID. This is the
destination subnet/ID the sensor will push data to.
Storage
The Storage area gives you information and options related to data stored on the sensor.
˽
The top area features a switch that can be toggled to turn data storage on and off.
The Stop when FULL checkbox lets you select what happens when the sensor’s
onboard storage is full. If this is checked, the sensor stops storing new data; if it’s
not checked, the sensor will start deleting the oldest data to make room for the new.
˽
The center area gives information about the data currently stored on the sensor:
above is the timestamp of the oldest and newest data in storage, and below is
information and a status bar showing how much storage space is free.
˽
Click the eraser icon at the bottom of the screen to delete all data currently stored on the sensor.