Wavetronix SmartSensor Advance Extended Range (SS-200E) - Quick-reference Guide (User) User Manual
Smartsensor advance, User quick-reference guide, Make a connection
SmartSensor Advance
USER QUICK-REFERENCE GUIDE
www.wavetronix.com
801.734.7200
2
Make a connection
1
Install the SmartSensor Manager Advance (SSMA) software
1 Download the setup file SSM Advance Setup.exe by going to the www.wavetronix.com.
2 Click Support and select SmartSensor from the Start by drop-down list.
3 Select SmartSensor Advance from the SmartSensor Support list.
4 Double-click on the file and follow the steps included in the install wizard.
1 Make a connection between your computer and the sensor. This can be done
with a Click communication module. The Click module must be mounted on
the same T-bus as the Click 200/222/223 surge protector.
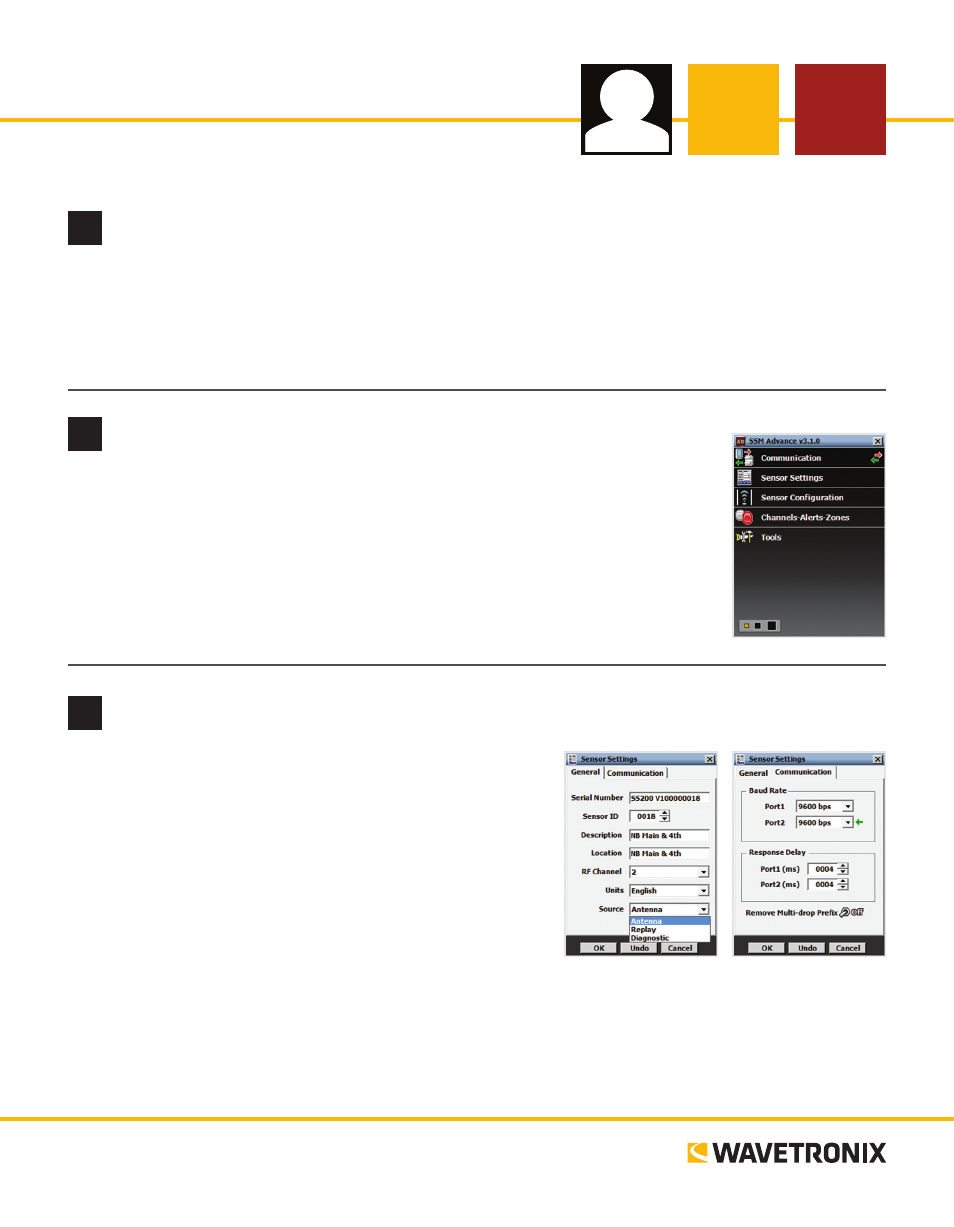
2 Select Communication on the SSMA main menu.
3 Select the type of connection you want to make (Serial, Internet or Virtual).
4 Click Connect.
1 Select Sensor Settings on the SSMA main menu.
2 Edit the following fields (if necessary):
˽
Sensor ID – Text field.
˽
Description/Location – Text field.
˽
RF Channel – Prevents radars from interfering.
˽
Units – English or Metric.
˽
Source –Antenna, Replay or Diagnostic.
˽
Baud Rate – Allows you to set the baud rate for RS-232
and RS-485 communication. The green arrow shows the
communication link on which SSMA is connected. The
default value is 9600 bps.
˽
Response Delay – Allows you to configure how long the sensor will wait before responding to a mes-
sage received.
3
Enter the sensor settings