Westermo Lynx 100 User Manual
Page 15
15
6640-2205
By clicking the “Scan for Devices” button the IP Configuration tool will detect the
switches/routers in the network. The software will list all Westermo managed switches
or routers connected to the network. Information as in the figure 1 will appear for each
detected unit connected to the same network as your PC.
If you only want to change the IP address and the subnet mask, this
can be done within the IP config tool.
By clicking the listed Lynx that you wish to be re-configured you will be
asked if you would like to access it via the web, see figure 2. Click the
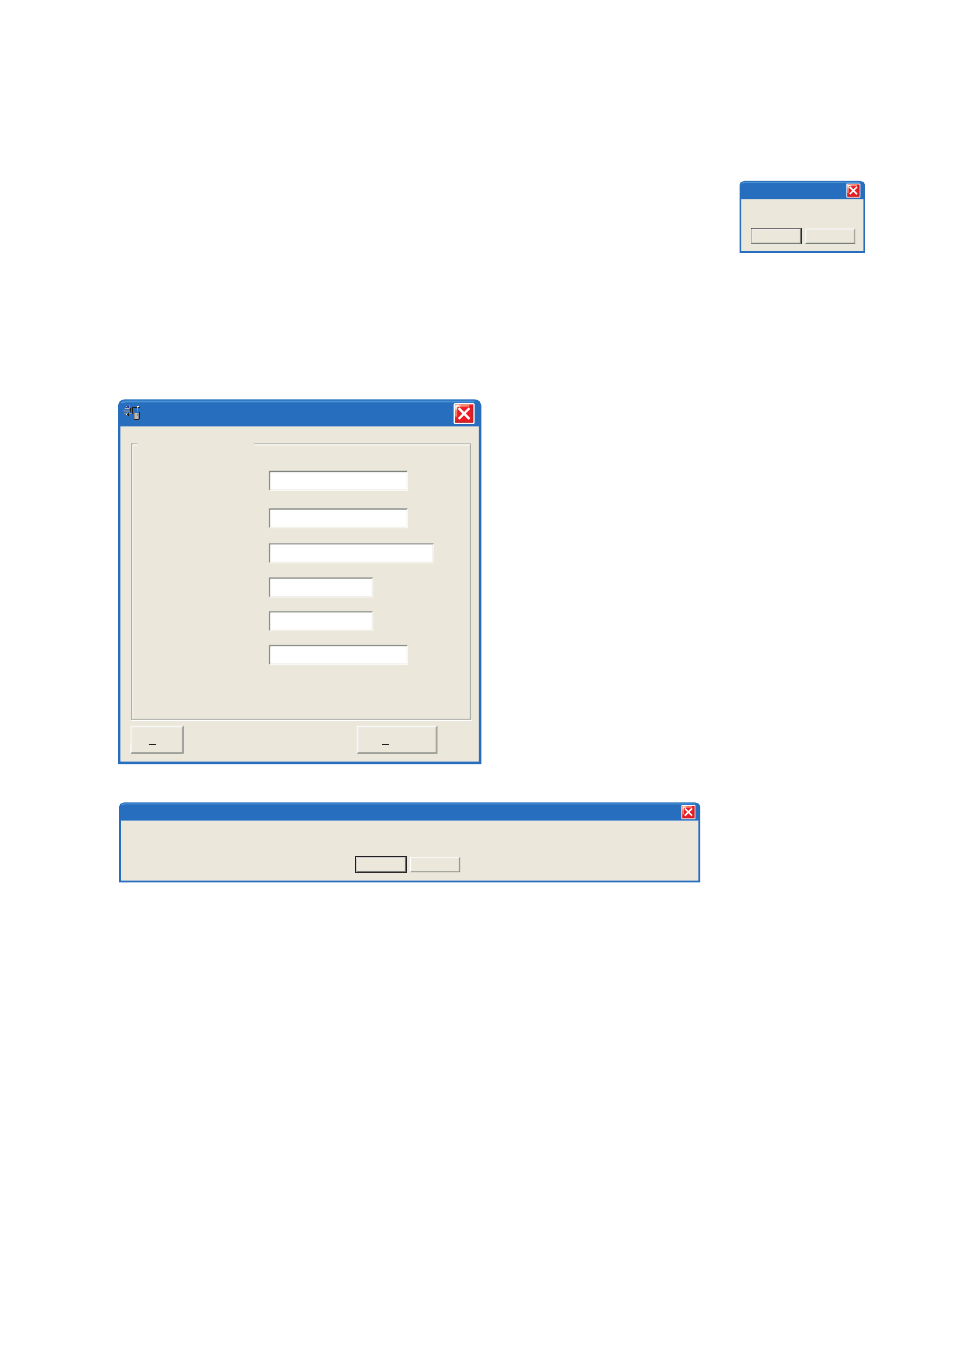
cancel button, enter the preferred IP address, Subnet mask and IP gateway address and
click the Set button to confirm the settings in the unit (see figure 3).
Note! If you are not sure about the settings – consult your network administrator.
Figure 2
Access switch via web?
Cancel
OK
IP configuration
Click the Close button to get back to main view.
You will then be asked if you would like to quit.
Click the OK button, figure 4, and you will be
back to the main view of the IP Configuration
program(see figure 1).
Click the Scan for switches button again and the settings you configured will appear in the list. Now
you can access the Lynx via the browser for further configuration by clicking the unit with an IP
address that fits your subnet. Figure 2 will appear and when you click the OK button and a web
browser will be opened and redirected to the Lynx unit log in page (see figure 5).
Figure 3
Selected Device
192
Lynx configuration
IP adress:
IP gateway adress:
IP gateway adress:
Subnet mask:
MAC adress:
Host name:
Location:
168
2 200
192
168
2 200
255
Westermo
location
00 07 7C 80 4A 6C
255 255
0
Set
Close
You have set new parameters on the switch. The switch must be restarted in order for the new parameters to take effect (except IP address change). Type cancel to return to
selected dialog or OK if you still want to quit.
Cancel
OK
IP configuration
Figure 4