Uploading a video file – ZeeVee ZvShow Channel (QAM & DVB-T/C) User Manual
Page 5
5
w w w . z e e v e e . c o m
C O N F I G U R I N G A N D U S I N G T H E Z V S H O W C H A N N E L
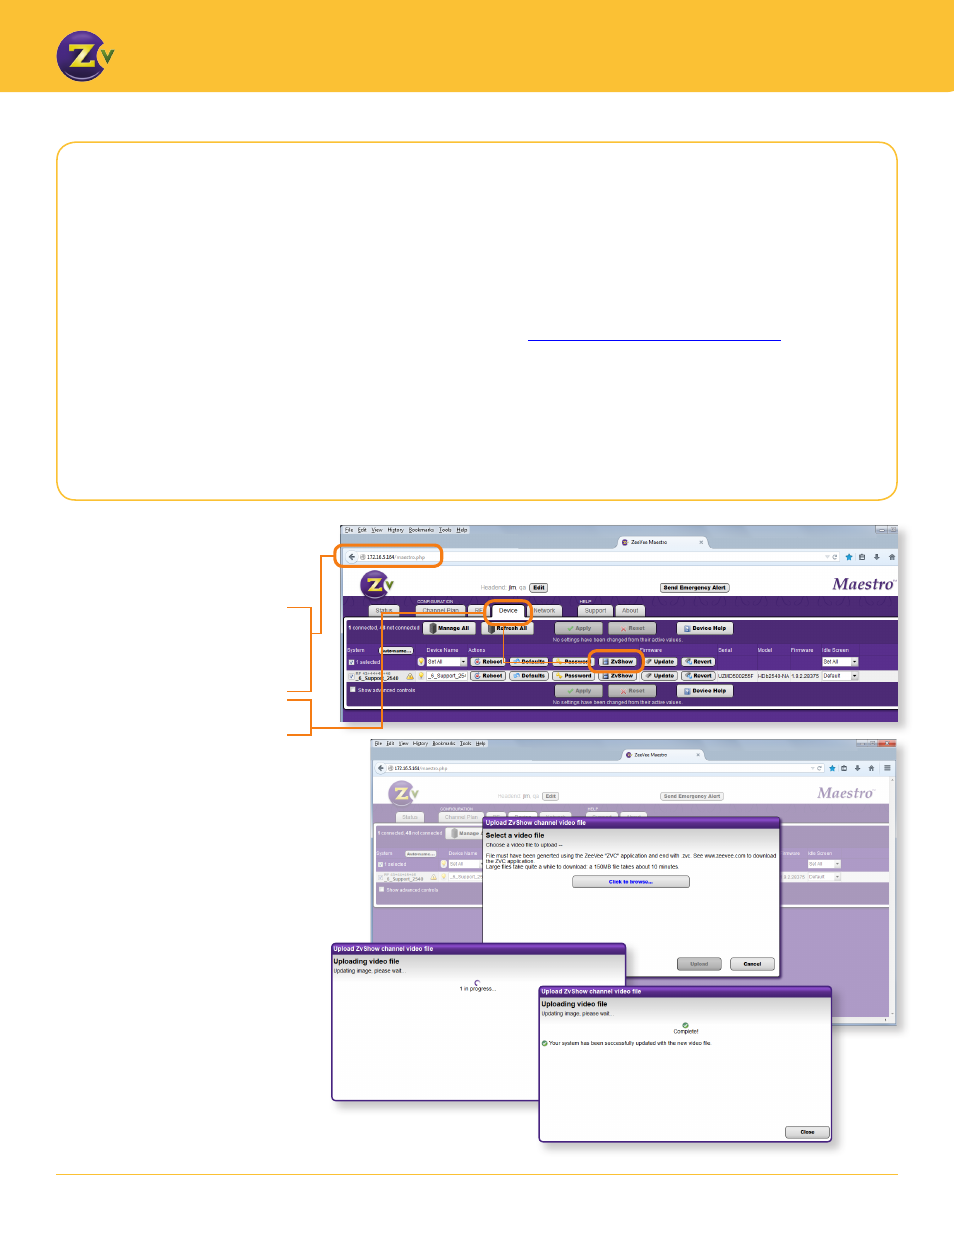
Upload the file using
the Maestro interface:
1. Log in to the ZeeVee unit and type
the IP address in the browser. The
IP address is found on the Front
Panel Display of the unit).
2. Click on the Device tab and click
the ZvShow button.
A popup will appear prompting for
the location of the media file to be
loaded in to the ZeeVee product for
use by the ZvShow player option:
3. Press the
Click to browse… button
and then select a video file from
your computer and click the file
button to begin the upload.
The progress window may linger for
several minutes depending on the
size of the file to be uploaded. Do
not close your browser or reboot the
system during the upload operation
or the media file will be corrupted.
Completion is indicated with a
dismissal window at the end of the
upload operation.
Uploading a Video File
Once a video file has been created, you need to upload it to the ZeeVee unit for playback on the ZvShow
channel.
To upload the video, the following specifications and instructions need to be satisfied:
•
The ZvConvert file cannot exceed 250MB.
• The ZeeVee unit must be running firmware <1.9.2> or higher. For information on updating firmware
please go to the firmware section under technical support
http://zeevee.com/support/firmware
.
• The ZeeVee unit must also be configured for the default “Double QAM” mode. This is done under
advanced controls on the Device tab in Maestro.
• The ZeeVee unit must be connected to the same network and accessible to the PC or device containing
the file to be uploaded.
• Log in to the ZeeVee unit and type the IP address of unit in the browser (IP address is found on the Front
Panel Display of unit).