Installation positions of the adjustment plate – Alinco DJ-V57 User Manual
Page 63
10.Maintenance and Reference
10
63
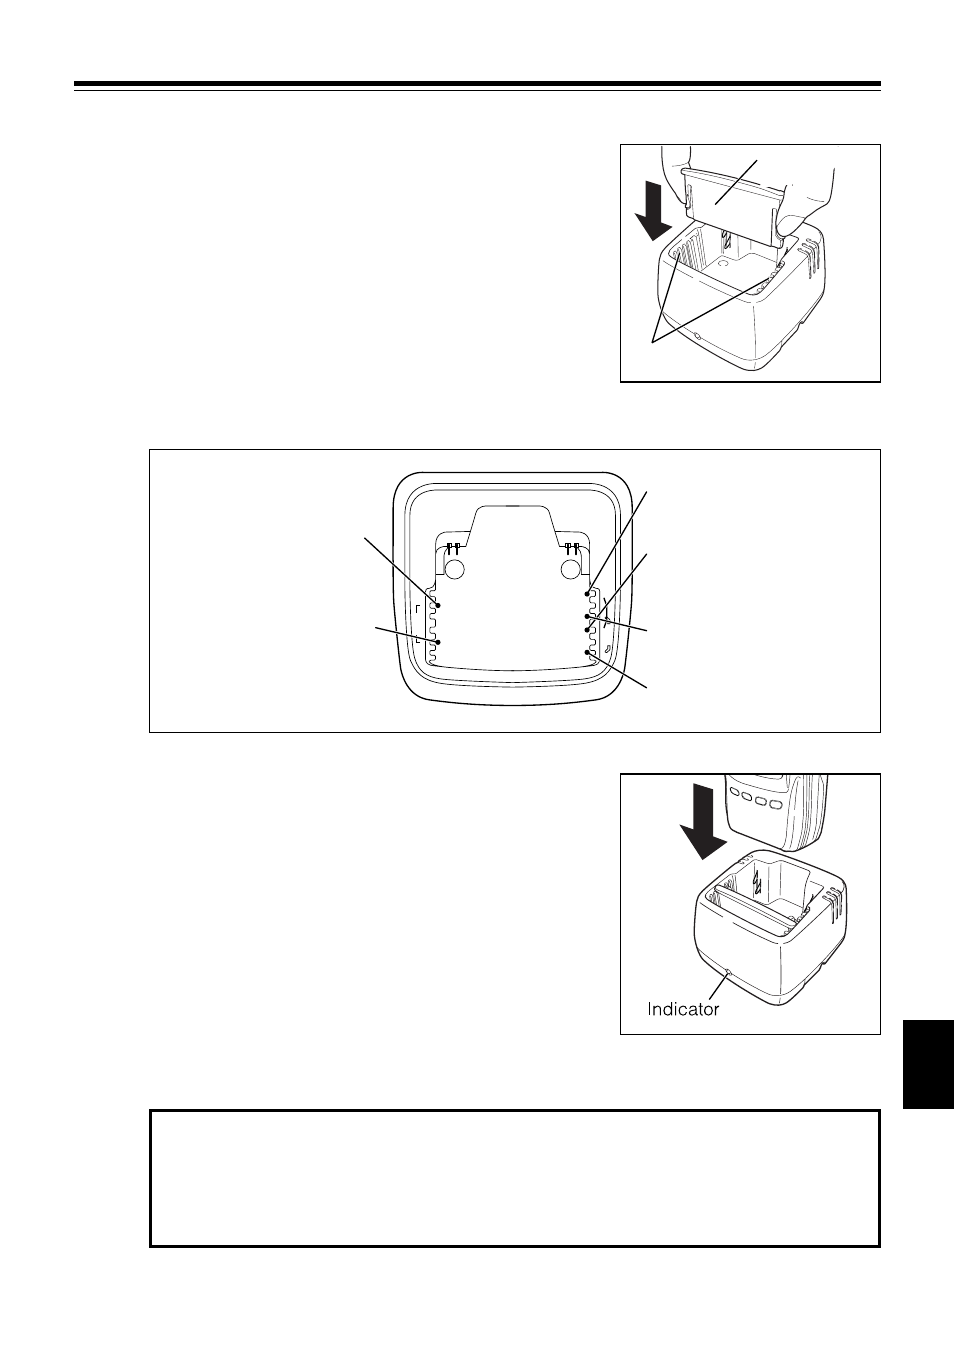
3. Press the sides of the adjustment plate, and attach
it to the proper grooves of the basket according to
the size of the battery pack. Make sure that the
characters A, B and C on both sides of the stand
match each other and the plate is placed all the
way down to the bottom.
Installation Positions of the Adjustment Plate
4. Mount the battery (with or without being attached
to the unit) in the basket as shown. Turn off the
unit while charging.
The red indicator on the basket turns on and
charging starts.
5. The red indicator turns off when the charge is completed. Remove the battery pack
from the basket.
NOTE:
The flashing red indicator means that the charger isn't working properly. Stop
using it immediately, remove the cord form the outlet and consult with your
local Alinco dealer.
A
EBP-64
B
C
A
B
C
A
B
C
A
B
C
EBP-66
EBP-63/65
When mounting only the
battery (EBP-63/65)
When mounting the battery
attached to the unit
(EBP-63/65)
When mounting the battery
attached to the unit (EBP-64)
When mounting only the
battery (EBP-64)
When mounting only the
battery (EBP-66)
When mounting the battery
attached to the unit (EBP-66)
Adjustment
plate
Groove