Verifying the installation, 4 in, Figure 59 – H3C Technologies H3C S5820X Series Switches User Manual
Page 66: 3 in
56
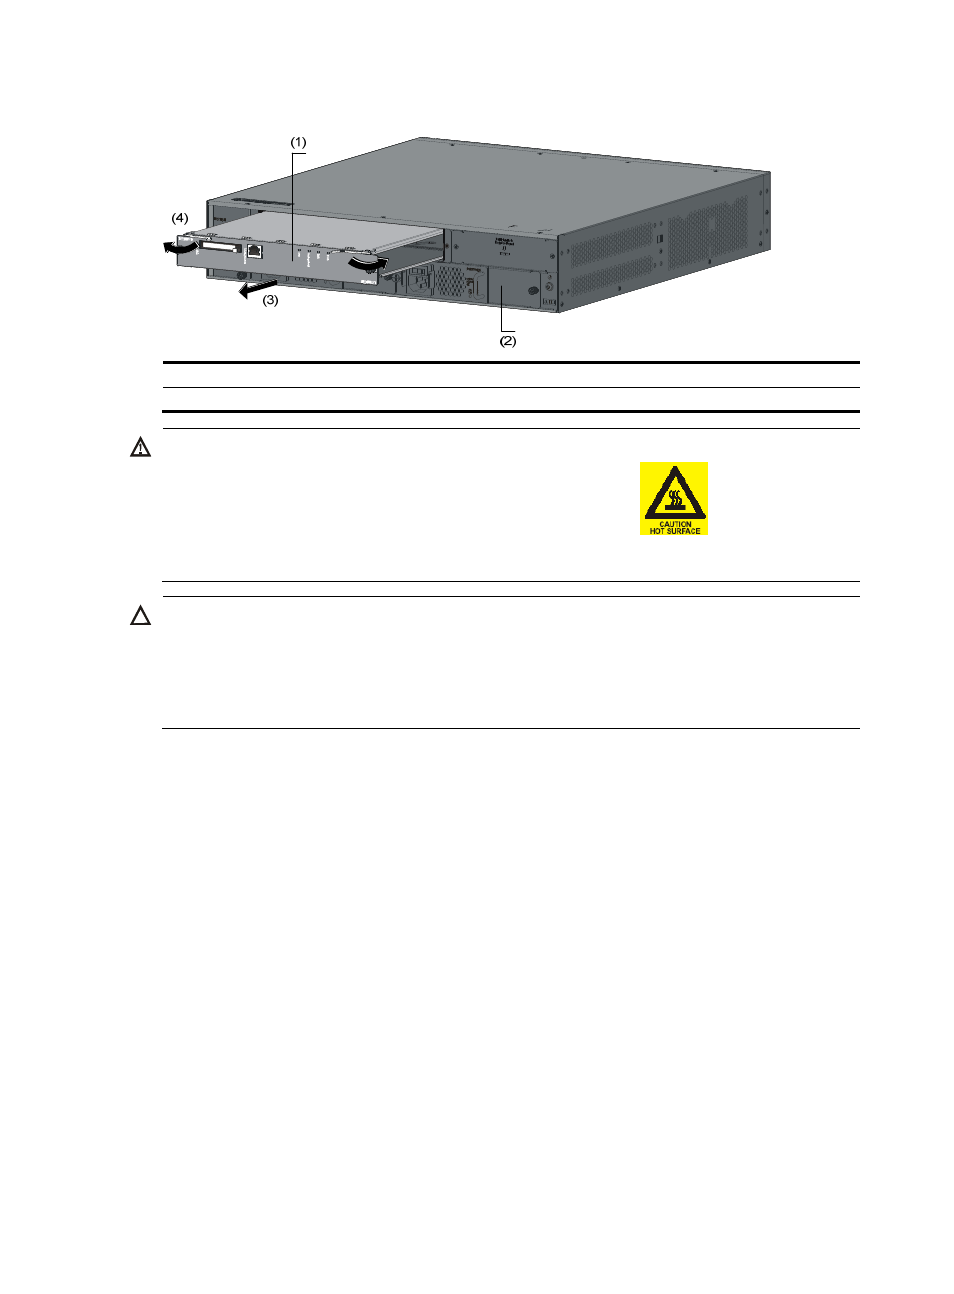
Figure 59 Remove the OAP card
(1) OAP card
(2) Chassis rear panel
(3) Pull out the OAP card
(4) Pull the ejector levers outward
WARNING!
Do not touch the protection cover marked by the yellow warning label
on the OAP card.
Underneath this protection cover is a heat radiator. After the OAP card runs for a period of time, this area
can get as hot as to burn your skin.
CAUTION:
•
Do not touch the surface-mounted components directly with your hands.
•
Do not use excessive force while removing the OAP card.
•
If you do not install a new OAP card in the slot, install a filler panel to prevent dust from entering the
switch and ensure good ventilation in the switch.
Installing an OAP card in an expansion interface card slot
Unpack the OAP card and use
to check that the card can be installed in an expansion interface
card slot.
Follow the procedure described in "
" to install the OAP card in an expansion
interface card slot.
Removing the OAP card in an expansion interface card slot
Follow the procedure described in "
" to remove the OAP card in an
expansion interface card slot.
Verifying the installation
Before powering on the switch, check that:
•
There is enough space for heat dissipation around the switch, and the rack or workbench is stable.
•
The ground wire is securely connected.