Step 5: testing the monitor wall operation, Using the kaleido-rcp2 with default settings – Grass Valley KALEIDO-IP X300 v.7.80 User Manual
Page 38
26
Setting Up the Kaleido-IP
Testing the Monitor Wall Operation
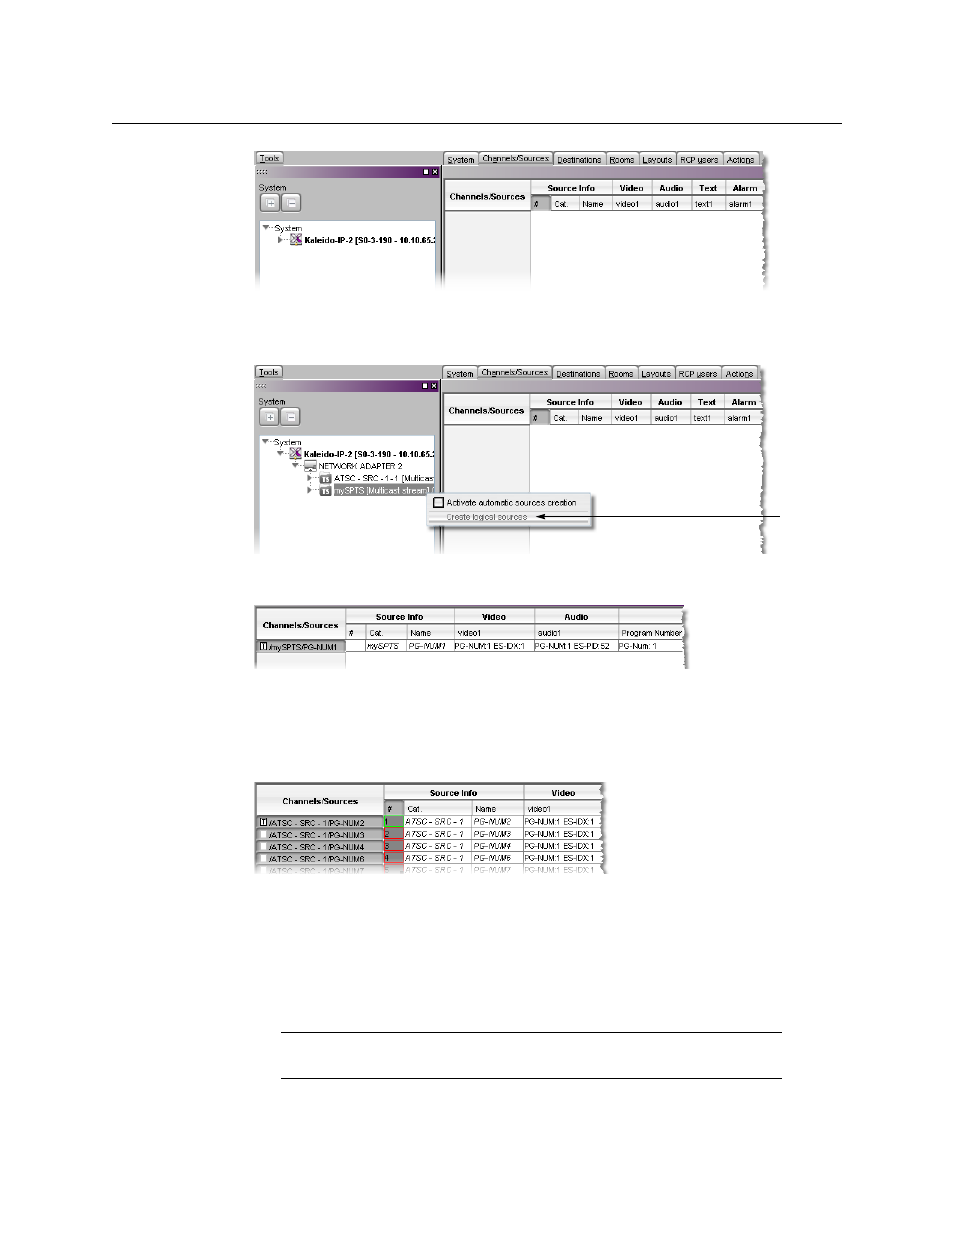
2 In the Tools pane, expand the multiviewer, and navigate to the transport stream for
which you wish to define logical sources.
3 Right-click the transport stream, and then click Create logical sources on the menu.
Logical sources are automatically created for every program signal found in the
selected transport stream.
4 Repeat until you have added logical sources for every stream you wish to monitor.
5 If your system involves a control panel from which you will control your multiviewer as
a router, then configure source numbers for the KX Router logical router, by typing the
appropriate numbers in the first column (#) under Source info, and using the
incremental copy tool as needed.
6 On the File menu, click Save. Alternatively, click the Save button on the toolbar.
Step 5: Testing the Monitor Wall Operation
Using the Kaleido-RCP2 with Default Settings
Note:
The Kaleido-RCP2 unit is optional and is not included in the standard
Kaleido-IP package.