Mechanical installation, Unpacking, Mounting the kaleido-x16 in a rack – Grass Valley Kaleido-X16 Installation v.7.70 User Manual
Page 16
4
Kaleido-X16 Installation
Mechanical Installation
Mechanical Installation
Unpacking
Make sure the following items have been shipped with your
Kaleido-X16
. If any of these are
missing, contact your distributor or Grass Valley.
•
Kaleido-X16
unit with one or two power supplies pre-installed (second power supply
optional)
• Two support brackets
• One AC power cord per power supply
• DVD including manuals, software and release notes
• One mouse
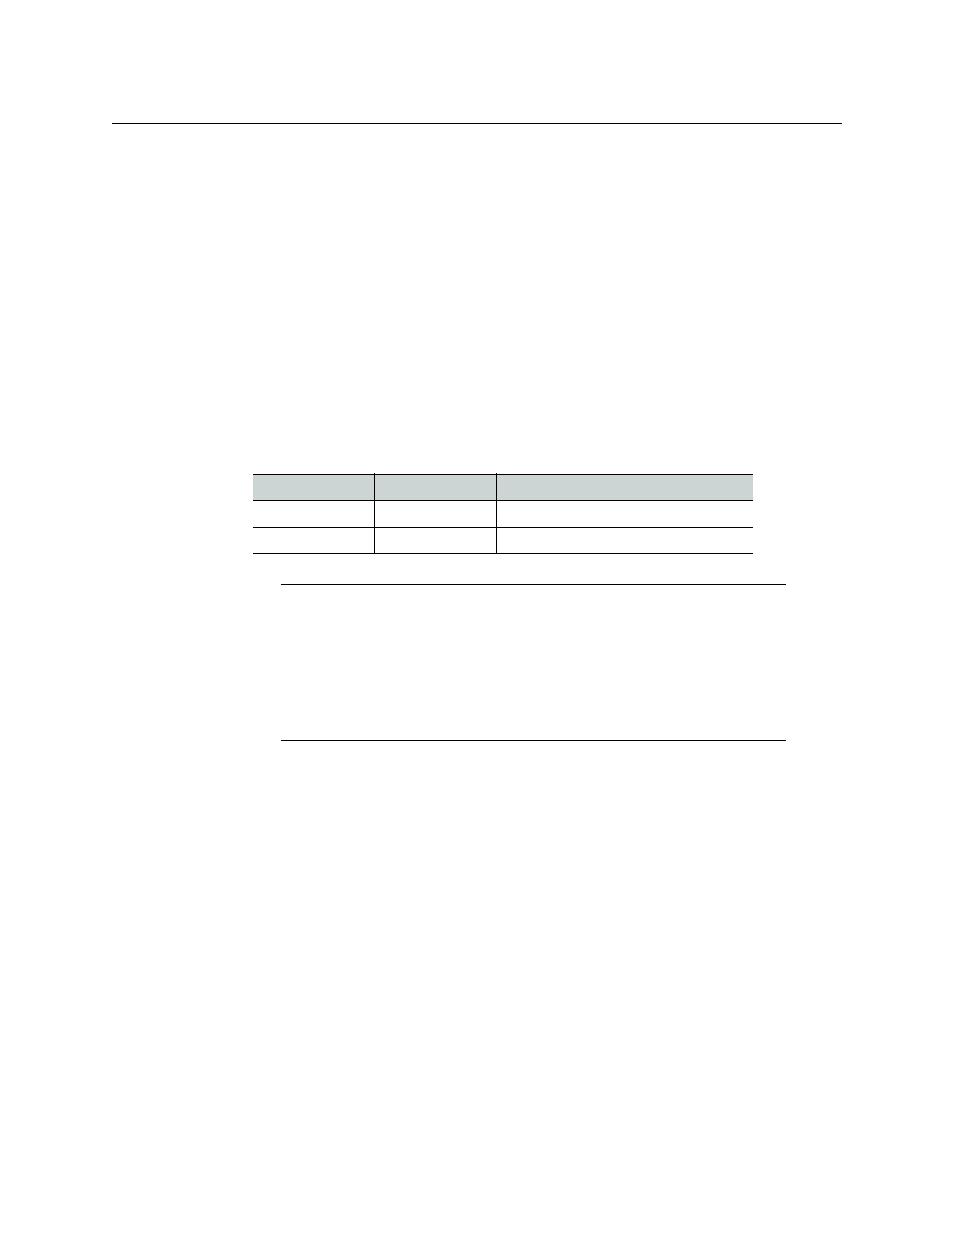
• Four serial port adapters (one with straight wiring and one with crossover wiring for
each of the two RS-422 ports on your multiviewer):
Mounting the Kaleido-X16 in a Rack
To mount the Kaleido-X16 in a standard 19-inch rack
1 Install both support brackets at the back of the rack by using suitable screws and
washers (not included), so that the bottom of the Kaleido-X16 frame will be supported
by the brackets.
Part number
Adapter cabling
RS-422 pinout at the DE-9P connector
1737-3000-102
Straight
Controller (SMPTE master) mode
1792-3700-100
Crossover
Tributary (SMPTE slave) mode
Notes
• The Kaleido-RCP2 unit is optional and is not included in the standard
Kaleido-X16 package. Refer to the Kaleido-RCP2 Guide to Installation and
Operation (available on the DVD that shipped with your system) for more
information.
• The standard Kaleido-X16 comes with one PSU. A redundant, second PSU
is optional.