Illumination submenu, Setup mode, Operation – Grass Valley NV9607 v.1.1 User Manual
Page 62
52
Operation
Setup Mode
Illumination Submenu
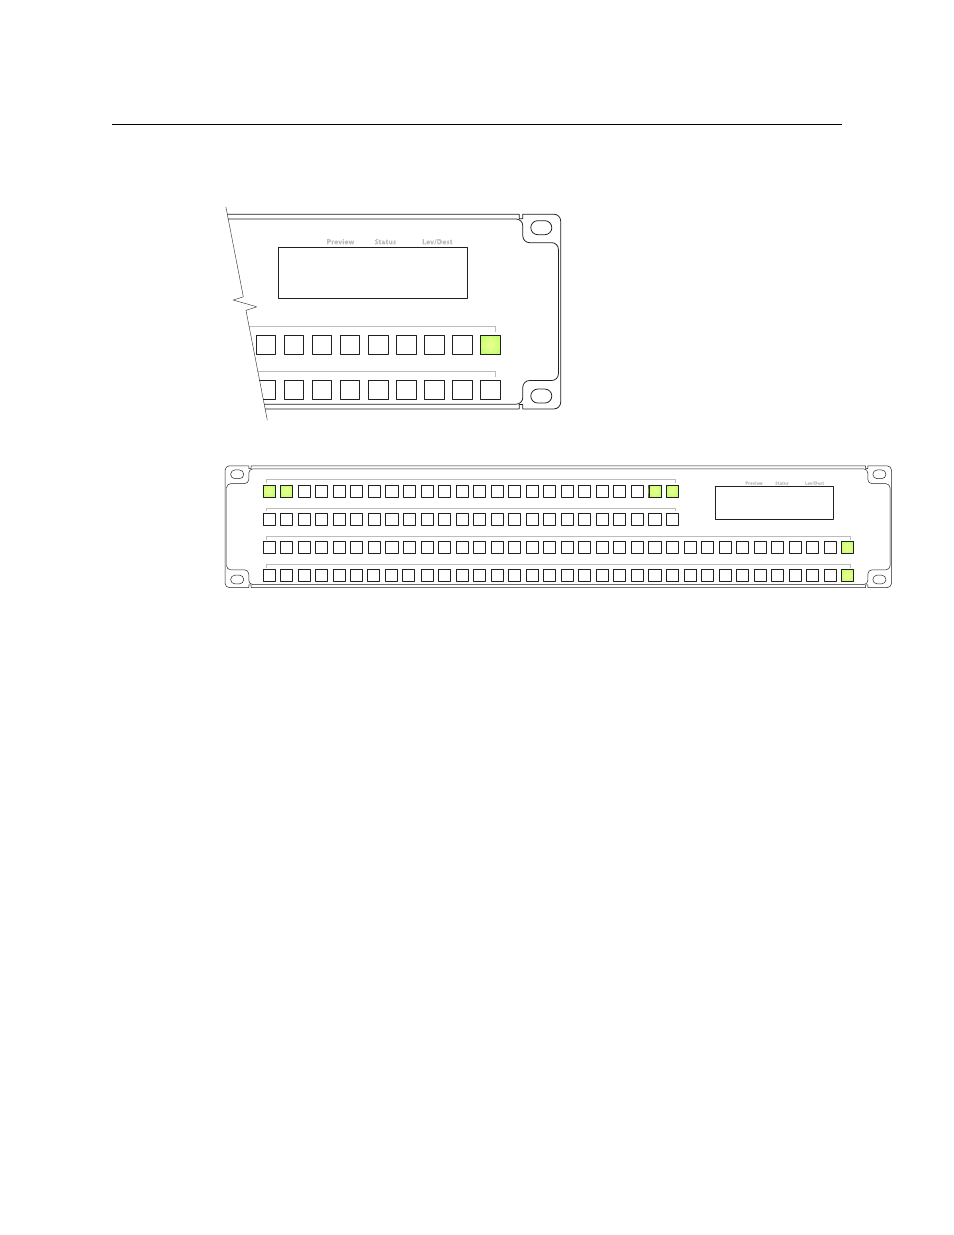
The illumination submenu appears when you press button 2 under the panel menu:
These are the buttons involved:
Button 0 (at the far left) represents the low illumination level. Button 1, to its right, represents
high-tally illumination. Press button 0 to select low illumination; press button 1 to select high
illumination. When you press either of these buttons, the bottom two rows of buttons illuminate
to show you the illumination level currently selected.
The right-most two buttons increase and decrease the selected illumination level by 10%. The
default low level is 40% and the default high level is 100%. These buttons remain disabled until
you select either low illumination or high illumination.
When you are satisfied with the illumination level you have chosen, press button 23 to return to
the panel menu or button 24 to exit from the menu.
Setup Mode
Setup mode occurs when the NV9607 is disconnected from its network and is freshly powered
up. In setup mode, you can set or change the panel ID, identify the software version, and
perform a test of the panel’s buttons. It is in setup mode that you must initially set the panel ID.
It can take several seconds for the buttons to appear.
Illumination Menu Lo Value 40%
Hi Value 100%
Illumination Lo 0 Panel Menu 23
Illumination Hi 1 Exit 24
24
23
1
0
Illumination Menu Lo Value 40%
Hi Value 100%
Illumination Lo 0 Panel Menu 23
Illumination Hi 1 Exit 24