3 closing the disconnect unit, Closing the disconnect unit – SMA DU-SC-US User Manual
Page 29
SMA America, LLC
Preparing the Disconnect Unit for Installation
Unpacking
DISU_SCUS-AP-eng-IUS110911
29
5. Align the lid flush with the sides and back of the
Disconnect Unit. Holes in the front of the lid must be
positioned to fit over the threads of the Disconnect
Unit.
6. Install the lid on the Disconnect Unit using the screws
provided.
7. Tighten screws with a torque of 18 in-lbs. (2 Nm).
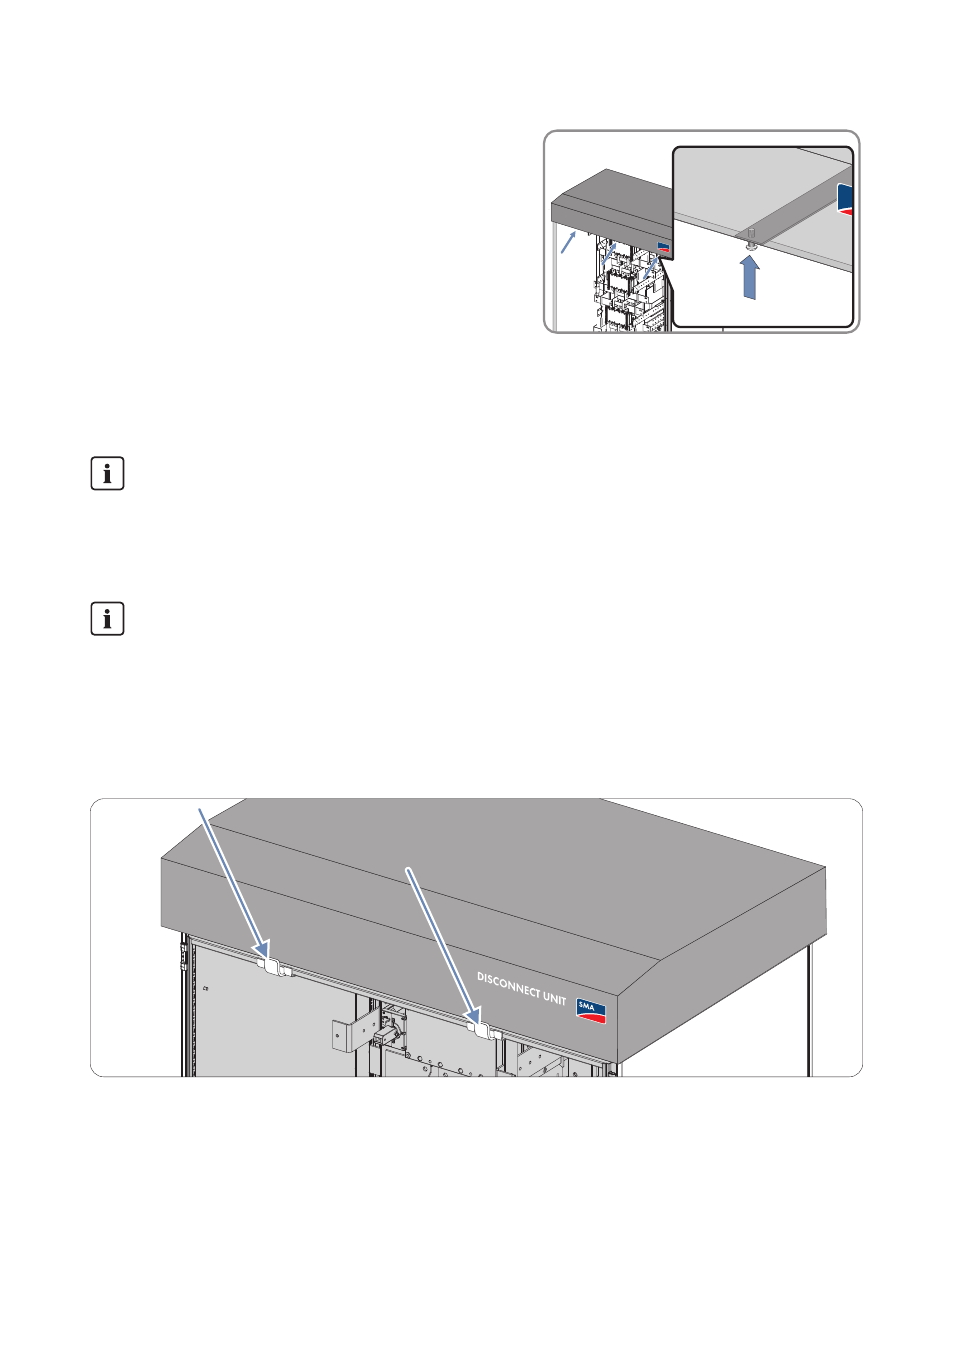
8.3 Closing the Disconnect Unit
Figure 2: Position of the hooks for connecting the front plate.
Fully Installing the Disconnect Unit
If you are fully installing the Disconnect Unit in accordance with the Installation Guide, you will
save time because the Disconnect Unit is already open. If the installation takes place later or at
a different location, close the Disconnect Unit as described in this chapter.
Note before closing the Disconnect Unit
• The handles on the front plate of the enclosure must be put into the "Off" position so that
the shafts can be engaged.
• The two hooks for the front plate of the enclosure must be correctly positioned. The two
hooks are moveable and must be arranged 11
3
⁄
4
in. … 1 ft. 3
3
⁄
4
in.
(300 mm … 400 mm) from the sides.
DISCONNECT UNIT
SMA
DISCONNECT UNIT
SM