Irritrol RainSensor User Manual
Page 6
Part 2 - Power Wire Connection
Note: The Receiver requires a nominal voltage of 24 VAC to operate. It should only
be connected to an irrigation controller that uses a 24 VAC UL listed Class 2
transformer to supply power.
Caution: Do not connect the Receiver directly to 120/240 VAC power as
this may result in irreversible damage. If you are in doubt, contact a
qualified installer or electrician.
1. Disconnect power to the controller.
2. Follow applicable wiring procedure A or B.
A. Controllers with 24 VAC terminals:
Refer to Figure 8 (page 5). Terminals for 24 VAC power are present on the
majority of controllers. Typical markings are “24 VAC”, “24 and 24”, “0 and 24”
and “Hot Post and 24.” Verify correct voltage, then simply attach the two Red
power wires to these terminals leaving existing connections in place.
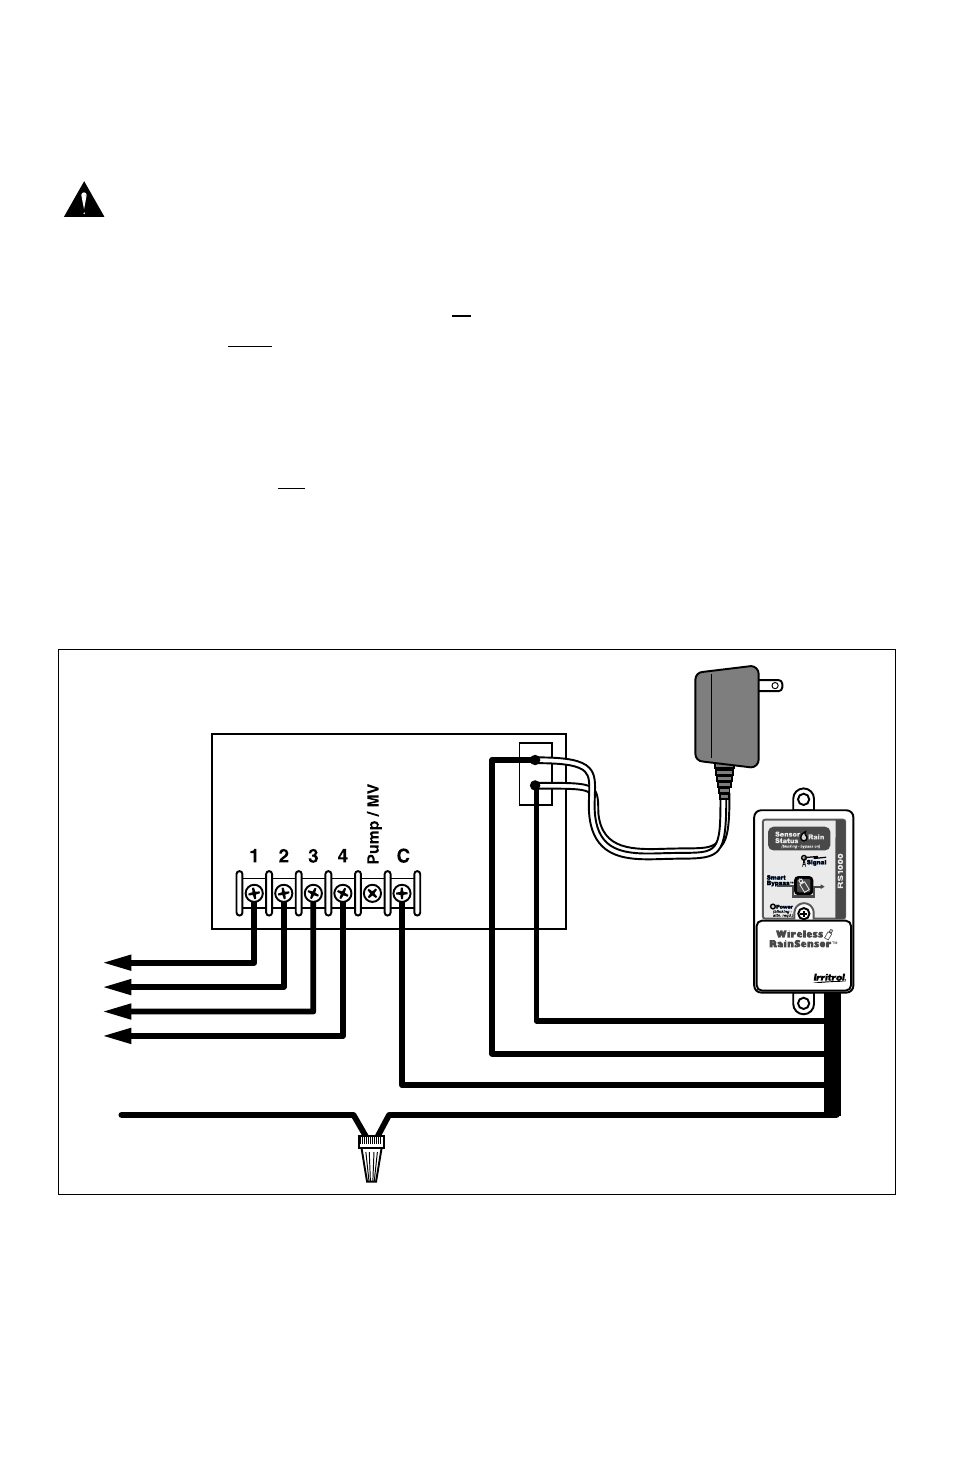
B. Controllers with no 24 VAC terminals:
Refer to Figure 9. On controllers that do not have 24 VAC terminals, connect the
two Red power wires to the transformer’s secondary 24 VAC power wires where
they attach to the controller’s circuit board.
Note: This procedure will require a solder or wire-splice connection. If you are unsure
how to do this correctly, contact a qualified contractor or electrician for assistance.
Initial Receiver Testing
Reconnect power to the controller and verify the Receiver’s Power Indicator is illumi-
nated. Prior to mounting the Sensor/Transmitter, hold it at close range to the Receiver,
then lightly press and hold the spindle. The Sensor Status indicator should illuminate
and remain on until the spindle is released. The Signal Indicator should also illuminate
during the test to verify good signal strength. If either indicator does not illuminate,
recheck your wiring. Verify that both antennas are fully extended and straight.
6
Figure 9
Red
Common From Valves
To Valves
White
Wire Connector
Irrigation System Controller
24 VAC UL listed
Brown
Red