Caution, Recording images, Using ac power – Casio QV-200. User Manual
Page 5
17
DEL
ON
/O
FF
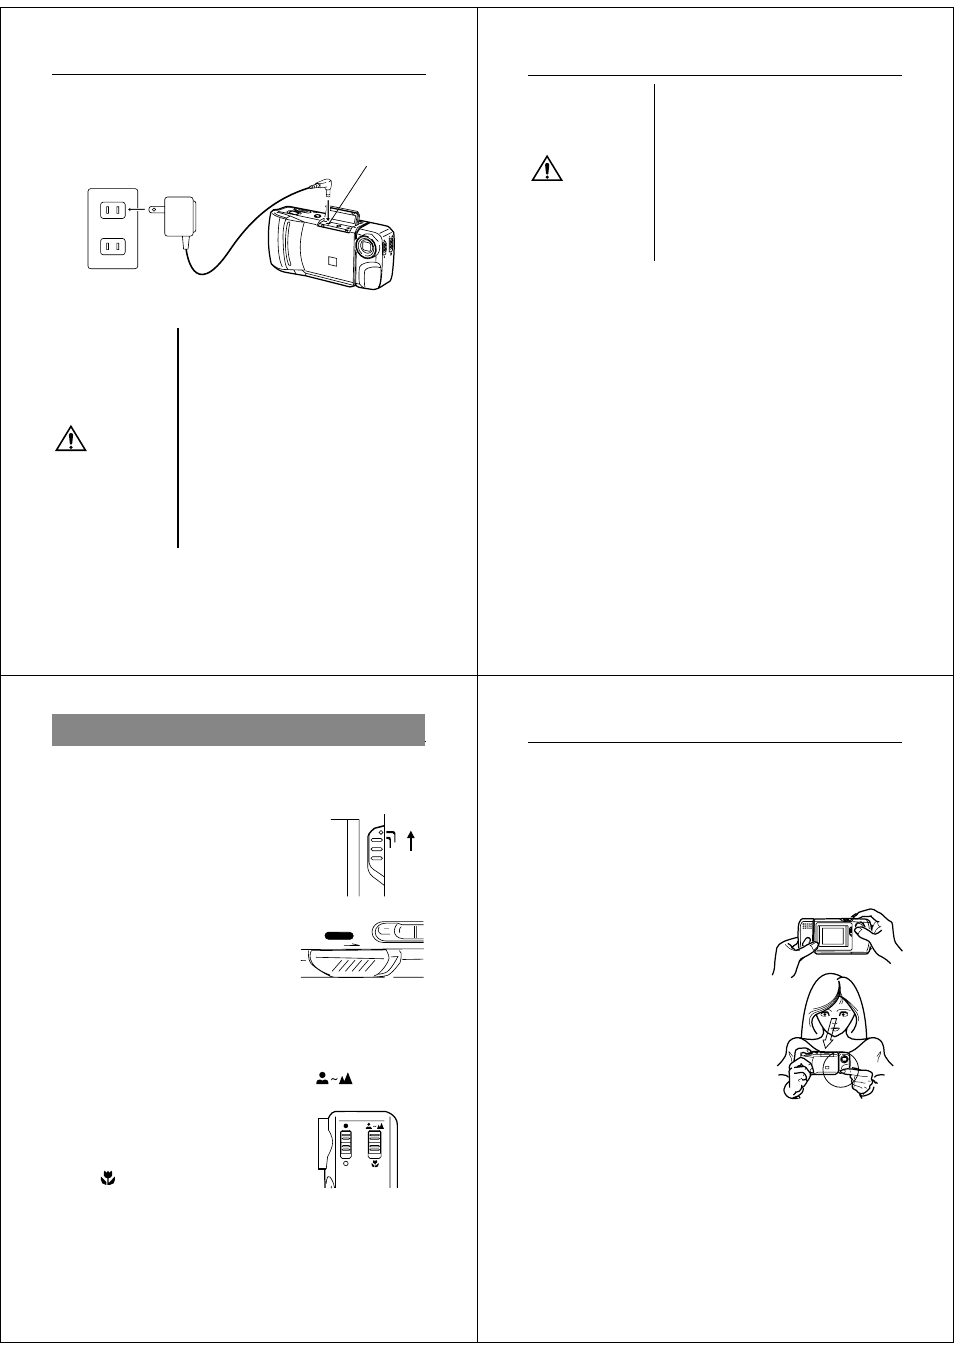
Using AC Power
To power the camera from standard AC power, use the optional AC
adaptor (AD-C60).
AC Adaptor precautions
• Never use an electrical outlet whose
voltage is outside the rating marked
on the camera. Doing so can create
the danger of fire or electrical shock.
Use only the optional AC adaptor
specified for this camera.
• Should the cord of the AC adaptor
become damaged (exposed internal
wiring or shorts), request a replace-
ment from an authorized CASIO
service provider. A damaged AC
adaptor cord creates the danger of
fire or electrical shock.
Caution
Power Supply
AC outlet
AC power terminal
AC adaptor
Getting Acquainted
18
• Always be sure to use the AD-C60
AC adaptor only. Using any other AC
adaptor can cause damage to the
camera not covered by the warranty.
• When unplugging the AC adaptor
from the wall socket, be sure to
grasp the adaptor (not the cord).
• Avoid an undue bending, pulling,
and twisting of the AC adaptor's
cord, and never try to lengthen the
cord by splicing it with other wire.
• Be sure to switch power off before connecting or disconnecting the
adaptor.
• Always turn camera power off before disconnecting the AC adaptor,
even if the camera has batteries installed. If you don't, the camera
will turn off automatically when you disconnect the AC adaptor.
Even so, you run the risk of damaging the camera whenever you
disconnect the AC adaptor without first turning power off.
• The AC adaptor may become warm to the touch after extended pe-
riods of use. This is normal and is not cause for alarm.
• After use turn off the power switch of the camera and unplug adap-
tor from the AC outlet.
Caution
19
Recording Images
REC
PLAY
Recording Images
The following procedure provides the basic steps for recording an
image.
To record an image
1.
Enter the Record Mode.
•
Slide the function switch to the
REC position.
2.
Turn on the camera.
•
Slide the POWER switch in the di-
rection indicated by the arrow.
•
The POWER switch automatically
slides back to its original position
when you release it.
•
When power comes on, the image of the object that is in
front of the camera’s lens appears on the LCD.
•
You can perform steps 1 and 2 in either order (1 then 2, or 2
then 1).
3.
Set the NORMAL/MACRO switch to
(NORMAL)
position.
•
If the object whose image you are
recording is about 13 centimeters
from the lens (about 5 inches), set
the NORMAL/MACRO switch to
(MACRO). See page 24 for
details on using this switch.
Note
• The camera is designed to refresh the image on the LCD about
seven times per second. Because of this, you may experience a
feeling of jerkiness in the changing image if you move the camera
quickly. This is normal and does not indicate malfunction.
ON/OFF
POWER
Operation
20
4.
Use MODE to enter the resolution mode (FINE or NORMAL)
you want.
•
Each press of MODE toggles between the Normal Mode
and Fine Mode.
•
Note that the number of images that can be stored in
memory is different depending on whether images are
saved in the Normal Mode or Fine Mode. See “Resolution
Modes” on page 24 for details.
5.
Record the image.
•
Compose the image you want to
record while viewing it on the
LCD.
•
It is best to look at the LCD di-
rectly, and not from an angle.
•
Take care that your finger is not
blocking the lens.
•
Should the lens become dirty, use
the cloth that comes with the cam-
era to clean it off.
•
When the image is situated on the LCD as you want it, press
the shutter button.
•
Press the shutter button lightly to avoid moving the camera.
See page 21 for information on how to avoid hand move-
ment.
•
The message “WAIT” appears on the LCD for about six sec-
onds along with the image that was recorded when you
pressed the shutter button. You can use the camera to take
the next picture after the “WAIT” message disappears.
•
Here you could change the function switch to the PLAY posi-
tion and view the image you just recorded.