Livarno lux lles b2 8 - english installation – Livarno LLES B2 User Manual
Page 10
LIVARNO LUX LLES B2
8 - English
Installation
Detach the wall bracket (6) from the energy-saving outdoor spotlight by removing the 2 screws (2)
with a Phillips screwdriver. Note that the wall bracket (6) is attached on both sides with a screw (2), a
spring washer and 2 other washers. Keep these parts safe until you are ready to assemble them.
Use the wall bracket (6) as a template to mark the two holes.
Then drill the two holes and attach the wall bracket (6) using the supplied wall plugs and screws or,
depending on the installation location, using other suitable plugs and screws.
Open the cable junction box (3) by loosening the four screws using a Phillips screwdriver and
removing the cover.
Loosen the 2 screws on the strain relief within the cable junction box (3) with a Phillips screwdriver
only to the extent that the cable (11) can be subsequently fed through it.
Loosen the screw connection (5) of the cable bushing (4), but do not completely unscrew it.
Remove approx. 5 to 8cm of the sheath of the cable (11).
First, route the cable (11) through the screw connection (5) and the cable bushing (4), and then
through the strain relief in the cable junction box (3). When routing the cable (11) through the cable
bushing (4), an internal rubber seal must be penetrated. A slight resistance may thus be felt.
Fix the cable (11) by tightening the 2 screws on the strain relief within the cable junction box (3). The
end of the cable sheath must be in the strain relief for this purpose. Do not clamp the individual wires!
Then tighten the previously loosened screw connection (5) of the cable bushing (4) in a clockwise
direction. This ensures the sealing of the cable (11).
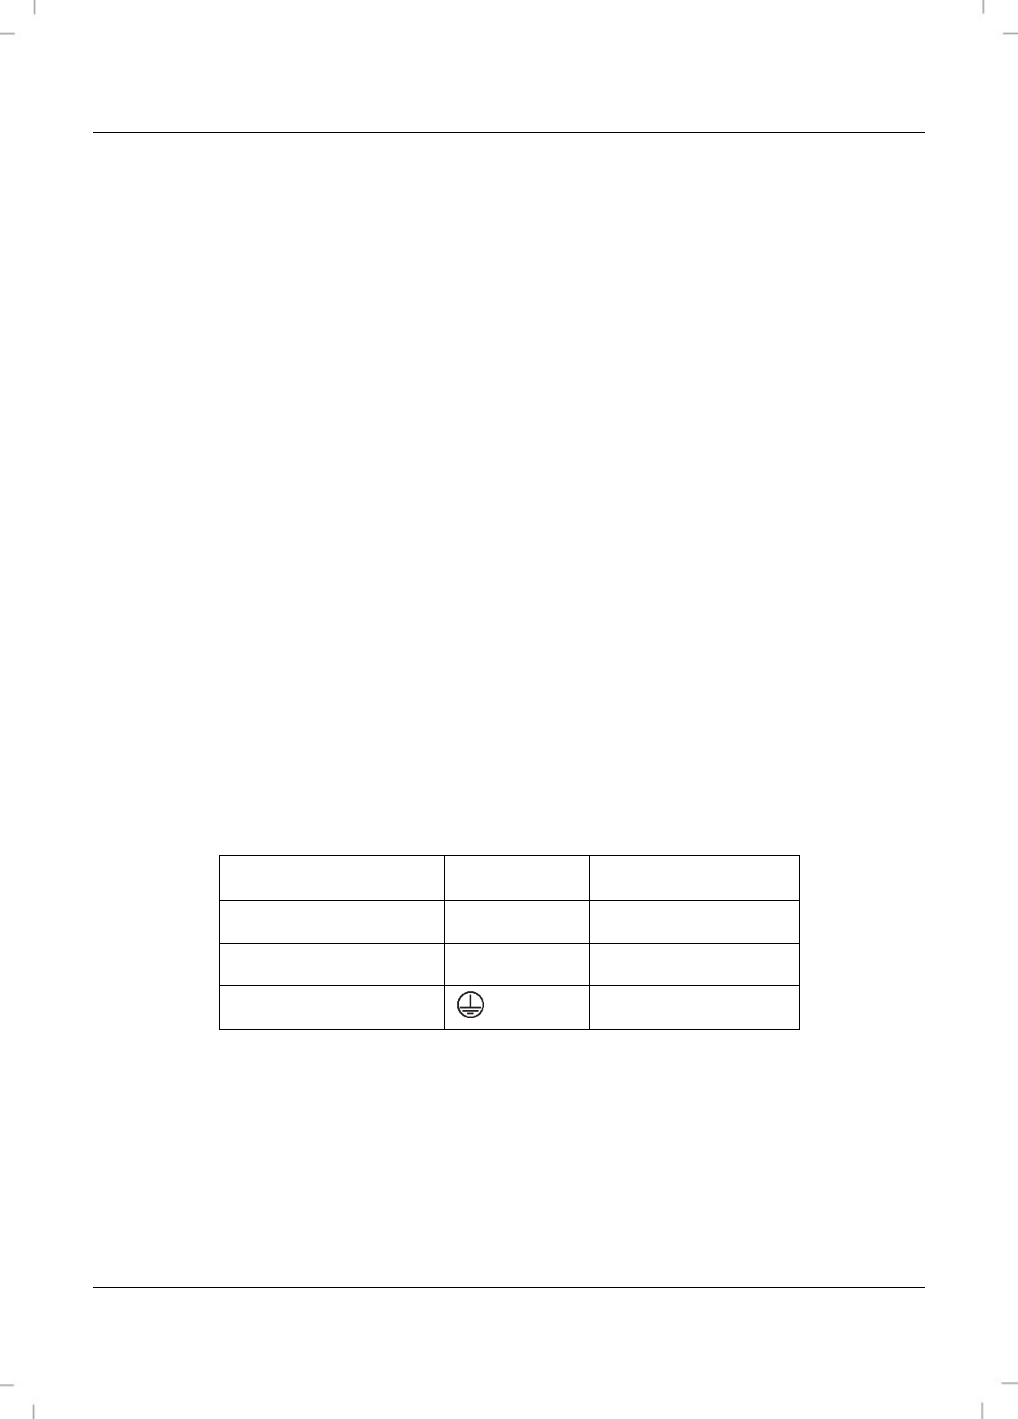
Connect the stripped wire ends of the cable (11) using the screw terminal (12). Make sure that the
individual wires of the cable (11) are connected correctly. Also pay attention in this context to the
illustration [B] on the inside cover.
Wire
Symbol
Designation
Black or brown
L
Phase
Blue N
Neutral
Yellow/green
Earth conductor
Close the cable junction box (3) by screwing the cover again tightly with the four screws that you
previously removed. A rubber seal which is integrated in the cover ensures the sealing of the cable
junction box (3). Ensure that the rubber seal lies correctly in the groove provided in the cover.
Then attach the energy-saving outdoor spotlight to the wall bracket (6). To do so, use the previously
removed screws (2) and washers.
Switch on the circuit.