Fig. 2 fig. 1, Fig. 3, Fig.2 – Medal Sports SH1325701 User Manual
Page 6: Fig.2 fig.1 fig.1, Fig.3
www.themdsports.com
1325701
5
(Continúe en la siguiente página.)
(Continued on the next page.)
Español
English
FIG.2
FIG. 2
FIG. 1
FIG.2
FIG.1
FIG.1
FIG. 3
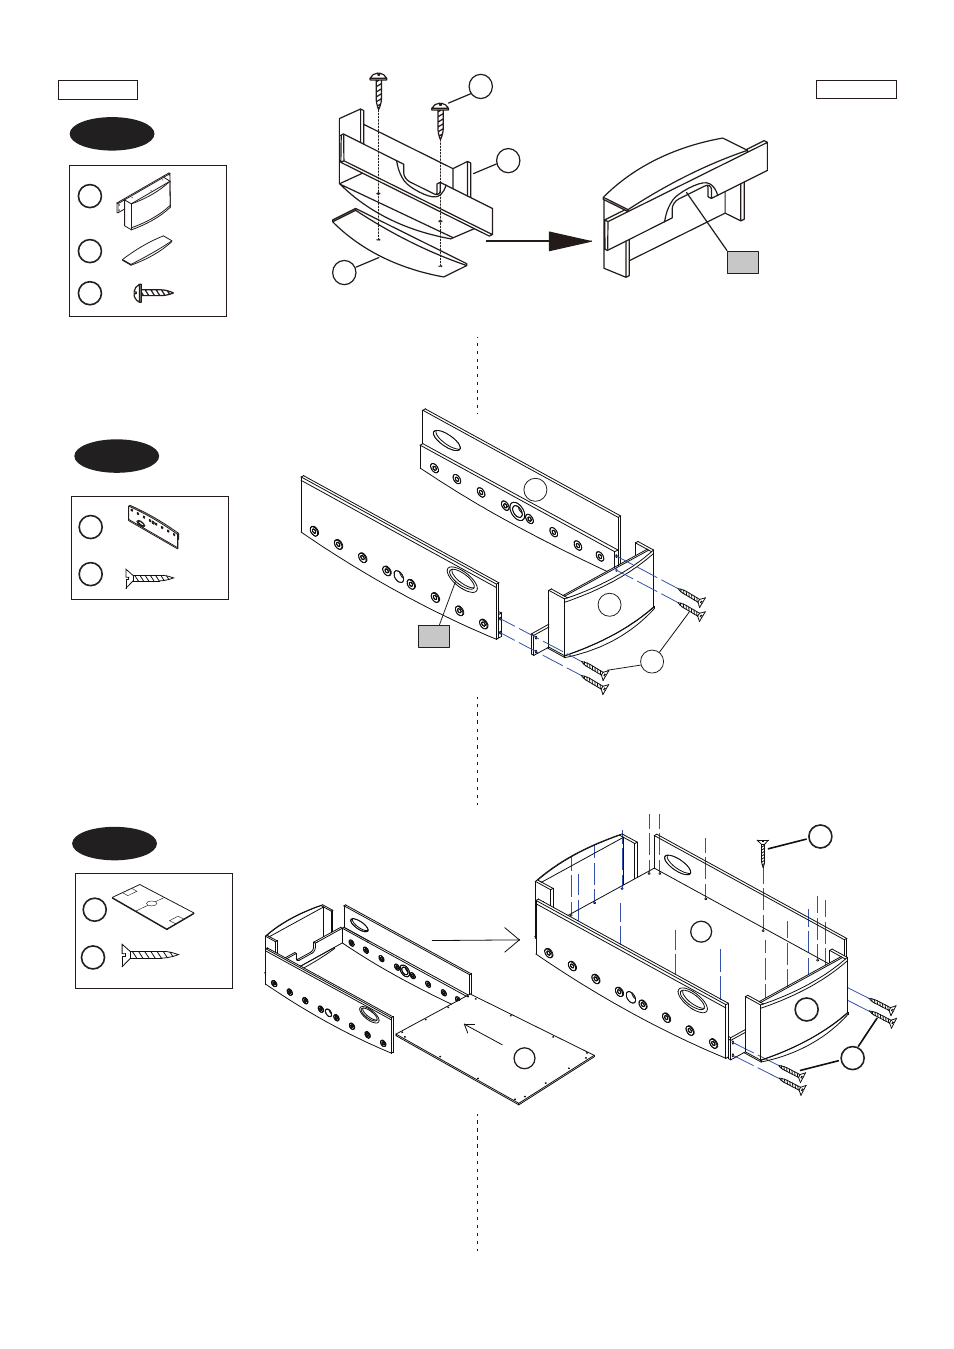
4. Attach the End Apron (#2) to the Side Apron (#1) using
four Screws (#25).
See FIG. 2.
Note: Do not tighten the screws at this step.
4. Adjunte los Delantales Final (#2) a los Delantales Lateral
(#1) usando cuatro Tornillos (#25) .
Vea la FIG. 2.
Nota:Que no ajustes los tornillos en este paso.
FIG.3
FIG.3
5. Adjunte el Campo del Juego (#3) con cara gráfica hacia
abajo, dentro de las muescas de los Delantales Lateral
(#1). Atornille el Delantal Final (#2) al otro lado del
marco usando 4 Tornillos (#25). Luego use 16 Tornillos
(#25) sobre el Campo del Juego (#3) para colocar el
marco principal.
Vea la FIG. 3.
X 4
X 2
1
25
X 1
3
X 20
25
X 2
X 4
X 2
2
39
38
2
38
39
3. Attach the End Apron (#2) to the Top Slat Boards
(#38) using two Screws (#39) per End Apron.
See
FIG. 1.
3. Adjunte los Delantales Final (#2) a los Tablero de
Listón Superior (#38) usando 2 Tornillos (#39)
por Delantal Final.
Vea la FIG. 1.
2
1
25
A3
A4
3
3
2
25
25
5. Attach the Playfield (#3), with the graphics facing down,
Into the grooves of Side Aprons (#1). Screw the End
Apron (#2) to another side of frame using 4 screws
(#25). Then use 16 screws (#25) on the playfield (#3)
to set the main frame.
See FIG. 3.