Rose Electronics UltraView Remote 2 User Manual
Page 23
ULTRAVIEW REMOTE 2 INSTALLATION AND OPERATIONS MANUAL
19
HTTP Port
This is the logical link that communications with a remote web browser will be channeled. The default setting of 80 is
an established standard for web (HTTP – HyperText Transfer Protocol) traffic though this can be changed to suit
your local network requirements.
IP Access Control
This section allows you to optionally specify ranges of addresses which will or will not be granted access to the
UltraView Remote 2. If this option is left unchanged, then the default entry of ‘+0.0.0.0/0.0.0.0’ ensures that access
from all IP addresses will be permitted. If this feature is needed, please see Appendix E for a detailed explanation of
IP access control.
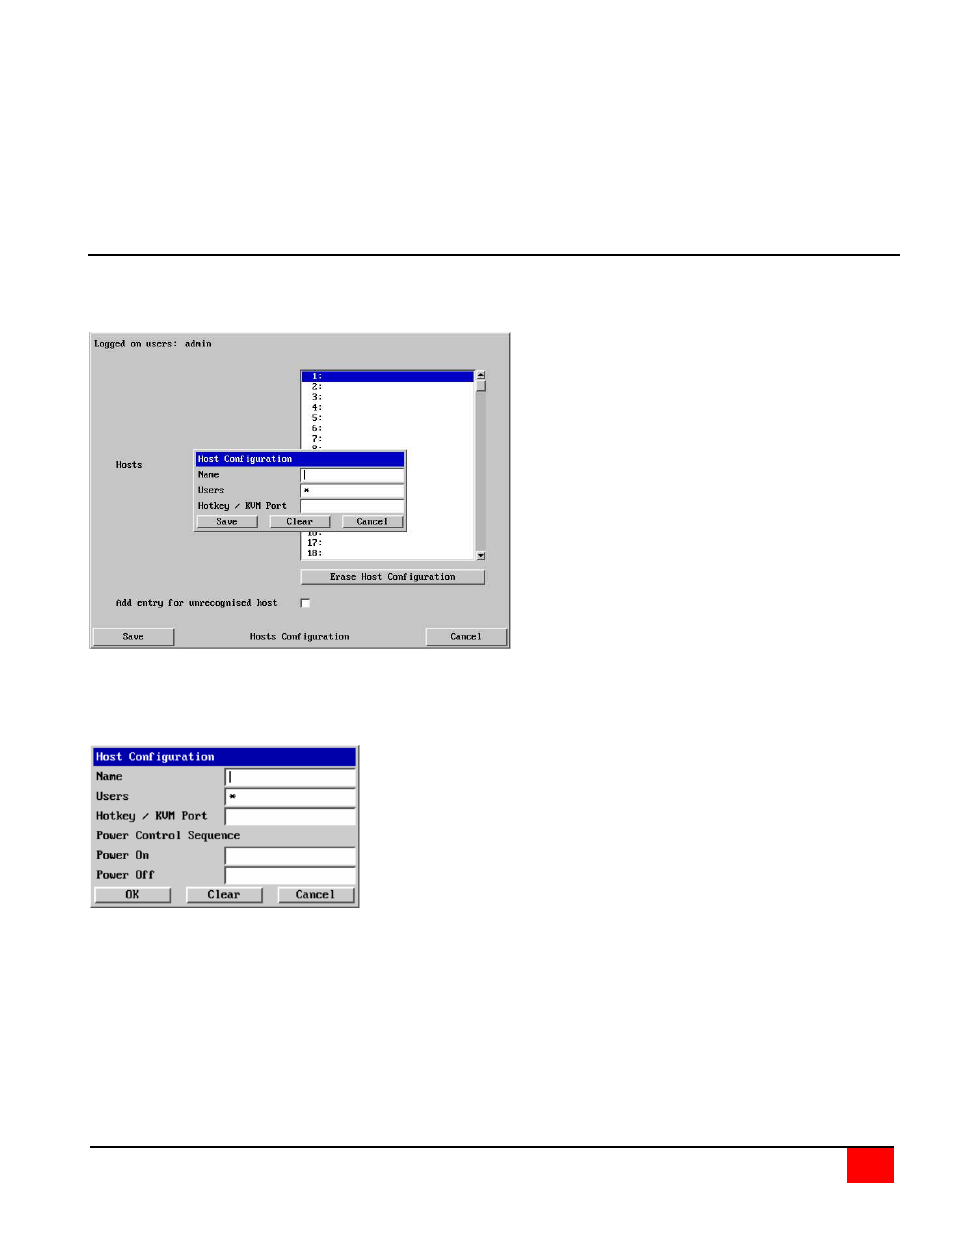
Host Configuration
The Host Configuration menu allows you to configure various details for each of the host systems that may be
connected to the UltraView Remote 2. Each of the 128 entries can be configured with a name, the permitted users,
and the hot key combinations to switch to it.
Click on the “Erase Host Configuration” tab to remove
all host entries if needed.
Check the box “Add entry for unrecognized host” to
add any system connected to that is not specified in
the Host list. Verify these added hosts for the correct
Hot key sequence and user permission. Connecting
to complex cascaded systems should be verified.
It is recommended that the naming and hot key
assignments for each Host Configuration entry match
the CPU port configuration of the UltraView Remote 2.
Entry #1 - Name and hot key defined to switch to
CPU port #1, Entry #2 for CPU port #2, etc.
Examples of Hot key sequences for switching to a
given port are shown below.
To add a new entry to the Host Configuration, click (highlight) one of the host entries to bring up the host
configuration dialog box.
Select each item (1 – 128) as needed and enter the Name, Users,
Hotkey / KVM port keyboard sequence, and power control ON and
Off key sequences.
Click OK after each item has been entered.
Name
Enter the name that will be displayed in the viewer window when you click the Host button.
Users
Select the users that will be permitted to connect to this host. Either enter * to allow all users or a list of users
separated by commas (e.g. sales, admin, eng, david).