Graphical interface – Akai Professional Akai MPK Mini Plus 37-Key MIDI Controller User Manual
Page 19
19
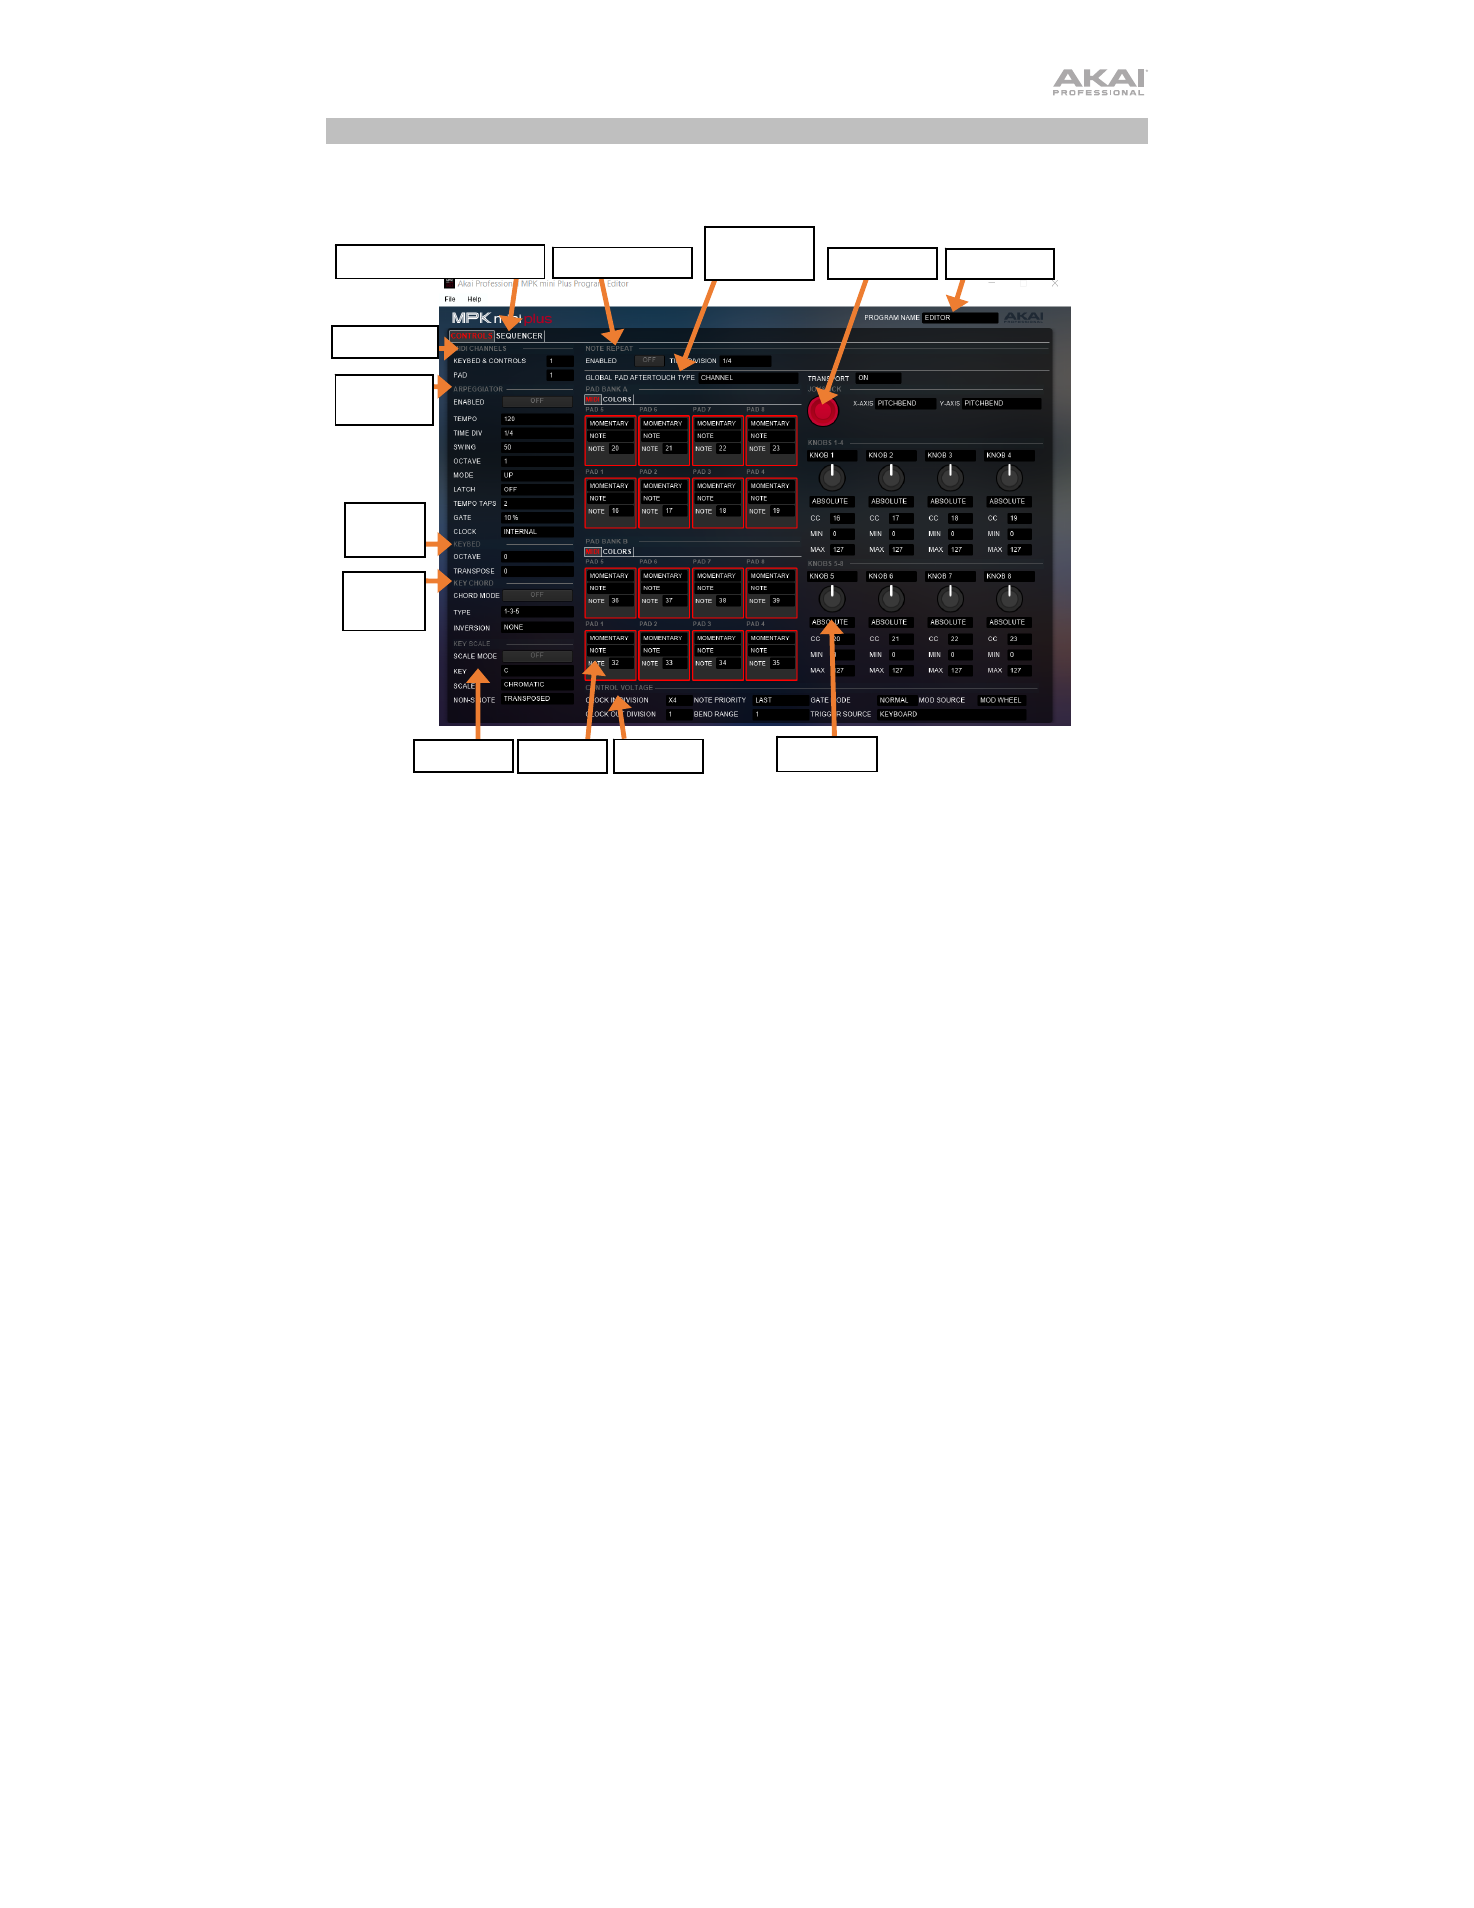
Graphical Interface
The MPK mini Plus Program Editor has a straightforward user interface that can be broken
down into distinct sections for editing:
1.
MIDI Channel:
These two fields determine the channels through which the pads, knobs, X-Y
Controller, and keyboard send MIDI data. Specific instructions are provided in the chapters for
each control:
Operation > Editing a Pad’s MIDI Note
,
,
2.
Controls/Sequencer:
These tabs indicate the two display views of the Editor; the selected tab
is highlighted in red. The Controls page, shown above, displays upon launching the application.
Click the Sequencer tab to view the Sequencer page. See
more.
3.
Note Repeat:
This section contains the Note Repeat functions. Click the button next to
Enabled
to turn it on and select a time division for the function.
4.
Global Settings:
This section allows you to set global parameters such as Pad Aftertouch Type
and Transport CC mode.
5.
Joystick:
These settings control the parameters affected when moving the X-Y Controller along
its X axis (left/right) or Y axis (up/down). See
Editing the X-Y Controller (Joystick)
to learn
more.
6.
Preset:
Click the text field and type in a preset name for your settings before saving. This name
will display on MPK mini Plus’s screen when loaded onto the unit from the Editor.
7.
Knobs:
This section enables you to edit the function of the knobs. 8 knobs are pictured in the
to learn more.
8.
CV:
This section contains the CV/Gate settings parameters. See
to learn more.
9.
Pads:
Click the
MIDI
tab to edit the pad assignments. This section enables you to edit note
assignments for the pads. 16 pads are pictured in the Editor: 8 of them correspond to the pads
on the MPK mini Plus when Bank A is active, and the other 8 correspond to the pads on the
device when Bank B is active. Click the
Colors
tab to select each pad’s on/off colors. See
to learn more.
9. Pads
10. Scale
7. Knobs
2. Controls/Sequencer
8. CV
5. Joystick
4. Global
Settings
3. Note Repeat
11.
Chord
6. Preset
12.
Keybed
1. Channel
13.
Arpeggiator