Rear panel – Akai Professional Akai MPK Mini Plus 37-Key MIDI Controller User Manual
Page 7
7
21.
[<<] Rewind / Prev Step:
Press this button to rewind in a connected DAW.
While editing
a sequence, press this button to go to the previous step.
22.
[>>] Fast-Forward / Next Step:
Press this button to fast-forward in a connected DAW.
While editing a sequence, press this button to go to the next step.
23.
Stop:
Press this button to stop transport playback in a connected DAW. Press and hold
Shift
and press this button to open the
Global
menu to edit Global parameters such as
Transpose, Tempo Taps, Octave, Pad channel, and Aftertouch. See
for more information about these Global functions.
24.
Play:
Press this button to start transport playback in a connected DAW.
25.
Rec:
Press this button to enable recording in a connected DAW.
26.
Seq Play/Stop:
Press this button to start and stop playback of the sequence. When
playback is stopped, it will resume from the start of the sequence.
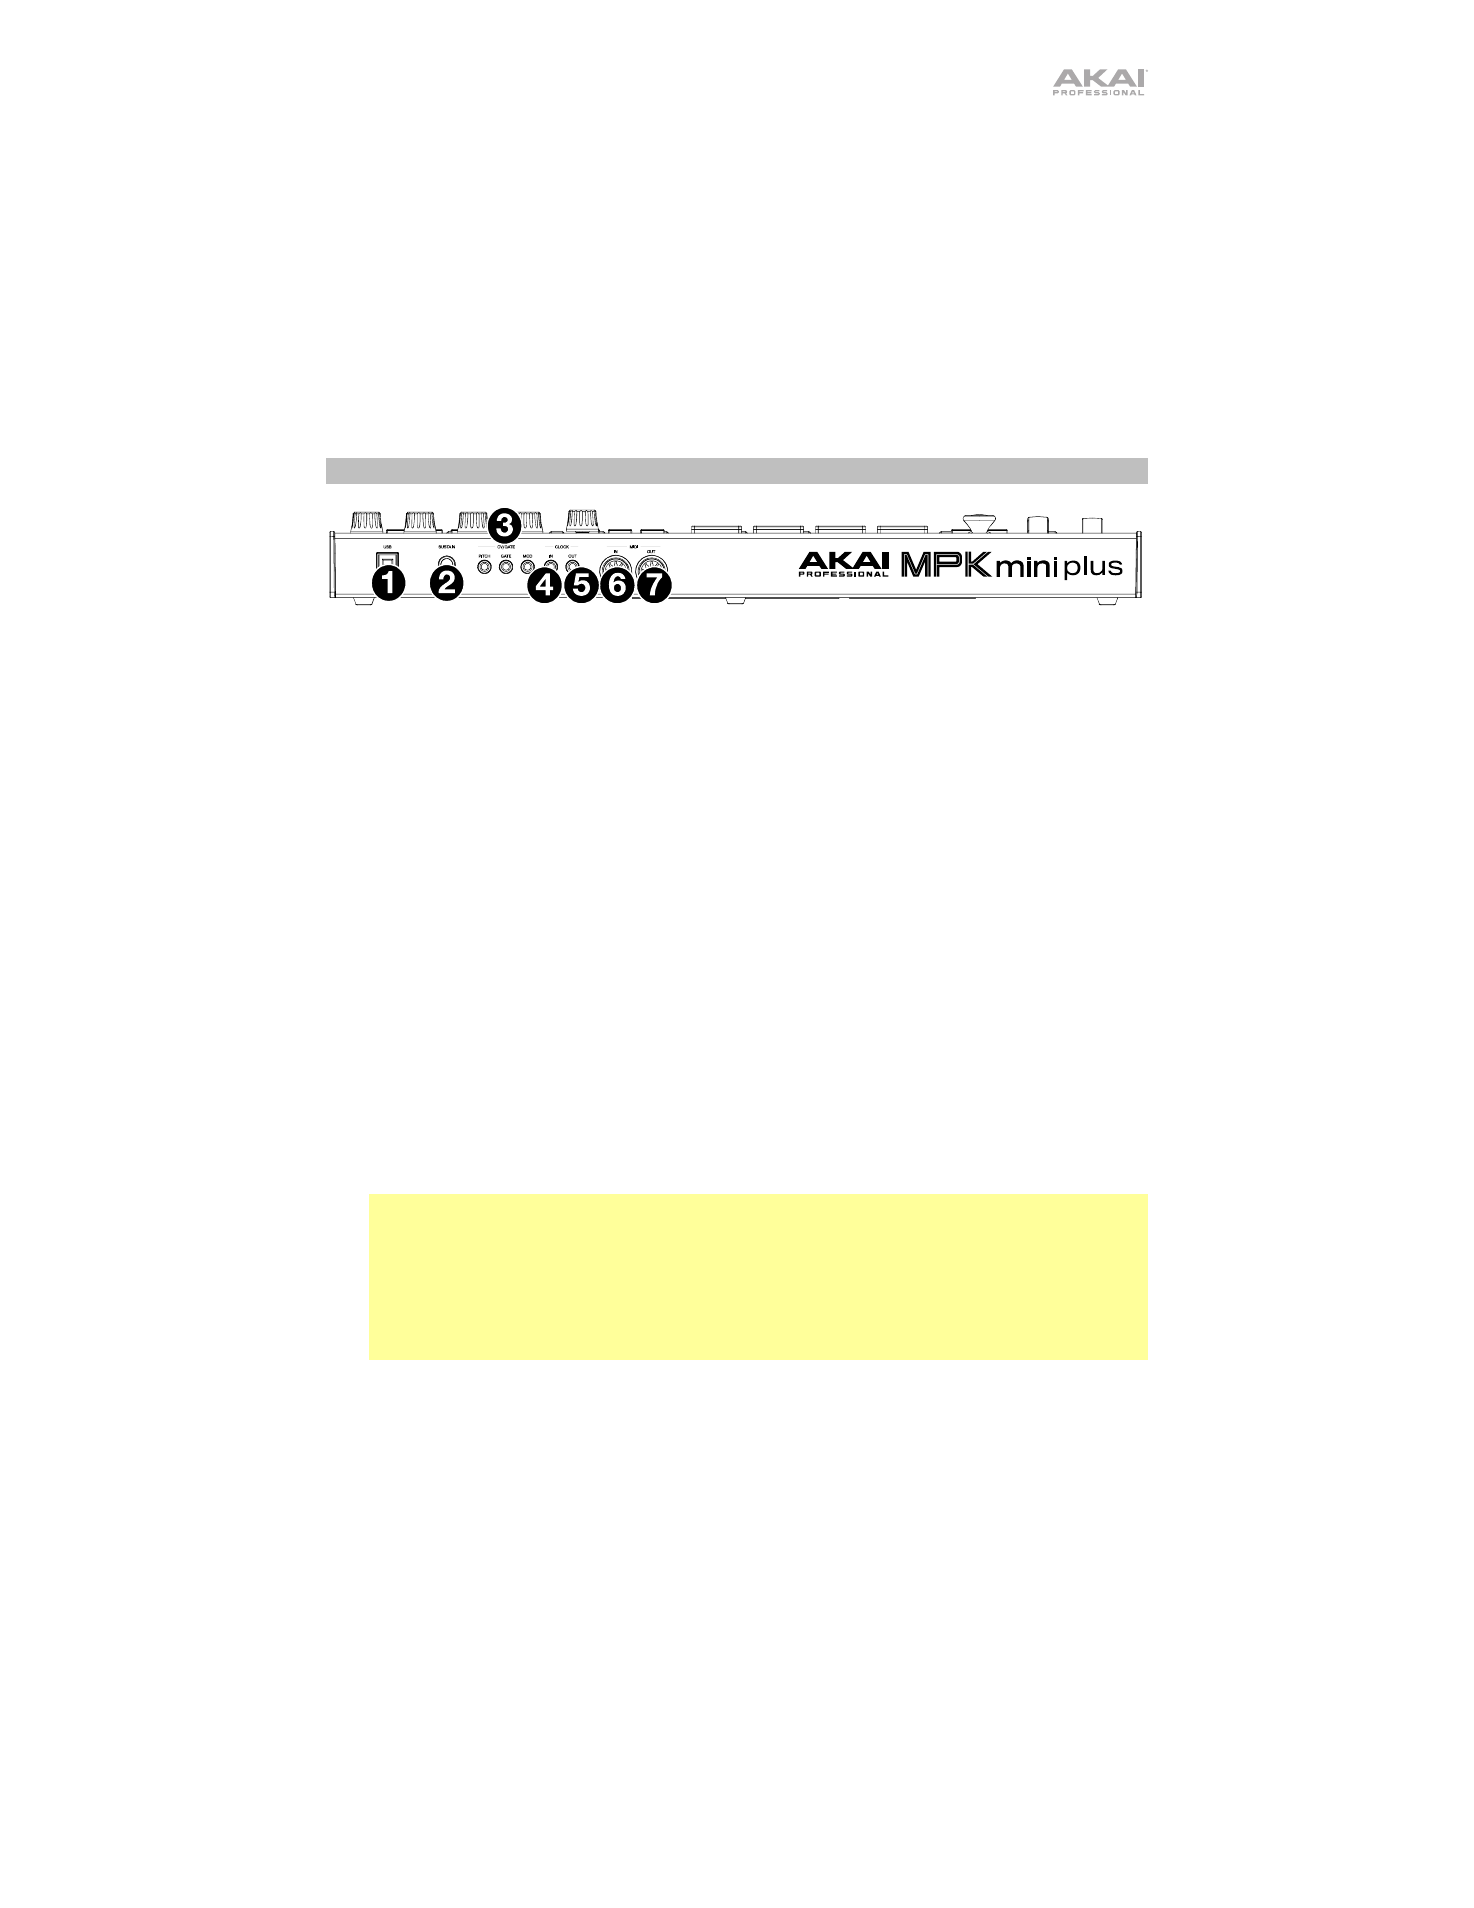
Rear Panel
1.
USB Port:
Connect a USB cable here to deliver power to the keyboard and transmit MIDI
data
to a connected computer to control a software synth or MIDI sequencer. MPK mini
Plus can also be powered via a USB cable and wall outlet adapter.
2.
Sustain Input:
Connect a sustain pedal (sold separately) to the keyboard here. When
pressed, this pedal will sustain the
sound you are playing without having to keep your
fingers pressed down on the keys.
3.
CV
/
Gate Out
(1/8" / 3.5 mm, TS): MPK mini Plus will send control voltage (CV) and/or Gate
signals over these outputs to optional external synths or sequencers. Use standard 1/8”
(3.5 mm) TS cables to send a single CV/Gate signal through the following outputs:
•
Pitch:
Sends CV pitch messages.
•
Gate:
Sends Gate (note length) messages.
•
Mod:
Sends CV Modulation or Velocity messages.
4.
Clock In:
MPK mini Plus will receive control voltage (CV) timing signals from this input.
When receiving clock in, this tempo will set the internal arpeggiator and sequencer clock.
5.
Clock Out:
MPK mini Plus will send control voltage (CV) timing signals from this output.
When sending clock out, the signal will follow the internal arpeggiator clock when set to
Internal
, or incoming MIDI clock when set to
External
.
6.
MIDI In
: Use a standard 5-pin MIDI cable to connect this input to the MIDI output of an
external MIDI device (additional MIDI keyboard, pad controller, etc.).
7.
MIDI Out
: Use a standard 5-pin MIDI cable to connect this output to the MIDI input
of an
external MIDI device (synthesizer, drum machine, etc.).
IMPORTANT:
When MPK mini Plus is
powered by a computer
, its
MIDI In
/
Out
ports
become a fully functional computer MIDI interface. In this configuration, the 5-pin MIDI
ports are accessed by selecting them from your DAW’s MIDI Setup or Preferences. This
allows you to flexibly route MIDI channels within your DAW of choice and use your MPK
mini Plus as a primary controller for your studio setup.
When MPK mini Plus is
powered by a wall adapter
, MIDI data will transmit to the 5-pin
MIDI Out
port by default.