Changing wheels, Re p la c ing co mp o n en ts – Mini 2010 Cooper Convertible User Manual
Page 134
Re
p
la
c
ing co
mp
o
n
en
ts
132
>
To increase the inflation pressure: switch on
the compressor. To check the current infla-
tion pressure, switch off the compressor.
Do not run the compressor for longer
than 10 minutes; otherwise, the
device will overheat and possibly be dam-
aged.
<
>
To decrease the inflation pressure: press the
release button 5.
If the tire cannot maintain the inflation
pressure, drive the vehicle again, refer to
Distributing the sealant. Then repeat steps
1 to 4.
If an inflation pressure of 26 psi/180 kPa still
cannot be reached, the tire is too heavily dam-
aged. Contact the nearest MINI dealer.
<
Driving on
Do not exceed the permitted maximum
speed of 50 mph/80 km/h; doing so may
result in an accident.
<
Replace the defective tire as soon as possible
and have the new wheel/tire assembly bal-
anced.
Have the Mobility System refilled.
Changing wheels
Space-saver spare tire*
To change a space-saver spare tire, proceed as
follows:
>
Remove the space-saver spare tire,
page
132
>
Prepare for tire change, page
>
Jack up vehicle, page
>
Mount space-saver spare tire, page
>
Tighten lug bolts, page
>
Drive with space-saver spare tire, page
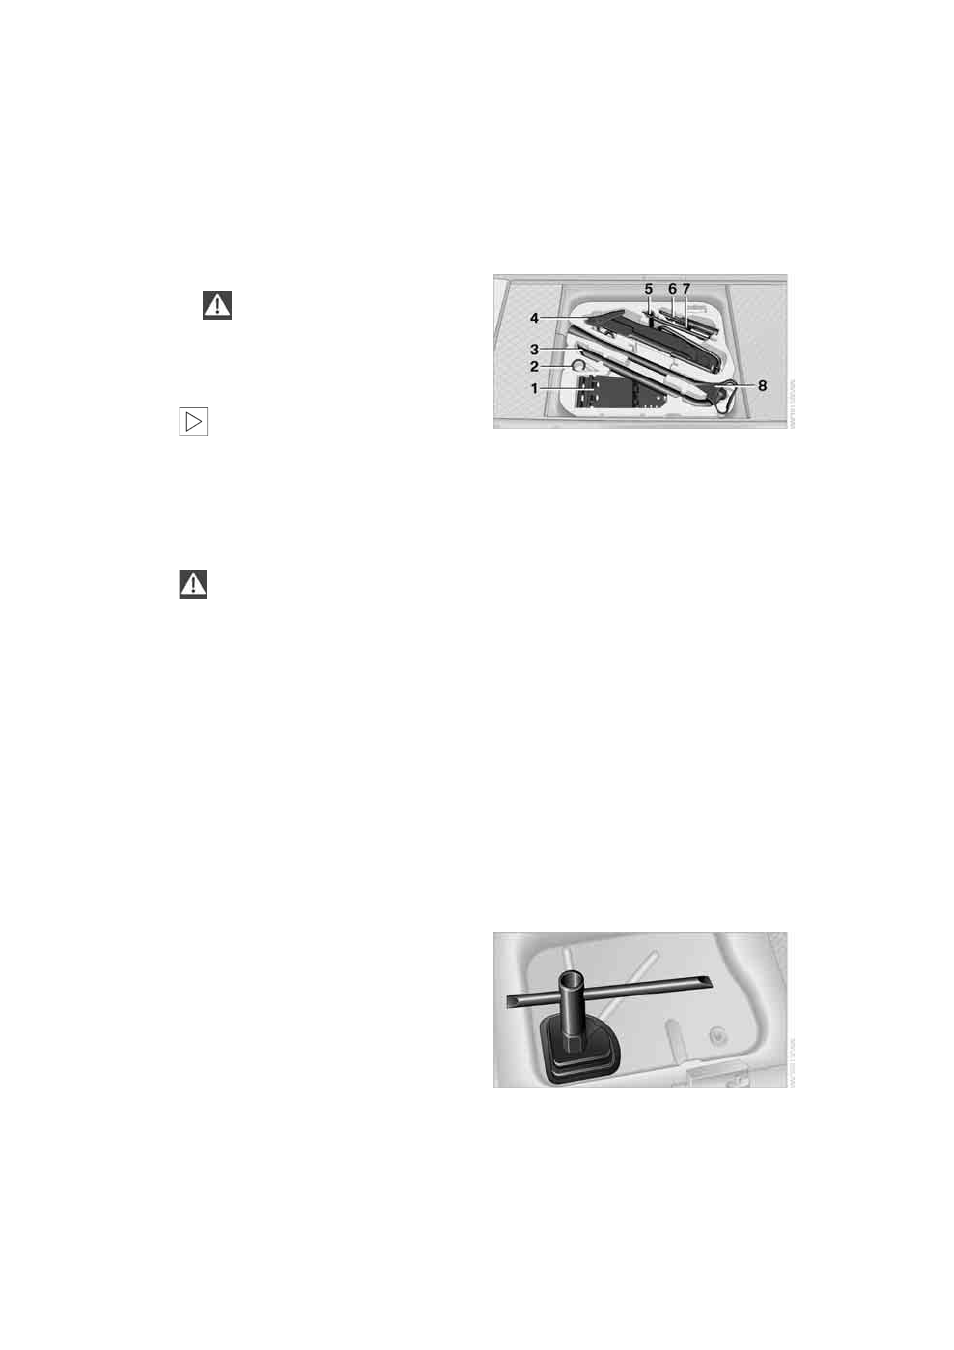
Tire change set for a space-saver spare
tire*
On vehicles with a space-saver spare tire, the
tire change set with onboard tools is stored
under the floor mat in the cargo bay.
1 Chock, folding
2 Extractor hook
*
3 Wheel stud wrench
4 Vehicle jack
5 Special wrench for removing the space-
saver spare tire
6 Flat screwdriver/Phillips screwdriver
7 Towing eyelet
8 Lifting handle
The onboard vehicle tool kit includes a pouch
with a plastic bag in which you can place the
damaged wheel.
Removing the space-saver spare tire
The screw connection of the space-saver spare
tire is under the floor mat in the cargo bay, on
the base of the storage compartment for the tire
change set.
1.
Unscrew the screw connection with the spe-
cial wrench.
2.
Take out the cover panel.
Online Edition for Part no. 01 41 2 604 483 - © 02/10 BMW AG