Replacing components – Mini 2009 Cooper Convertible User Manual
Page 130
Replacing components
128
>
MINI Mobility System, refer to the following
section
>
Run-Flat Tires, page
>
Tire change with space-saver spare tire,
page
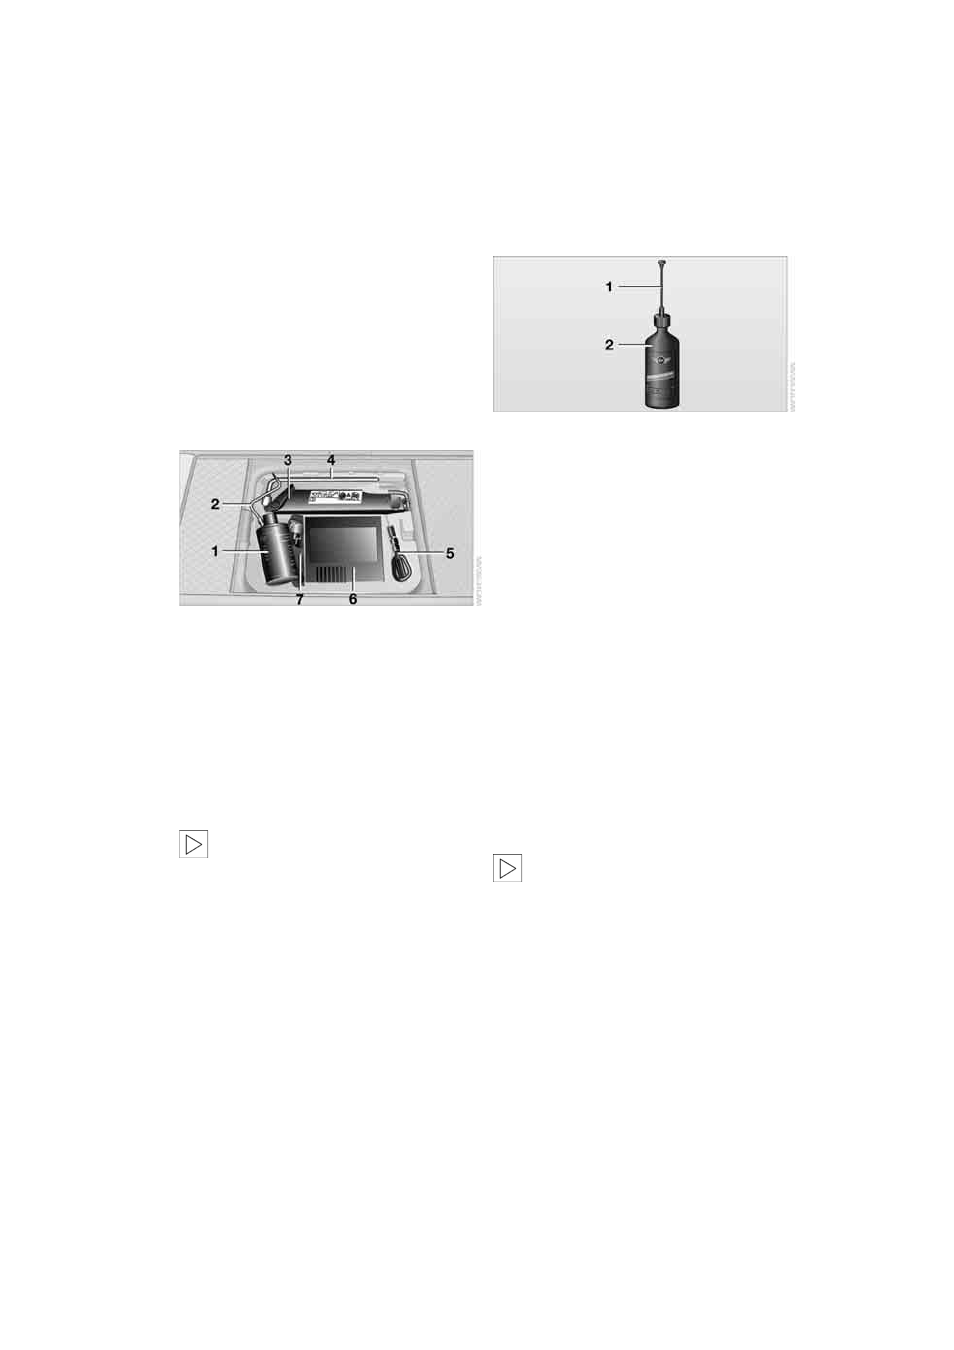
MINI Mobility System with onboard tool
kit and tire change set*
The MINI Mobility System with onboard tool kit
and tire change set
*
is located under the floor
mat in the cargo bay.
1 Filling canister
2 Hexagon wrench
*
3 Vehicle jack
*
4 Wheel stud wrench
5 Flat screwdriver/Phillips screwdriver, towing
eyelet
6 Compressor, hose with manometer and plug
for cigarette lighter socket
7 Package with filling hose, valve remover and
valve core
Use of the MINI Mobility System may be
ineffective if the tire puncture measures
approx. 1/8 in/4 mm or more. Contact the near-
est MINI Dealer if the tire cannot be made driv-
able with the MINI Mobility System.
<
Liquid sealant
1 Filling hose
2 Filling canister
Filling
1.
Shake the filling canister.
2.
Screw the filling hose onto the filling canis-
ter.
3.
Unscrew the dust cap from the valve of the
defective tire.
4.
Screw out the valve core with the valve
remover. The valve remover is located in a
package with the filling hose.
5.
Remove the cap from the filling hose.
6.
Push the filling hose onto the tire valve.
7.
Hold the filling canister with the cap down
and squeeze.
8.
Squeeze the entire contents of the canister
into the tire.
9.
Remove the filling hose.
10.
Screw the valve core into the tire valve with
the valve remover.
In the event of a lost or dirty valve core
you will find another valve core in the
package with the filling hose.
Remember that the liquid canister must be
replaced every four years if the equipment has
not been used.
<
Online Edition for Part no. 01 41 2 601 570 - © 11/08 BMW AG