Perform acoustic calibration – Casella CEL CEL-424 User Manual
Page 5
5.
Perform Acoustic Calibration
Operations are performed by a sequence of key strokes.
Perform a field accuracy check
each time the instrument is switched ON
using a CEL-282 (Class 2) or CEL-284/2
(Class 1) Calibrator as follows.
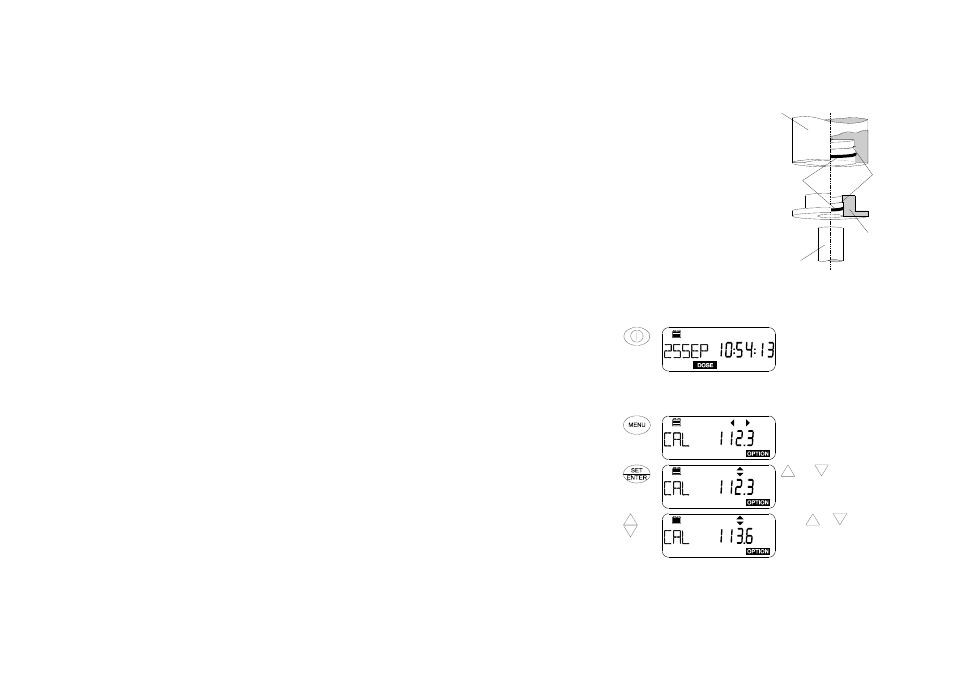
Fit the microphone into the CEL-
4725 Coupler supplied with the calibrator,
making sure it is pushed firmly into contact
with the shoulder in the coupler cavity.
Then fit the coupler complete with micro-
phone into a CEL-282 (or CEL-284/2) Cali-
brator, again ensuring that it makes contact
with the shoulder in the calibrator cavity.
(To aid removal, the coupler flange does
not fit close against the calibrator housing).
Switch the calibrator ON, then fol-
low the instruction after the Start Up sequence of displays has finished.
Operation
Press
Display Shows
Comments
1. Switch the
instrument
ON
Start Up messages show:
Instrument Type,
Serial Number (when set),
Print (when printer cable
connected),
Firmware Version,
Current Date, Time, Battery
Condition and last used
Measurement Mode.
2. Change
Operating
Mode
re-
peatedly
To select OPTION, to enable
Acoustic Calibration, it shows
current SPL.
3. Enable
Level
Change
and
are now enabled.
The display shows current
sound level.
4. Change
Indicated
Level
or
Press
or
.
Indicated level rises (falls)
0.05 dB for each key press.
Adjust to correct level for
CEL-420/460 microphones at
standard temperature and
pressure: 113.6 dB.
Calibrator
980057
1/4"
Microphone
'O' Ring
Shoulder
Microphone
Coupler
CEL-420/460 Getting Started - Page 57