AGI Security SYS-4HNVR304 Manual User Manual
Page 13
CONNECTION
7
To solve this, use our brand’s IP camera, and reconfigure its IP address to 10.1.1.xx (xx ranges from 11 ~
253), in the same network segment as the recorder.
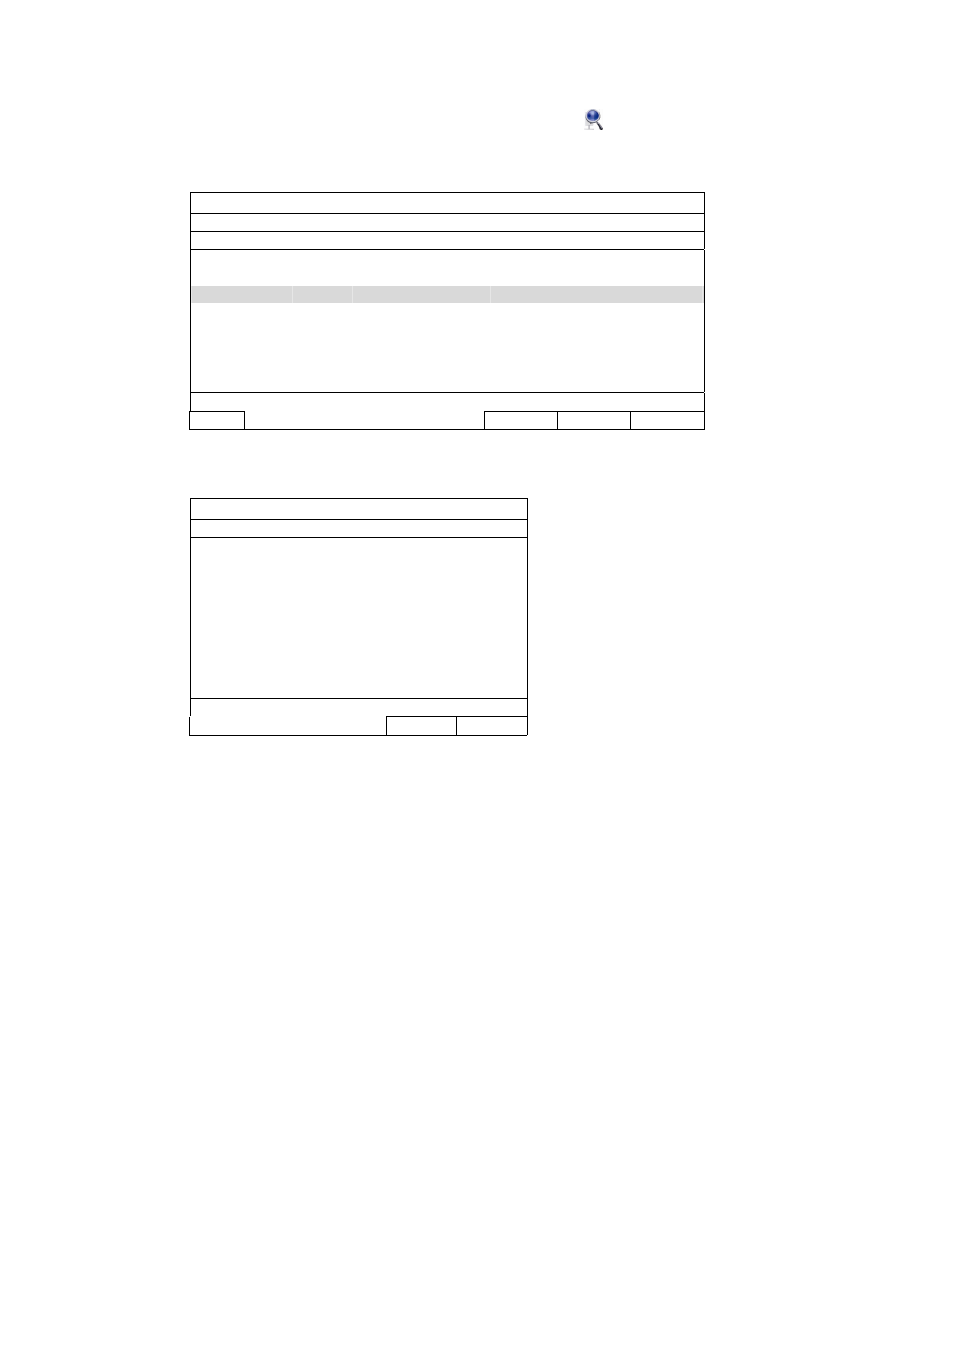
a) Move your mouse to the left to call the quick bar, and select “
”. You’ll see the list of every connected IP
camera with its connection status to this recorder and MAC address.
b) Select the IP address which is not used, and select “SETUP”.
IP SEARCH
IP PORT
MAC
STATUS
10.1.1.12
88
00:0e:53:e5:9a:f1
CONNECTED TO CH1
10.1.1.13
88
00:0e:53:a6:91:18
CONNECTED TO CH2
10.1.2.14
88
00:0e:53:a5:9f:a2
UNUSED
10.1.1.15
88
00:0e:53:e1:4e:k5
CONNECTED TO CH3
10.1.1.16
88
00:0e:53:s5:3e:h6
CONNECTED TO CH4
10.1.1.17
88
00:0e:53:e6:4b:26
CONNECTED TO CH5
CONNECT
SETUP EXIT
c) Select “DHCP” in “NETWORK TYPE”.
d) Click “APPLY” and “EXIT” to save your changes.
SETUP
NETWORK TYPE
DHCP
IP
10.1.1.14
PORT
88
USER NAME
admin
PASSWORD *****
NETMASK
255.0.0.0
GATEWAY
10.1.1.10
PRIMARY DNS
168.95.1.1
APPLY
EXIT
e) The recorder will then detect the IP camera and display images soon.