Step 1 anatomy of the frame – Baby Lock Crown Jewel (Previous Model) (BLCJ18) Instruction and Reference Guide Addendum User Manual
Page 2
Step 1
Anatomy of the Frame
Note: A little preparation the first time you use your quilting frame will save you a lot of time later
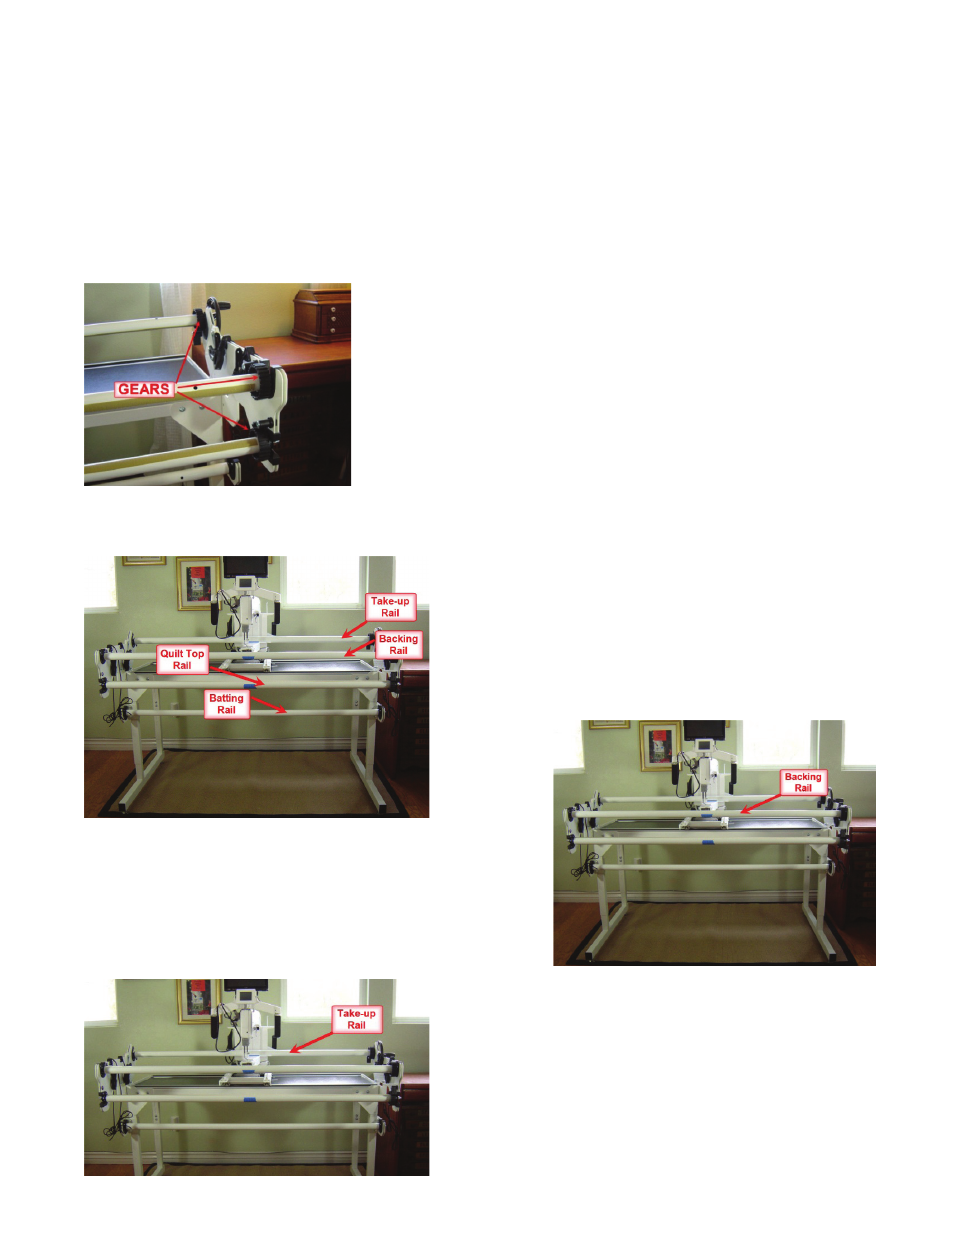
2. There are four rails on the Pearl Frame.
Descriptions of each rail follows.
A. Set up the rails
1. Ensure that all of your rails are installed correctly
and turning in the right direction
a) The large black gears should always be placed
at the right end of the Pearl Frame
B. Take-up Rail
1. The rail that passes through the throat of the
Crown Jewel is the take-up rail
a) As you work, the portion of the quilt that has
already been quilted will be rolled onto this
rail
C. The Backing Rail
1. The top rail on the front of the quilt frame
is the backing rail
a) The quilt back will be rolled onto this rail
2. The backing rail rotates away from the
center of the frame
a) If the rail is turning in the wrong direction,
lift it off the frame, turn it around and
place it back into the frame. (You are
switching which end is on the right and
which end is on the left.)
2. The take-up rail turns toward the center of the
frame
a) The hand wheel at the right end can be used
to turn this rail as the quilt is rolled forward
b) If the rail is turning in the wrong direction,
and the gears are on the wrong end, lift it
off the frame, turn it around and place it
back into the frame. (You are switching
which end is on the right and which end is on
the left.)
1