Zeroing, Zeroing with the micro-switch, Zeroing through the digital communication – Bronkhorst CORI-FLOW User Manual
Page 18: Attention, Procedure, 3 zeroing, 1 zeroing with the micro-switch, 2 zeroing through the digital communication, Zero instrument before use
BRONKHORST CORI-TECH B.V.
3.3 Zeroing
3.3.1 Zeroing with the Micro-switch
Before using the instrument zeroing is required.
•
Set process conditions
After warm-up, pressure up the system and fill the CORI-FLOW according to
the process conditions
•
Stop flow
Make sure no flow is going through the instrument by closing valves near the
instrument (for types M52, M53 and M54 two valves (one before and one after)
the instrument are required).
•
Press and hold, Until
With no flow, use the push-button switch (#) on the right side of the instrument
to start the zero adjustment procedure.
Press the push-button (#) and hold it, after a short time the red LED will go ON
and OFF then the green LED will go ON. At that moment release the push-
button (#).
•
Zeroing
The zeroing procedure will start at that moment and the green LED will blink
fast. The zeroing procedure waits for a stable signal and saves the zero. If the
signal is not stable zeroing will take long and the nearest point to zero is
accepted. The procedure will take approx. 10 sec.
So make always sure that there is going no flow through the instrument when
performing the zeroing procedure.
•
Ready
When indication is showing 0% signal and the green indication LED is burning
continuously again, then zero has been performed well.
3.3.2 Zeroing through the digital communication
It is also possible to start the automatic zero adjustment procedure through the FLOW-BUS, using a E-7000
readout/control unit or a software program on a PC, connected to a FLOW-BUS interface module.
The following parameters must be used for zeroing an instrument:
Initreset
[unsigned char, RW,0...255, DDEpar. = 7, Proces/par. = 0/10]
Cntrlmode
[unsigned char, RW,0...255, DDEpar. = 12, Proces/par. = 1/4]
CalMode
[unsigned char, RW,0...255, DDEpar. = 58, Proces/par. = 115/1]
•
Set process conditions
Warm-up, pressure up the system and fill the instrument according to the process conditions.
•
Stop flow
Make sure no flow is going through the instrument by closing valves near the instrument.
•
Send parameters
Send the following values to the parameters in this sequence.
Initreset 64
Cntrlmode
9
Calmode
255
Calmode
0
Calmode
9
•
Zeroing
The zeroing procedure will start at that moment and the green LED will blink fast. The zeroing
procedure waits for a stable signal and saves the zero. If the signal is not stable zeroing will take
long and the nearest point to zero is accepted. The procedure will take approx. 10 sec.
So make always sure that there is going no flow through the instrument when performing the zeroing
procedure.
•
Ready
When indication is showing 0% signal and the green indication LED is burning continuously again,
then zero has been performed well. Also parameter Cntrlmode goes back to zero.
As last send 0 to parameter Initreset.
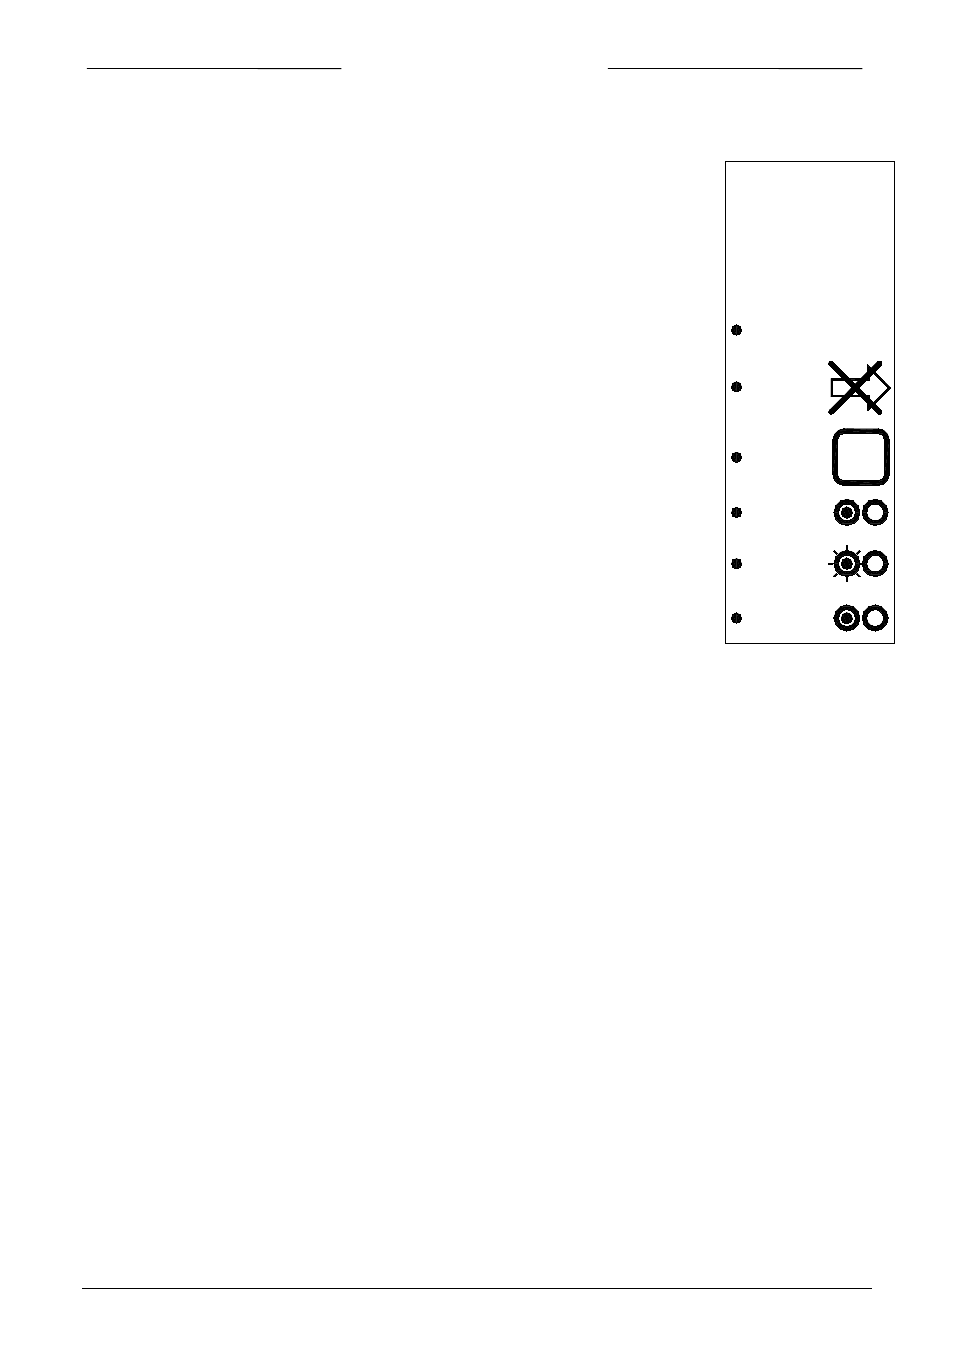
ATTENTION
Zero instrument
before use
#
Press and
hold
Until
Zeroing
Ready
Stop flow
PROCEDURE
Set process conditions
page 18
9.17.031