Fat Bagger 200MM FAT TIRE KIT 2008 User Manual
Page 5
www.fatbaggers.com
641-774-7499
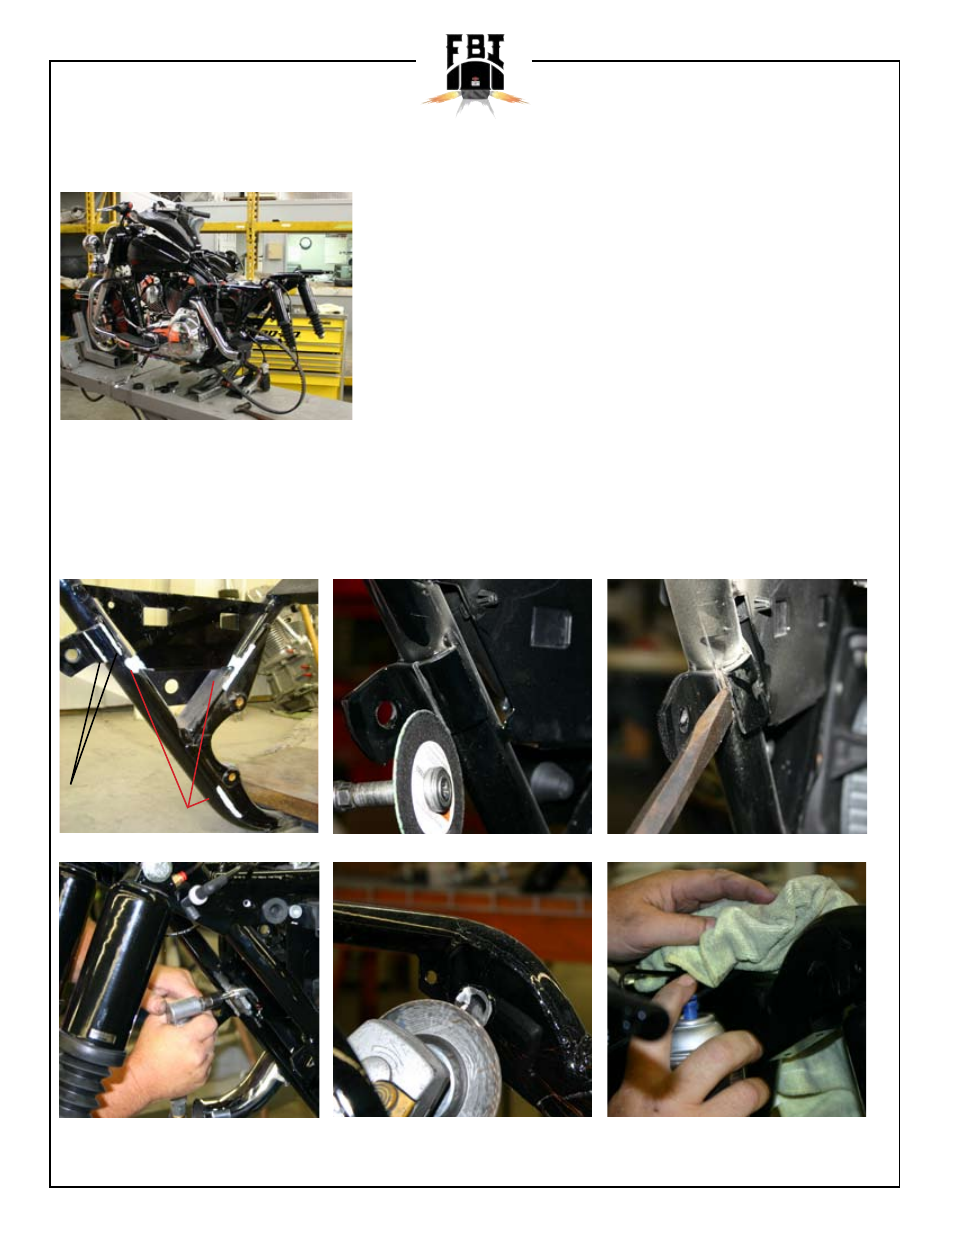
1. Disconnect the battery before starting any of the installation process. Then remove saddle bags,
seat, rear fender, rear wheel, swing arm, side covers, and exhaust system.
2. Locate the left side saddlebag frame rail that is welded to the frame, use a cut off wheel to cut
vertically in between the two welds, and cut through the inside weld. Making sure not to cut into
frame tube. Use chisel and hammer to knock inside of mounting tab off. Grind the remaining weld
off the inside of the frame tube. You must also grind welds down were belt passes through and
inside of the frame and the excessive material where the shocks mounts through the inside of the
frame for belt and tire clearance (see Image A) use touch up paint to cover any bare metal.
GRIND LINES
CUT LINES
Cutting part of mounting tab.
Removing part of mounting tab.
Image A
Grinding welds for belt
clearance.
Grinding shock mounts for tire
clearance.
Use touch up paint to cover all
bare metal.