Lighting (ignition) instructions, Electronic lighting, Manual lighting – Fire Magic 3287-1(P) Searing Station Built in User Manual
Page 13: 13 shutting off the unit, When using a portable propane tank, Replacing ignitor batteries
13
SHUTTING OFF THE UNIT
To shut off the unit, depress each valve control knob
and, and while pressing turn it clockwise to the OFF
position.
Always close the valve from the gas supply after each
use of the unit.
ELECTRONIC LIGHTING
Note: Electronic lighting requires an installed 9-volt
battery with a good charge.
1. Open lid(s) or remove cover(s) from burner(s) to be lit.
2. Turn all gas control knob(s) to their OFF position(s).
3. Turn on the gas at its source.
Note: DO
NOT
t u r n o n m o r e
than one valve at
a time for either
e l e c t r o n i c o r
manual lighting.
4. Depress the desired control knob for 5 seconds,
then, while pressing turn it counterclockwise to the
HI LIGHT position. Once the burner lights, release
the knob.
CAUTION:
If a burner does not light within fi ve (5)
seconds of turning on the control knob,
depress the knob and turn it to the OFF
position. WAIT FIVE (5) MINUTES
before repeating step 4. If you smell
gas, follow the instructions on the cover
of this manual. If the burners still do not
light after several attempts, refer to the
instructions for manual lighting.
5. Repeat step 4 for each additional burner to be lit.
WHEN USING A PORTABLE PROPANE TANK
Propane tanks are equipped with a safety shutdown
device that may cause low or no gas pressure/fl ame
at the burners if operating and lighting instructions
are not followed exactly (See important note in the
TROUBLESHOOTING section for more details.)
MANUAL LIGHTING
CAUTION: Always wait fi ve (5) minutes for gas to
clear after any unsuccessful lighting
attempt.
1. Follow steps 1 through 3 (left).
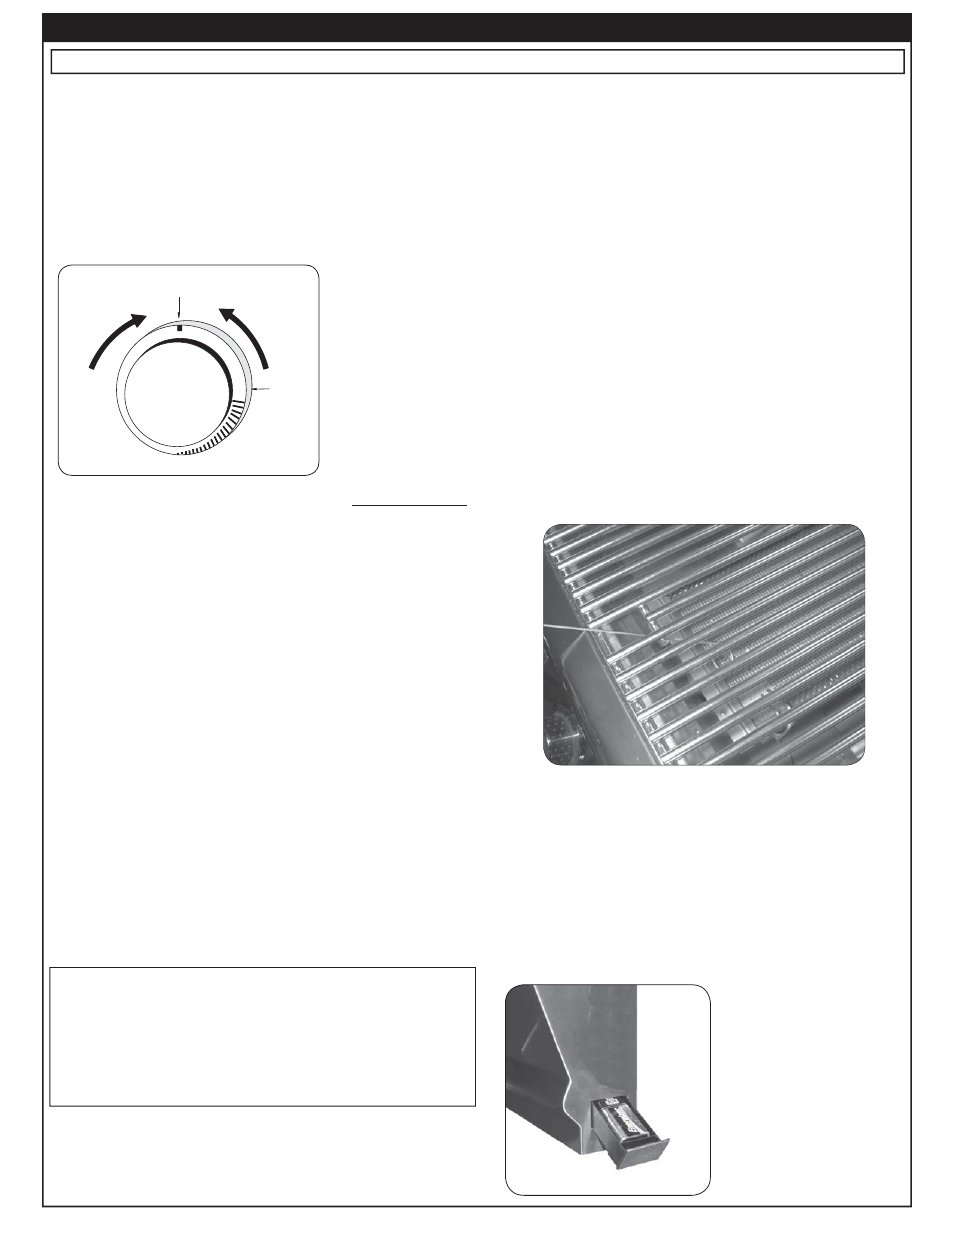
2. Insert either a burning long-barrel butane lighter or
a burning long-stem match through the cooking grid
opening to the top of the lighting tube. (Fig. 13-2).
F o r b a c k b u r n e r s , h o l d t h e f l a m e
a g a i n s t t h e s u r fa c e o f t h e b a c k b u r n e r.
For sideburners, hold the fl ame against the burner.
3. While holding the match or lighter fl ame at the top
of the lighting tube or next to the burner (sideburner
and backburner only), depress the desired control
knob and while pressing turn it counterclockwise to
the HI LIGHT position. Remove the lighter or match
when the burner lights, and release the control
knob.
4. If the burner does not light, immediately depress
the knob and turn the valve to OFF. WAIT FIVE
(5) MINUTES before repeating steps 2 through 4
of the MANUAL LIGHTING instructions.
Read all instructions before lighting, and follow these instructions each time you light the unit.
Fig. 13-2
- Manual lighting
Lighter
Lighting
tube
Fig.
13-1
- Control knob
OFF
HI
LIGHT
LOW
T
O
TURN OFF
T
O TURN
ON
Read setting
here
HIGH to
LIGHT
Read setting here
(OFF position shown)
To T
urn
OFF
To T
urn
ON
Use
HI (high)
to light
Press
knob in
to turn
REPLACING IGNITOR BATTERIES
To replace the 9V battery powering the ignitors, pull out the
battery holder located on the outside of the control panel.
Remove the lid. Disconnect the battery from the connector
and replace it connecting the new battery. Replace the lid
and close the drawer (see Fig. 13-3).
Fig.
13-3
2. Insert either a burning long-barrel butane lighter, a
burning long-stem match, or a burning match held
by a wire extension holder through the cooking grid
opening to the top of the burner (Fig. 13-2).
3. While holding the match or lighter fl ame at the top
of the burner, depress the control knob and while
pressing turn it counterclockwise to the HI LIGHT
position. Remove the lighter or match when the
burner lights, and release the control knob.
4. If the burner does not light, immediately depress
the knob and turn the valve to OFF. WAIT FIVE
(5) MINUTES before repeating steps 2 through 4
of the MANUAL LIGHTING instructions.
Fig. 13-2
- Manual lighting
Fig.
13-3
LIGHTING (IGNITION) INSTRUCTIONS