Removing the glass inside the oven door – Kleenmaid OMF6020 User Manual
Page 12
12
Removing the glass inside the oven door
General notes
To make it easier to clean the door, you can remove the
glass inside it. To take it out, follow the instructions below
according to the door model mounted on the oven.
Important: To remove the internal glass you need
to remove the door from the oven (see paragraph
on “Removing the oven door”) and place it on a
steady surface that ensures the necessary steps are
conducted safely.
Attention: Do not use any kind of blunt or sharp tool
that may break the glass or damage the door.
Pay attention to which way you place the glass
surfaces when you put them back, as they cannot be
turned around. If they are not positioned correctly, this
may affect the operation of the oven or even seriously
damage the appliance.
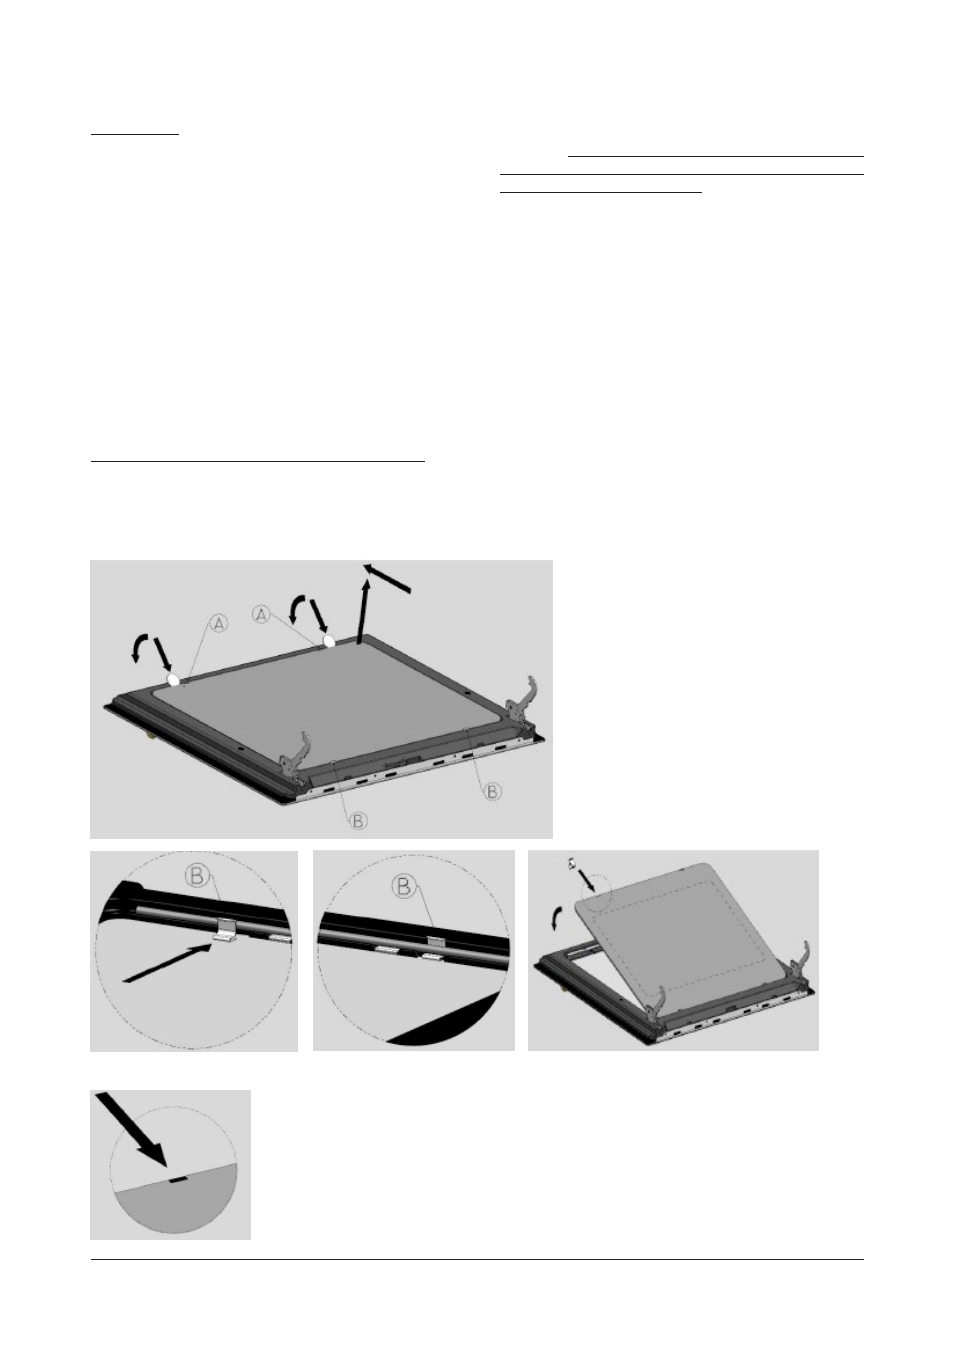
Pressed door model (remove the door from the oven)
You can use thin cylindrical objects (for instance two coins
with a diameter of roughly 25mm and 2mm thick). Insert
them between the enamelled door and the glass in the areas
right near the clips A that lock the glass into place in the
upper part of the door. Press until you hear a “click”, which
means that the clip has come out. Now lift the glass and
take it out. The intermediate glass you will find immediately
underneath (in versions where this applies) must only be
removed by qualified personnel.
To install the glass again (pay attention to putting it in
the right way round, the part with the graphics must be
towards the inside), position the upper clips
A near the
designated silk-screen printed notches in the glass
(fig.
4/A). Insert the latter in the lower clips B, which must be
positioned correctly into place in the door
(fig. 2). Also
make sure you position the silicone rubber cylindrical
gaskets correctly
(fig. 3). Now put the upper part of the
glass into place and exert a slight pressure directly on the
area featuring the upper clips
A, until a click tells you that
the glass has been locked into place correctly
(fig. 4).
Before mounting back the door, make sure the glass
is firmly secured into place
fig. 1
fig. 2
fig. 3
fig. 4
fig. /A