Installation instructions, Step 12 connect water supply, Step 11 install dispenser trim – Kleenmaid ZSGS420IBS User Manual
Page 17
17
Installation Instructions
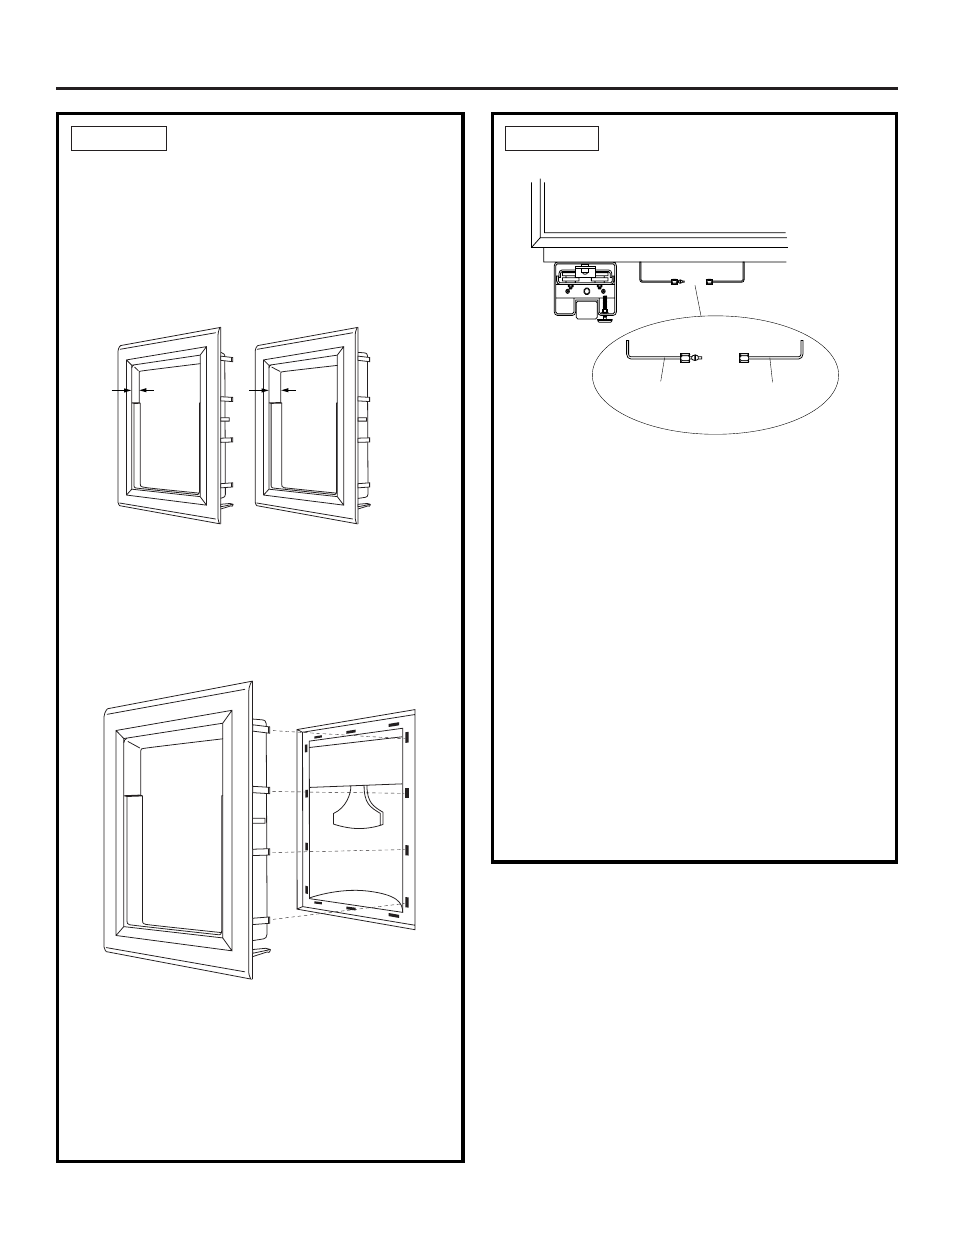
STEP 12 CONNECT WATER SUPPLY
• Locate and bring tubing to the front of the cabinet.
• Turn the water on to flush debris from line. Run
about a litre of water through tubing into a bucket,
then shut-off water.
Copper Tubing:
• Slip a 1/4" nut and ferrule (provided) over both
ends of the copper tubing. Insert tube into the
union fitting on the unit and tighten nut to union.
• Turn on the water to check for leaks.
GE SmartConnect™ Tubing:
• Insert the molded end of the tubing into the
refrigerator connection. Tighten the compression
nut until it is just hand tight.
• Tighten one additional turn with a wrench.
Overtightening can cause leaks!
• Turn on the water to check for leaks.
Note:
Make sure excess tubing length does not
interfere with toekick installation.
STEP 11 INSTALL DISPENSER
TRIM
Skip this step is you are installing a stainless
steel wrapped refrigerator.
There are two dispenser trims shipped with your
refrigerator. Select the appropriate trim for your
application.
• Press and snap the dispenser trim into the
dispenser recess on the refrigerator door.
If an excessive gap exists around the dispenser trim
or if the panel fits loosely in the door frame, foam
tape may be applied to help improve the fit. Remove
the trim and panel and apply foam tape to the door
around the dispenser and in the corners.
Compare the dispenser trims. Note that the inside
depth of the frames are different. Choose the trim
with less depth for framed panels, choose the
deeper one for overlay panels.
Dispenser trim fit over the custom panel depends on
correct panel thickness. See pages 7 and 8 for panel
construction information.
Framed
Panel
Trim
Overlay
Panel
Trim
Refrigerator
Water Supply
House
Water Supply