Installations of option – Standard Horizon HX-471S User Manual
Page 48
HX471S
Page 46
15. INSTALLATIONS OF OPTION
15.1 SU-1 BAROMETRIC PRESSURE UNIT OR
FVP-31 VOICE SCRAMBLER UNIT
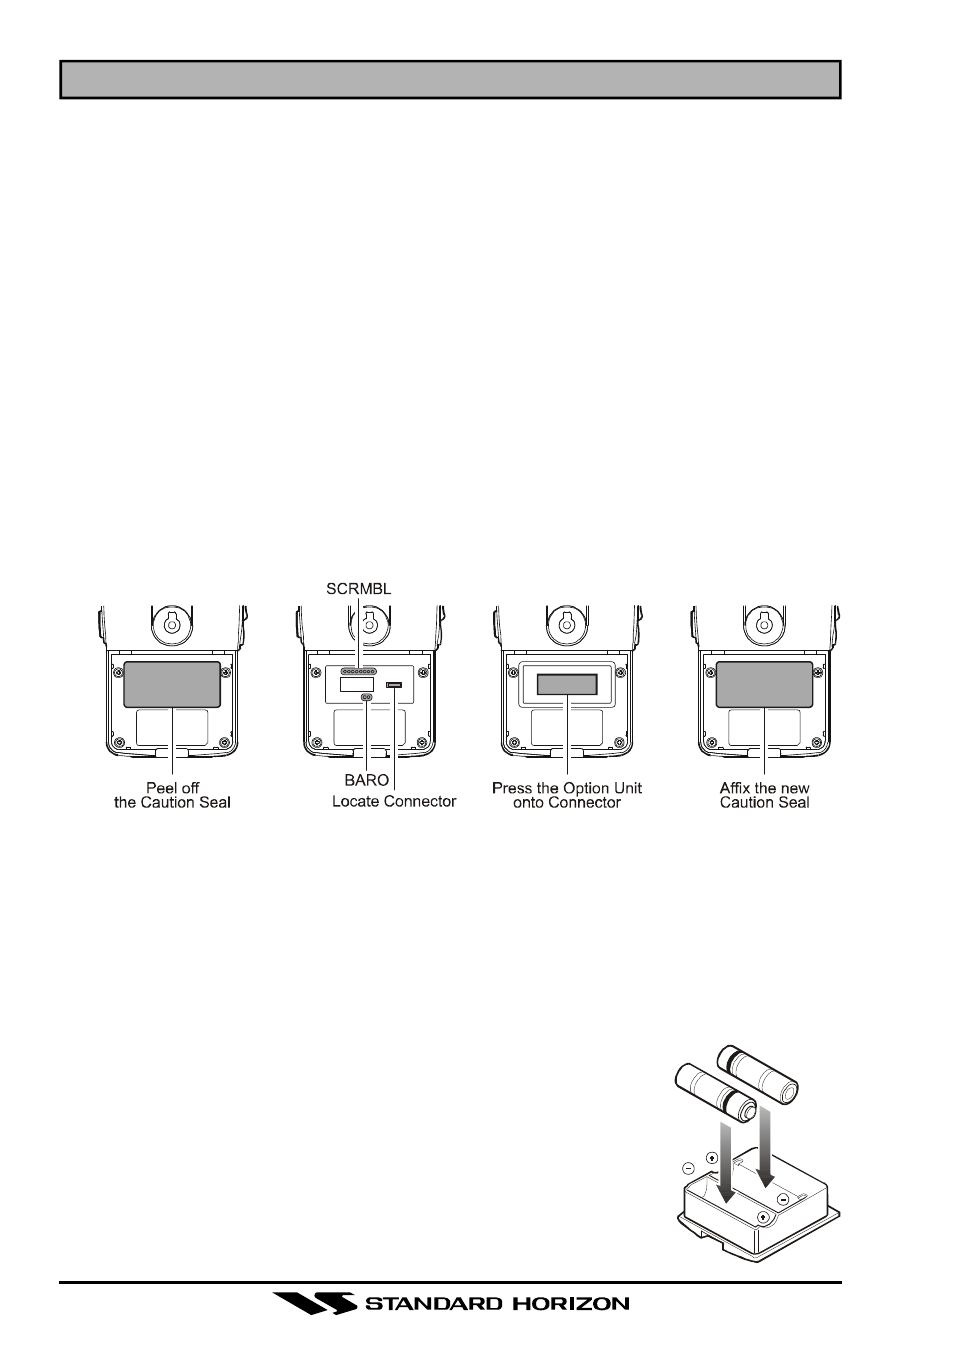
1. Make sure that the transceiver is off. Remove the hard or soft case, if
used. Remove the battery pack.
2. Locate the connector for the optional unit under the caution seal in the
battery compartment on the back of the radio; just peel off the caution seal.
3. When installing the Barometric Pressure Unit SU-1, connect the jumper
pads labeled “BARO” (2 pair) by soldering them together. When install-
ing the Voice Scrambler Unit FVP-31, connect the jumper pads labeled
“SCRMBL” (8 pair) using the soldering jumper.
Note: It is not possible to install both optional units into the same radio.
4. Align the connector on the optional unit with the transceiver’s connector
and gently press the unit into place.
5. Affix the new caution seal (supplied with the optional unit), and replace
the battery. Installation is now complete.
â
â
â
15.2 FBA-23 BATTERY CASE
FBA-23 is a battery case that holds two alkaline batteries and is used with
the HX471S transceiver. Alkaline batteries can be used for transmission in
an emergency, but power output is reduced to one watt, and battery life will
be short.
1. Slide the batteries into the FBA-23 with the Negative [–] side of the batter-
ies touching the spring connections inside the FBA-23.
2. Insert the FBA-23 into the battery compartment on the
back of the transceiver, then close the Battery Pack
Latch until it locks in place with a “click.”
Note: The battery indicator on the transceiver is only ap-
plicable to the FNB-80LI rechargeable battery. Disregard
this indication when using alkaline batteries.