La Crosse Technology Kcombo5 User Manual
Page 3
9
Outdoor Reception
Signal icon*
MIN/MAX Outdoor
temperature
SET key
Press and hold for about 3 seconds to enter the Manual setting mode.
+ key
Press to make adjustment in the setting mode.
Press and hold to reset all MIN/MAX records
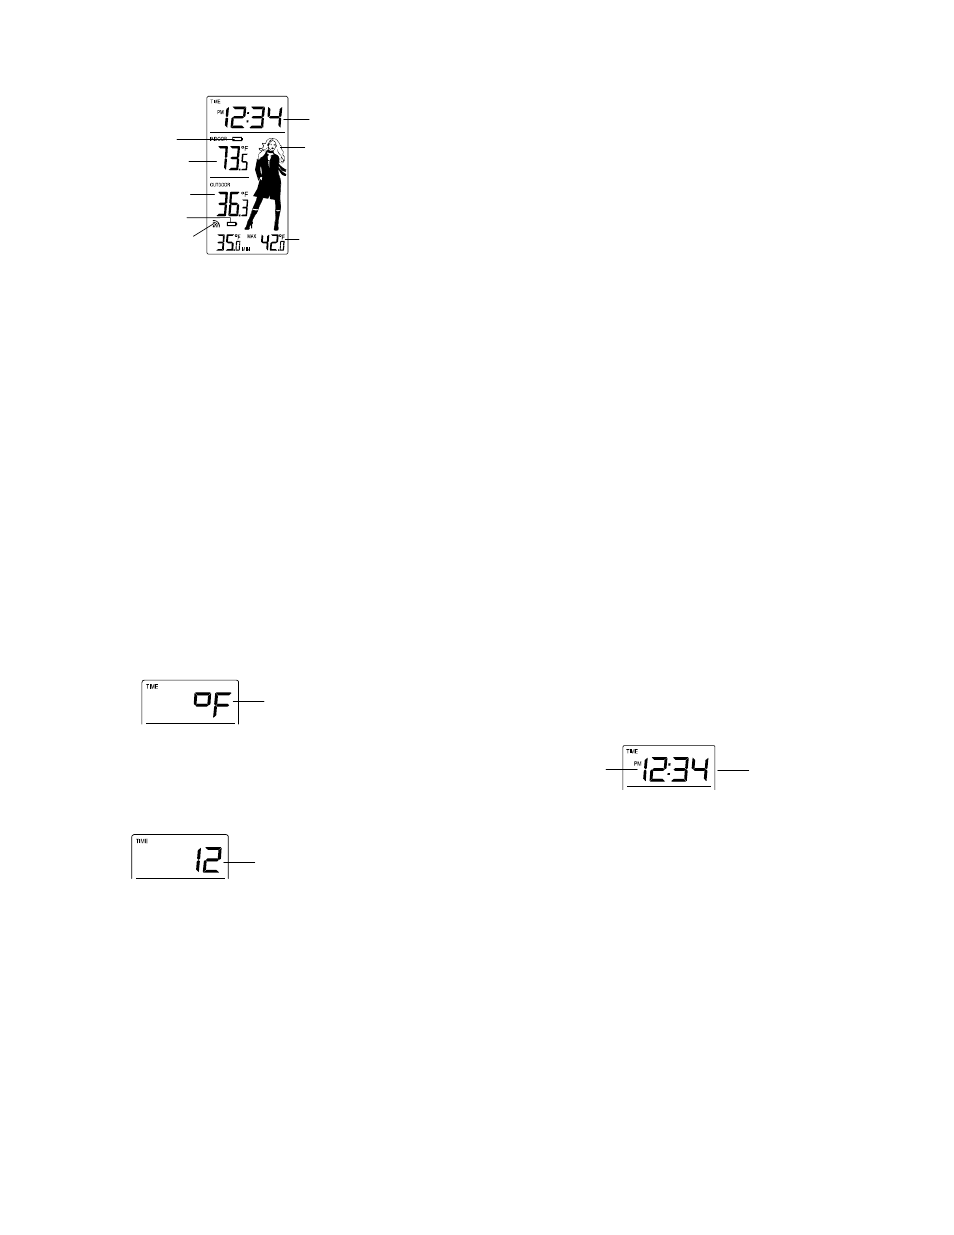
LCD SCREEN AND SETTINGS:
Time
Indoor Temperature
in °F/°C
Outdoor Temperature
in °F/°C
Temperature icon
(Weather Girl icon)
Low battery indicator
(temperature station)
Low battery indicator
(transmitter)
10
* When the signal from the transmitter is successfully received by the Temperature Station, this icon
will be switched on. (If not successful, the icon will not be shown on the LCD). User can therefore
easily see whether the last reception was successful (“ON” icon) or not (“OFF” icon). On the other
hand, the short blinking of the icon shows that a reception is being done at that time.
For a better display clarity, the LCD screen is split into 3 sections.
Section 1 - TIME
Display of time (manually set).
Section 2 - INDOOR TEMPERATURE
Display of indoor temperature.
Section 3 - CURRENT OUTDOOR TEMPERATURE AND MIN/MAX OUTDOOR TEMPERATURE
AND WEATHER GIRL ICON
Display the current temperature.
Display the outdoor minimum and maximum temperature.
Display of the current temperature condition on the right side of the LCD in form of one of the
five weather icons (featured by Weather Girl) which change their appearance depending on the
current outdoor temperature.
MANUAL SETTING:
In normal display, press and hold the SET key for 3 seconds to enter the manual setting mode.
11
Flashing
Flashing
F/C TEMPERATURE UNIT SETTING
The temperature can be set in
F (degree Fahrenheit) or C (degree Celsius); default setting in F:
1.
Press and hold the SET key in the normal display for about 3 seconds, the digit "
F" will be
flashing.
2. Press
the
+ key to select the unit as
F or C.
3.
Confirm by pressing the SET key to enter the 12/24 hour time display setting.
Note:
If no buttons are pressed within approximately 8 seconds while in any setting option, the unit will return
to normal operating mode.
12 / 24- HOUR TIME DISPLAY SETTING
The time format can be set in 12-hour or 24-hour mode (default setting “12”):
12
Minutes (flashing)
Hour (flashing)
1.
The "12" or "24" digit will be flashing.
2. Press
the
+ key to set the desired time display mode.
3.
Press shortly the SET key to advance to the MANUAL TIME SETTING.
Note:
If no buttons are pressed within approximately 8 seconds while in any setting option, the unit will return
to normal operating mode.
MANUAL TIME SETTING
To manually set the time of the Temperature Station:
1.
The hour digit of the time display will be flashing.
2. Press
the
+ key to adjust the hour (press and hold to allow fast advance). Press SET key to
confirm and go to the minute setting.
3.
The minute digit will be flashing. Press the + key to adjust the minute (press and hold to allow
fast advance). Press SET key once more to return to normal display.
Note:
If no buttons are pressed within approximately 8 seconds while in any setting option, the unit will return
to normal operating mode.