Installing the log set, Notice, Installation – Montigo H42DF User Manual
Page 30
H*42DF Indoor Gas Fireplace
Page 30
XG0148 - 150204.1
Installation
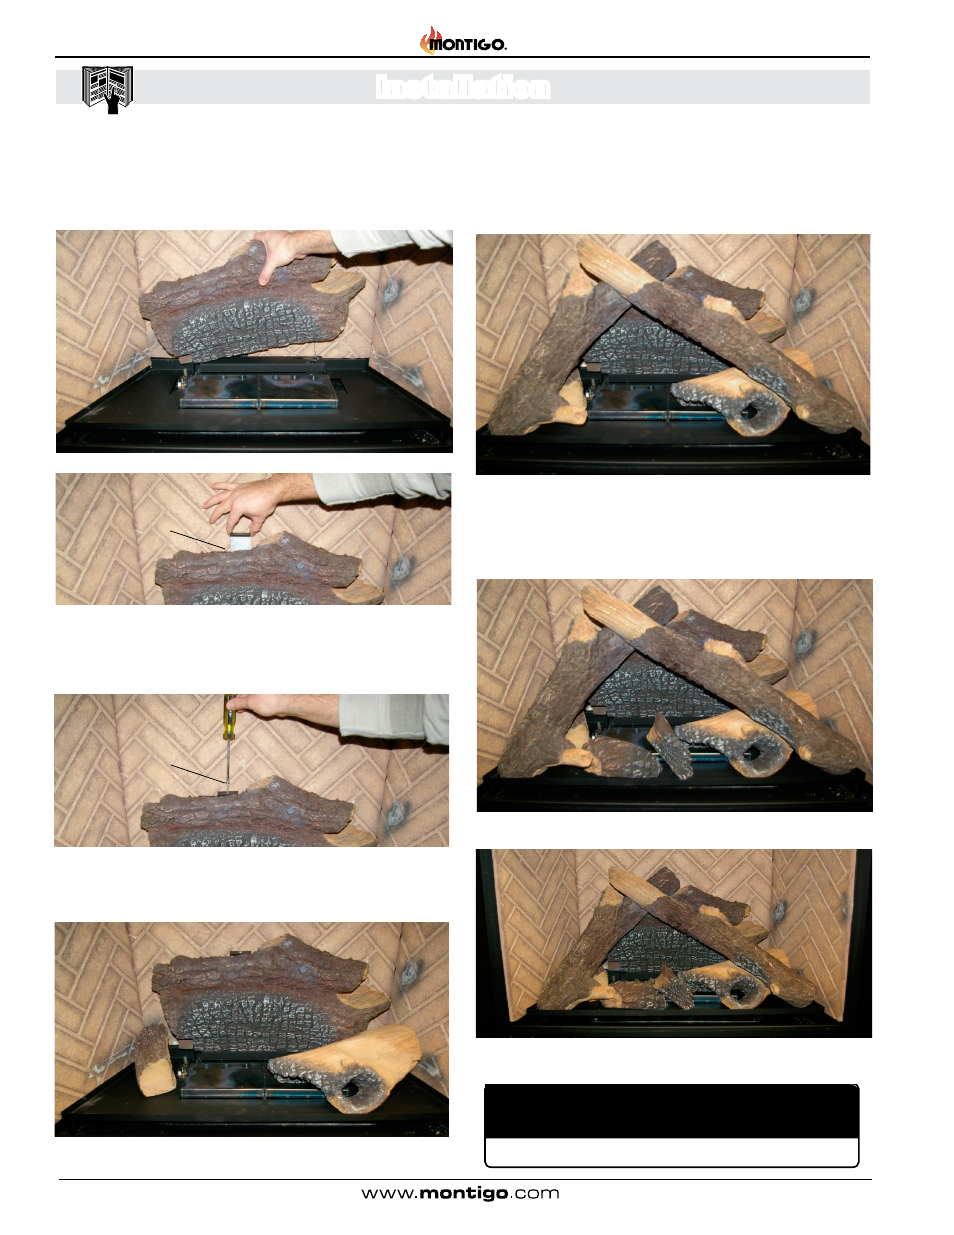
Figure 31. Rear log alignment.
Figure 31a. Rear log retaining bracket
Figure 31b. Fastening Retaining bracket to Rear Log.
Rear Log
1. Place & Align the Rear Log as shown above in figure 30, 30a.
2. Locate the retaining bracket as shown, slide bracket behind Rear
Log retaining plate as shown in figure 30a. Fasten bracket to log
as shown in figure 30b, (use supplied hardware).
Figure 31c. Placing front logs.
Rear Log Retrain-
ing bracket.
Rear Log Retraining
bracket hardware.
Log C
3. Place front Left log (Log B) and front right log (Log C) as shown
in figure 30c. Place Log C knot hole as shown.
Figure 31d. Place log D and then E, (note placement of Knot
on log).
Log E
4. Place the Long front Left log (Log D) as shown in figure 30d.
Angle log with knot pointing inward toward centre of firebox.
5. Place the Long front Right log (Log E) as shown in figure
30d. Angle log with knot pointing outward toward front of
Fireplace.
6. Place the Remaining two Front logs (Log F) & (Log G) as shown
in figure 30e . Space Logs evenly with log feature direction as
shown.
Figure 31f. Completed HW42DF Logset.
Figure 31e. Place log G, (note placement of log).
Log G
Installing the Log set:
The HW42DF* is supplied with a seven ceramic fibre log logset. Unpack
the logs and handle them very carefully.
If logs are not placed properly, excessive sooting will result.
NOTICE
Log D
Log F