Niveo Professional NUPS22-6000U User Manual
Page 10
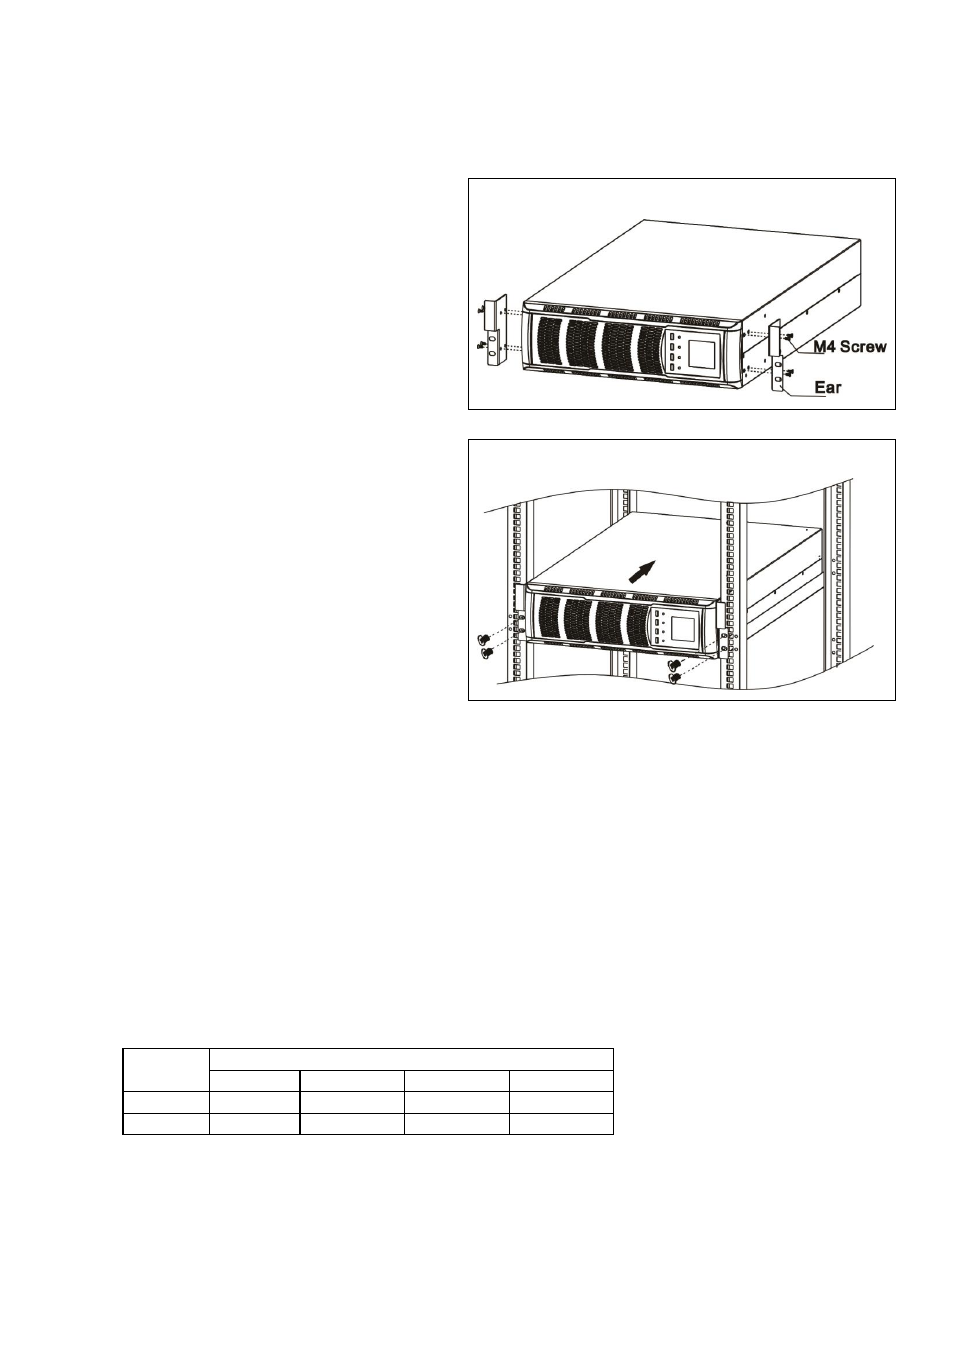
2-3-2 Rack Installation
Please follow below steps to mount UPS into 19” rack or rack enclosure.
Step 1: Attach mounting ears to the side mounting
holes of UPS using the screws provided and the
ears should face forward. Please refer to chart 1.
Chart 1
Step 2: Lift the UPS module and slide it into rack
enclosure. Attach the UPS module to the rack with
screws, nuts and washers (user-provided) through
its mounting ears and into the rack rails. Please
refer to chart 2.
Chart 2
2-4. Single UPS Installation
Installation and wiring must be performed in accordance with the local electric laws/regulations and execute
the following instructions by professional personnel.
1) Make sure the mains wire and breakers in the building are enough for the rated capacity of UPS to avoid
the hazards of electric shock or fire.
NOTE: Do not use the wall receptacle as the input power source for the UPS, as its rated current is less than
the UPS’s maximum input current. Otherwise the receptacle may be burned and destroyed.
2) Switch off the mains switch in the building before installation.
3) Turn off all the connected devices before connecting to the UPS.
4) Prepare wires based on the following table:
Model
Wiring spec (AWG)
Input
Output
Battery
Ground
6KVA
10
10
10
10
10KVA
8
8
8
8
NOTE 1: The cable for 6KVA should be able to withstand over 40A current. It is recommended to use
10AWG or thicker wire for safety and efficiency.
NOTE 2: The cable for 10KVA should be able to withstand over 63A current. It is recommended to use
8AWG or thicker wire for safety and efficiency.
NOTE 3: The selections for color of wires should be followed by the local electrical laws and