Cables and connections, Comunications, 7 rs232 serial interface – Pertech 5300 Series User Manual
Page 13: Rs-232 interface connection, Document guide installation
Pertech
220321A
6
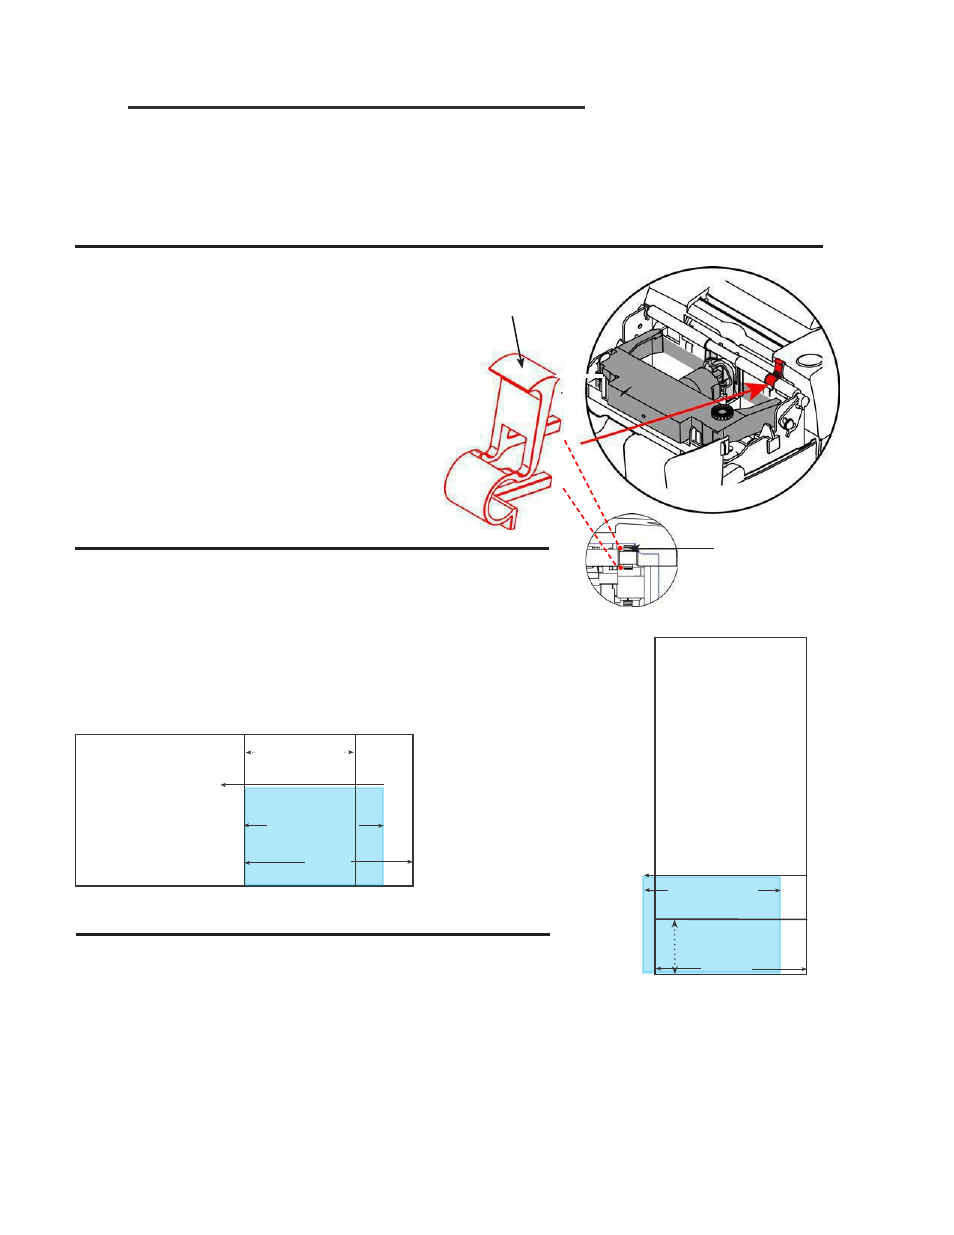
Document Guide Installation
The Document Guide is a clip in durable plastic part that attaches to the printers Validation Roller to provide a
right side guide for an inserted form.
NOTE: Before installing the Document Guide make sure the area where the guide is to be installed is free of
any dust debris or contamination that could inhibit the movement of the Validation Roller.
The Document Guide is installed by
attaching it to the Validation Roller. The
guide is installed vertically with the bot-
tom of the guide clipped into the Valida-
tion Roller in the rollers notch on the
right side. The tapered tab end of the
guide needs to be toward the top of the
printer. Align the bottom two extensions
of the Document guide so that they are
left of the MLV Roller Gear. Make sure
an inserted form will not catch on the
guide.
2.75 Inches
1.75 Document Stop
1 Inch
Print feld is 2.5” Wide
3 Inches
1 Inch
Print Zone
2 Inches for 6” Check
Print feld is 2.5” Wide
3 Inches
1.75 Document Stop
When the Document Guide is attached the
Print is Left Justifed to the 2” Print Zone on the
back of a 2 3/4” X 6” standard check.
Note: The Print Field is 2.5” wide. Left Justif-
cation can overlap into the 1” right zone.
Tab
MLV Gear
The print feld will be
1/4” left of a standard
2 3/4” X 6” form when
inserted vertically and
aligning with the docu-
ment guide.