Configuration & diagnostic print tests, Confguration & diagnostic print tests, Confguration utility program – Pertech 5300 Series User Manual
Page 23: Logo download utility
Pertech
220321A
16
Logo Download Utility
Pertech provides a Logo Download Utility to simplify the adding of logos or Bit Mapped images to your printed tickets
or receipts. The utility is available for download from the Pertech web site.
This utility allows BMP (Bitmap) graphic fles to be down-
loaded into Pertech Resources printer memory for later
printing. BMP graphics can be stored in non-volatile
Flash or RAM.
The BMP Download Utility can be used on either the
5300 series printers, or the A470e printers.
The utility may be confgured to download using one of
two communication types: RS232 or USB. RS232 may
be confgured to use hardware or software handshak-
ing, baud rates 1200, 2400, 4800, 9600, 19200, 38400,
57600 on a choice of COM ports 1-9.
Before using the utility to download BMP fles, the user
should verify the host communication settings match the
connection to the printer. The communication settings
used to transmit information to the printer are displayed
on the bottom of the form. If the settings are incorrect,
you may click on the “Setup” menu, then select “Com-
munications”. See the “Modify Host Communications”
section of this document for more information.
The printer must be confgured so that the “Printer Con-
trol Language” is set to “ACL Language”. This can be
verifed by printing a confguration ticket on the printer:
Turn off power to printer, press and hold the paper feed
button. While holding the feed button down, turn on the
printer power. Release the button after the printer has
fnished centering the printhead.
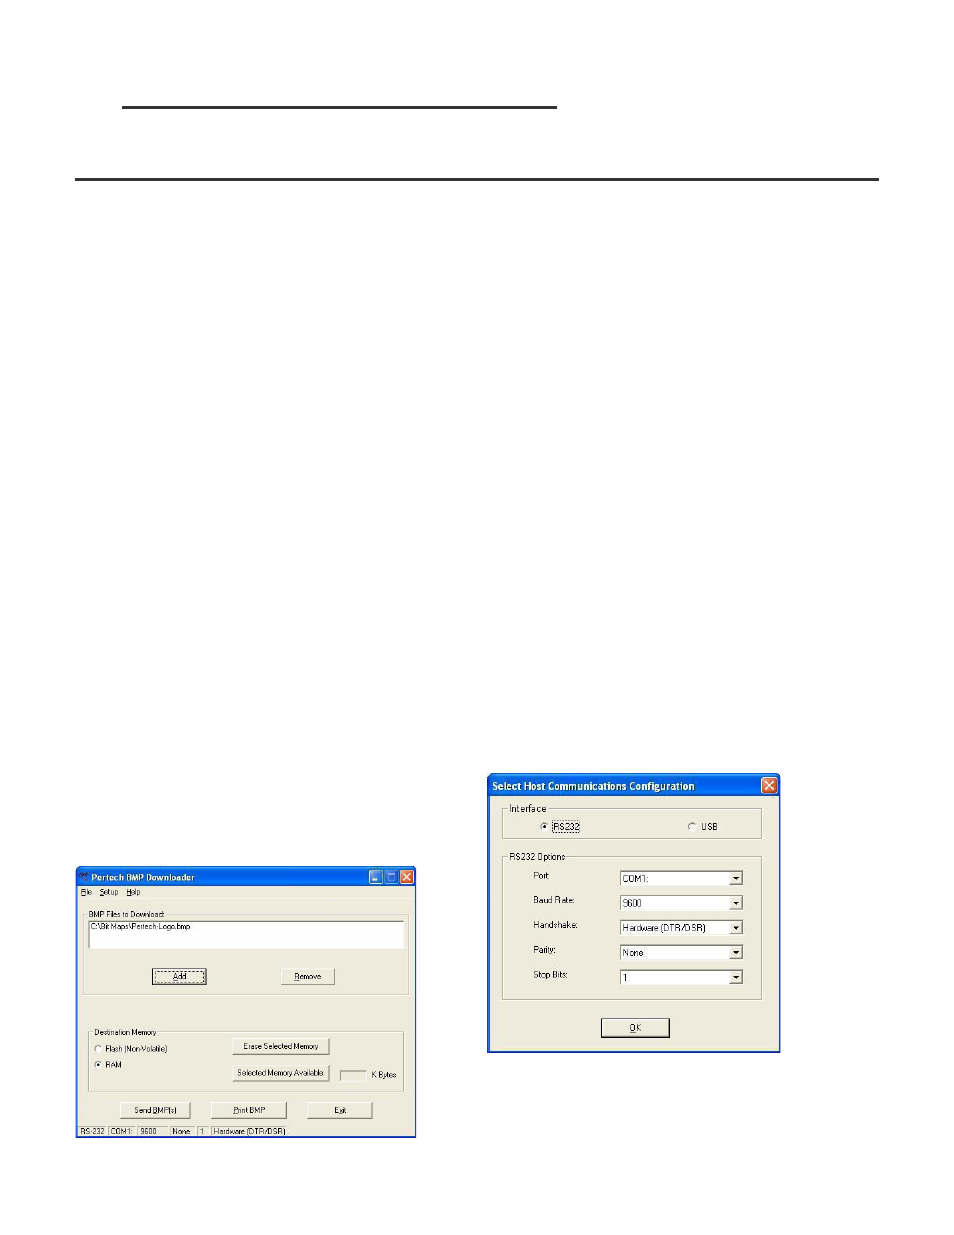
Features
The “Add” button will open up a browser window to
select a BMP fle and add it to the list of BMP fles to
download. The BMP fles must be monochrome and no
larger than 368 pixels wide.
The “Remove” button will take a selected fle off of the
list of BMP fles to be downloaded.
A “Destination Memory” must be selected, either FLASH
or RAM. This selection will choose which type of mem-
ory where the BMP will be stored in the printer when the
“Send BMP(s)” button is clicked. It will also choose the
type of memory to be erased (“Erase Selected Memory”)
and the amount of total memory available (“Selected
Memory Available”).
Modify Host Communications
Setting the communications is done in the dialog box
shown above. One of 2 interfaces may be checked,
RS232 or USB.
RS232: For RS232 connections, the baud rate and
handshaking method must match how the current printer
is confgured. If you are unsure how the printer is con-
fgured, print a self-test (hold the feed button and cycle
power). Make sure that a null modem cable is connect-
ed between the selected COM port and the printer.
USB: USB connections do not require any special pa-
rameter settings. (Windows 98 users may need to check
the “Troubleshooting” section of this document.)
Click on OK when the interface and parameters match
those of the connected printer.