Introduction – Rena EasyFeed 120 User Manual
Page 6
EasyFeed_120_Operations_
4-25-14
6
INTRODUCTION
Thank you for your purchase of the RENA EasyFeed 120 high speed friction feeder. Our
feeders are designed to offer you years of reliable use with minimal maintenance. Your new
feeder offers the ability to feed a wide variety of media types and sizes with ease, along with
exclusive features designed to reduce paper jams and paper skew.
Please use the following “Warranty Registration“ link, to register your product with Rena
Systems.
http://www.renausa.com/support_warranty.htm
The purpose of this manual is to familiarize you with standard set up procedures for the
EasyFeed 120, along with suggestions for setting up the feeder for various paper types, sizes
and thicknesses.
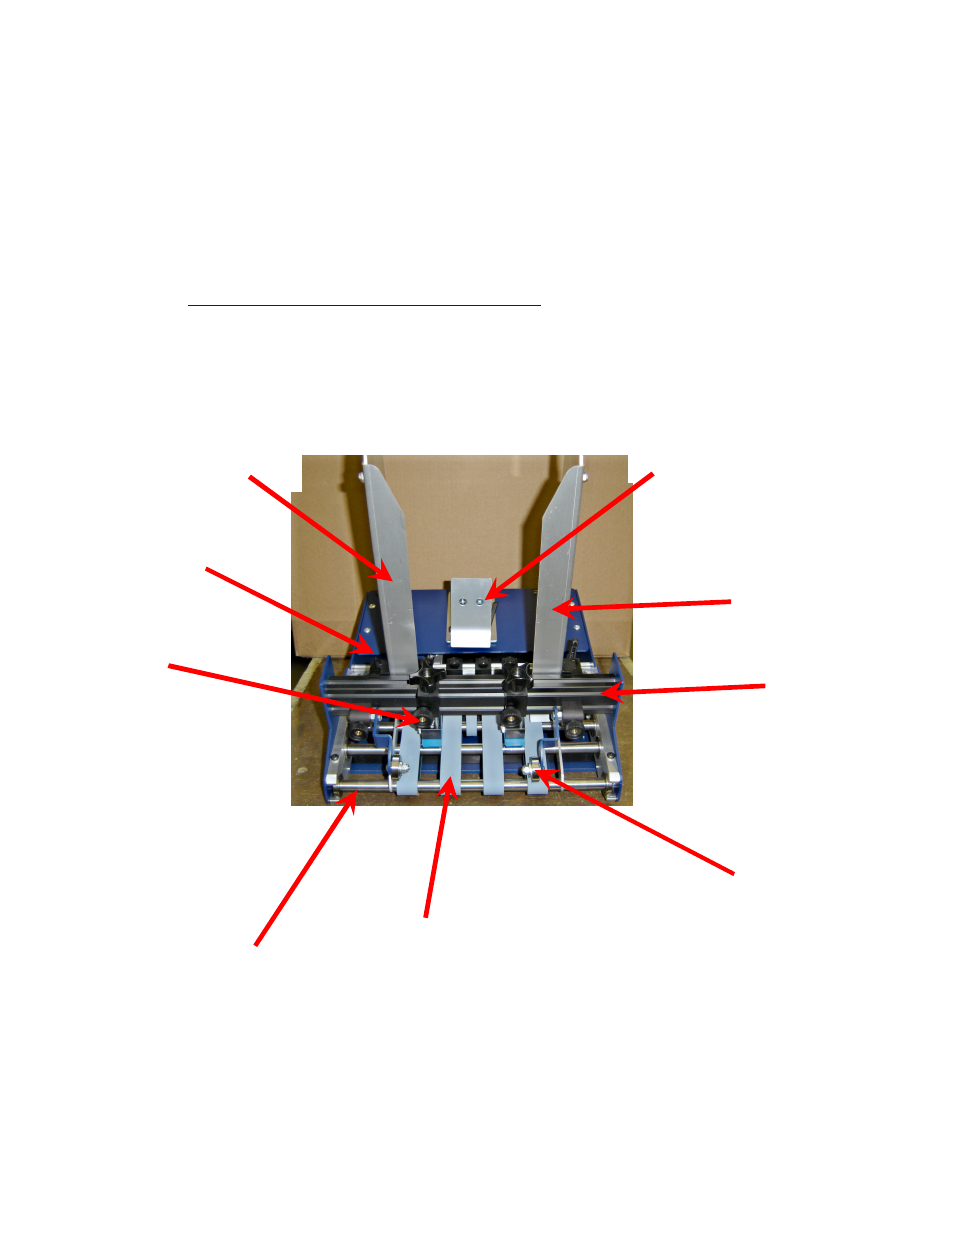
The picture below illustrates the main components of the EasyFeed 120:
After unpacking your feeder, install the front and back paper guides onto the bridge using the
flat head screws provided. Make sure that the paper guides are not pressing against the feed
belts. Supply power to the feeder and test operation by turning the power on and adjusting the
speed control knob.
Feed Belts
Exit Shaft
Rear Paper Guide
Eject Roller
Separator
Front Paper Guide
Bridge
Back Wedge Ramp
Locking
lever