SVS PLASMA TWO User Manual
Page 12
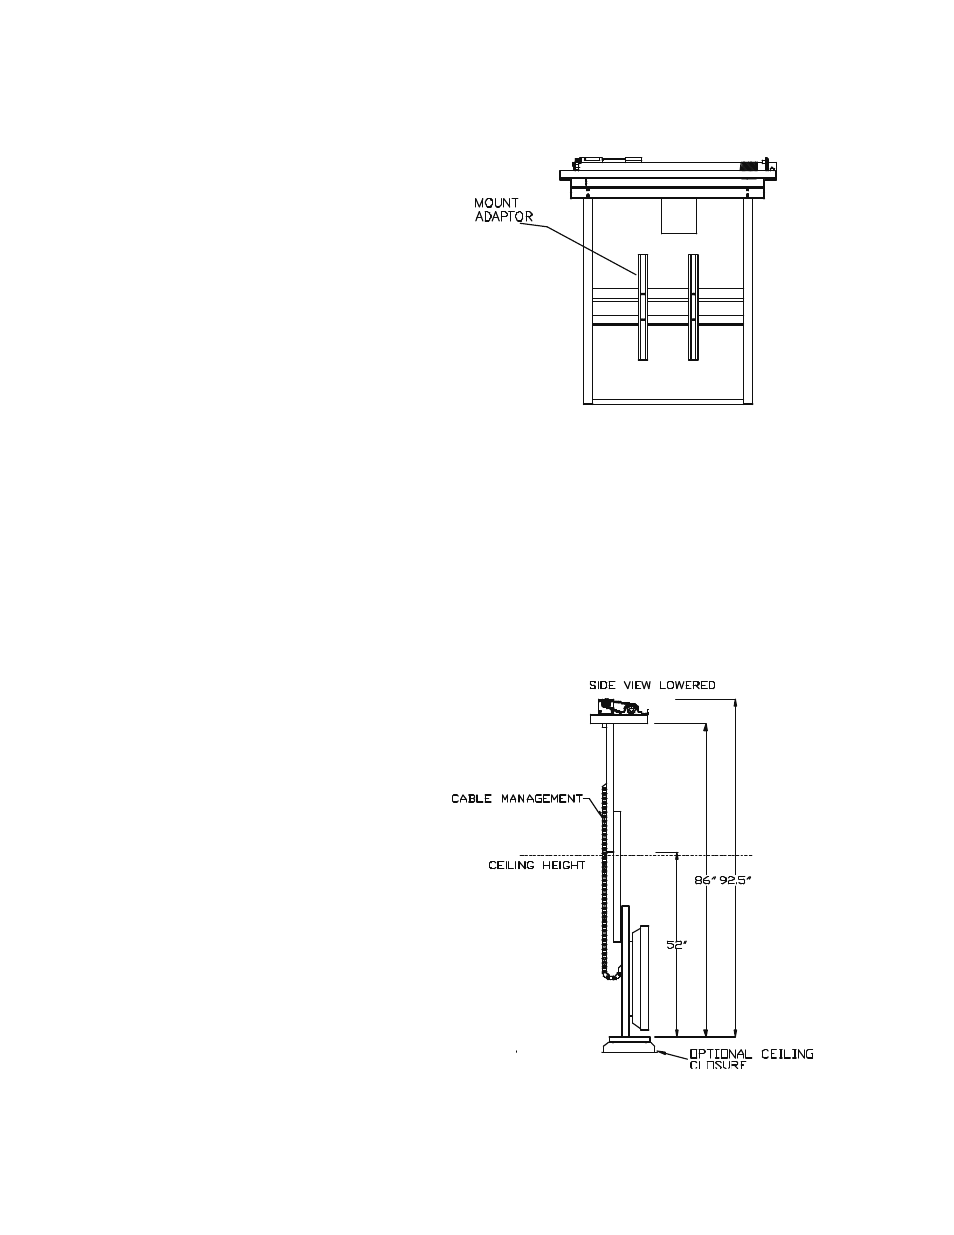
7. MOUNTING THE PLASMA SCREEN:
After checking the lift operation and all clearances, the plasma screen can be installed.
– The plasma screen can be attached to the
lift by using a #9 Mounting Bracket,
which is the actual connecting hardware
between the screen and the lift. The base
box of the #9 mounting bracket will
need to be bolted to the lift's mount
adaptor.
The mount base should be
centered side to side with the lift frame.
Figure 9.
Note: All weight attached to the lift must be centered between the cables.
1. Install the plasma Screen onto the mount adaptor. Again, make sure screen is leveled. There should
approx. 1.5" of clearance all the way around the plasma. Failure to maintain proper clearance
could damage the plasma screen when closing.
2. Using the low voltage controller, raise the lift towards a closed position. The toggle switch will allow
you to safely stop at several intervals and observe all clearances. Make sure that there are no
obstructions in the cavity where the plasma screen will be stored.
8. CABLE MANAGEMENT:
(on applicable models):
The SVS Plasma Two Series lift feature a
cable mgt. system installed in the rear of
the lift, which is used to to keep cables
and other cords securely out of the way
during operation- see Figure 10.
Figure 10.
SVS PLASMA TWO LIFT INSTALLATION
Page 12 of 13