Rf rules apply, Rack chassis – rk1 or rk2, Installing modules in the rack chassis – ZeeVee HDbridge Advanced User Manual
Page 3: Basic configuration (front panel), Getting started with hdbridge
HDbridge™ Module Configuration Manual
Page 3
www.zeevee.com
Rev 1.0
Getting Started with HDbridge
RF Rules Apply
Treat the HDbridge system the same way as any other RF system. Each modulator (or “module”) outputs a QAM
signal that works with off-the shelf RF tools, equipment, and materials.
Each module requires a full RF channel.
Each display must have a QAM tuner.
RF power output from each module must be balanced with existing modulators/feeds.
Standard calculations for distance and power apply.
Rack Chassis – RK1 or RK2
HDbridge modules mount into the HDb Rack Chassis for easy installation. For more flexibility, there are two Rack
Chassis to choose from:
RK1
RK2
Provided
Power for 8 modules
8-way RF combiner
RF amplifier
Launch power is 34db
Power for 8 modules
RF output of each module is 25db
Not Provided
Component cables
Digital Audio cables (optical or spdif)
Ethernet
8-way RF combiner
RF amplifier
Component cables
Digital Audio cables (optical or SPDIF)
Ethernet
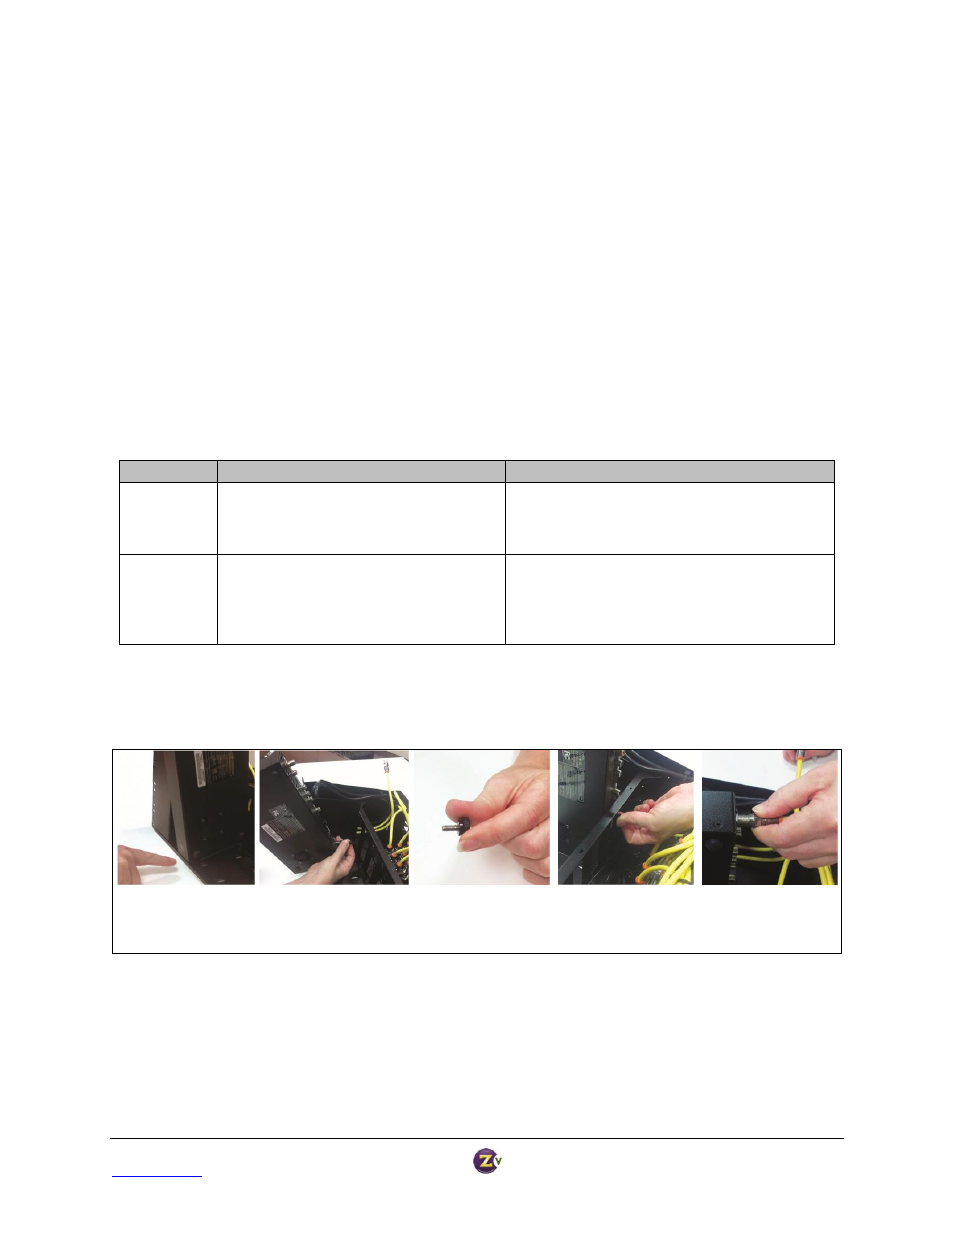
Installing Modules in the Rack Chassis
The Rack Chassis mounts up to eight modules, with thumb screws to secure them to the rack.
Align module inside the
small lip on the chassis.
Insert the DC power plug into
the module. Push down on
the module until it sits flat.
Locate the thumbscrew
in the bracket behind
the module.
Tighten the thumbscrew
into the module until
it is snug.
Attach the coax snugly to
the RF output connector
on the module.*
*RK2 users need to provide their own coax connections.
Connect the Component and Digital Audio cables from the source. Connect Ethernet cables for advanced
configuration. Refer to the HDbridge Rack Chassis Get Going Guide for detailed instructions on module installation.