Eneo HDB-2080MIR User Manual
Page 8
7
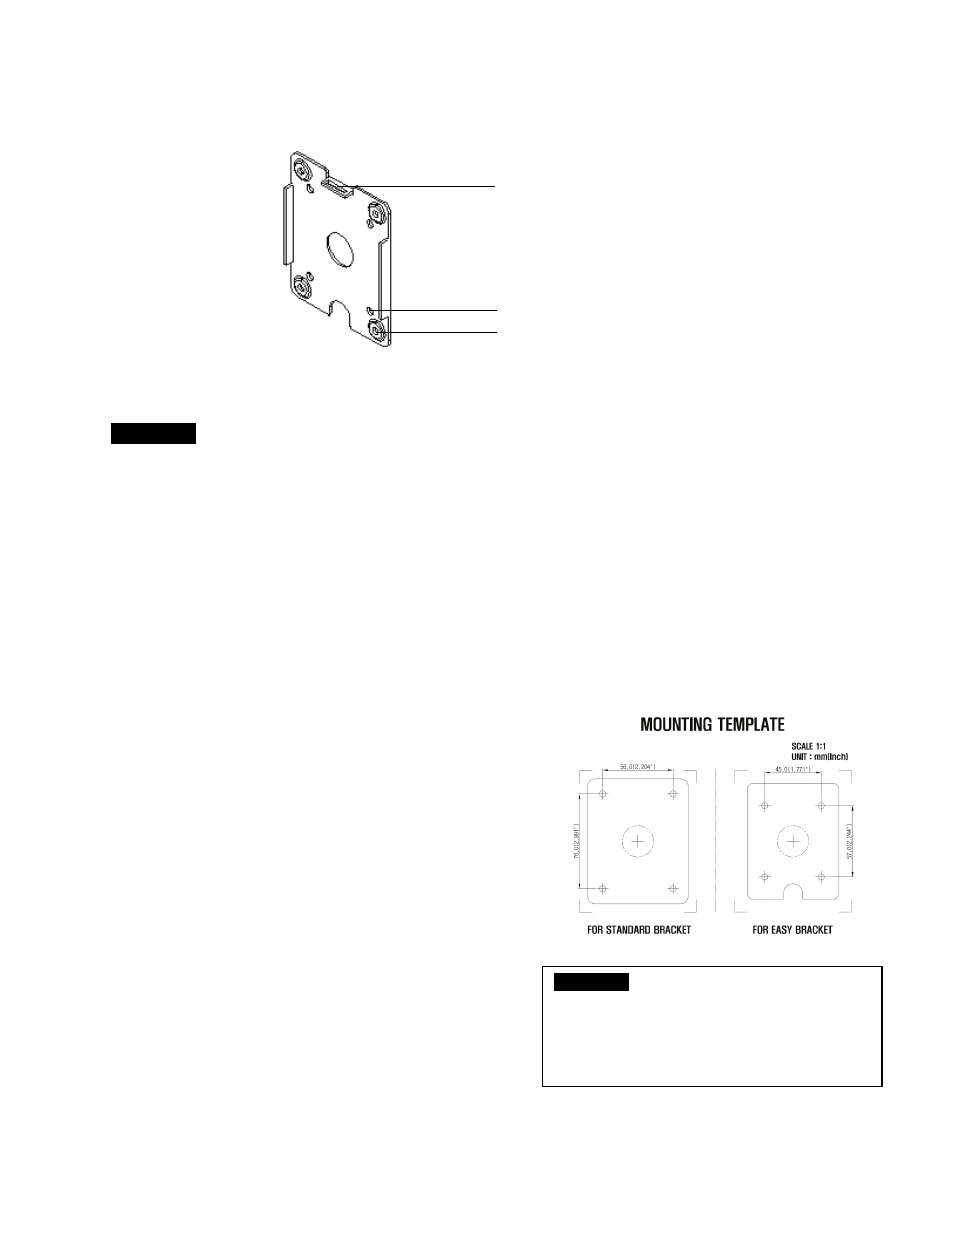
4.3 Easy Bracket
CAUTION
-
Easy Bracket can not be installed on the ceiling.
When it is installed on the wall, ⓝPeg for Easy bracket Hook must be placed upwardly.
5. Installation Instructions
•
Make sure the power is removed before the installation.
•
Follow the order for applying power.
First, connect the low voltage (AC24V or DC12V), then plug the AC adapter to AC outlets to avoid an
improper reset from power jitter and a damage from the surge voltage when no load.
5.1. Mounting the camera on wall
5.1.1 Without using an Easy Bracket.
1) Drill the holes on wall or ceiling using a supplied template.
2) Insert the ②anchors to the drilled holes
3) Match ⓔFoot mount Hole(x4) to the drilled position
4) Fix the bracket by using ③Wall fixing screws
5.1.2 With using an Easy Bracket.
1) Drill the holes on wall using a supplied template.
2) Insert the ②anchors to the drilled holes
3) Match the EASY BRACKET to the drilled position
4) Fix the EASY BRACKET by using ③Wall fixing screws
5) Connect hook(ⓛ) to peg(ⓝ)
6) Fix ⓓBracket Foot to EASY BRACKET by using
④wrench bolts through ⓔFoot mount Hole(x4)
CAUTION
-
Easy Bracket can not be
installed on the ceiling.
When it is installed on the ceiling,
ⓝ
Peg for Easy bracket Hook must be
placed upwardly.
ⓝ
Peg for Easy Bracket Hook(ⓛ)
ⓞ
Wall Mount hole(x4)
ⓟ
Bracket foot fixing hole(x4)
ⓝ
ⓞ
ⓟ