Creating an activex device for octopus, Configuring the mos device for octopus – Grass Valley Aurora Playout v.7.0 User Manual
Page 108
1. Find the file
MOSWrapper.ocx
on the Octopus server machine.
2. Put the file on the Octopus server in the following location:
•
On a Windows 2000 machine, put the file in C:/WINNT
•
On a Windows XP machine, put the file in C:/WINDOWS
3. Double-click on the file to register it.
4. If necessary, specify the program to register it as REGSVR32.exe.
Creating an ActiveX Device for Octopus
You need to create an ActiveX device before using Octopus with Aurora Playout.
1. In the Octopus application, go to
Admin | MOS | Devices
.
2. Highlight the MOS ID for Aurora Playout.
3. Click the
ActiveX
button in the toolbar.
4. Click
New
and configure the device as follows:
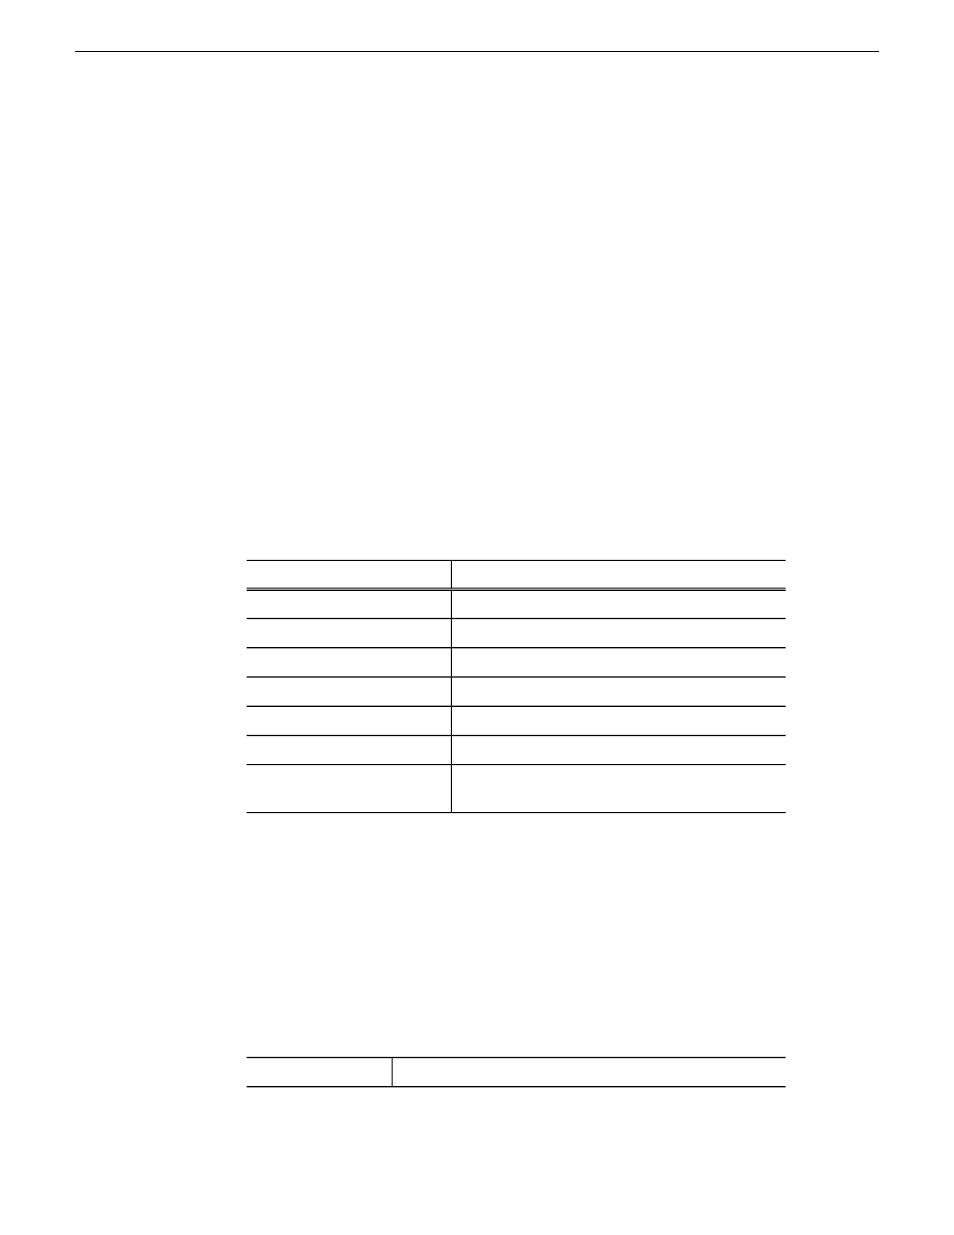
Setting
Option
User preference (e.g., ALP)
Name
User preference (e.g., Assignment List)
Long Name
800 width x 600 height
Size
browser
Type
1.0 iNews
Version
GUID
Insert ActiveX using
4A7EA76A-62A5-11D4-BAE8-0050048C80CA
Enter GUID of ActiveX
control
5. Click
OK
.
Configuring the MOS Device for Octopus
You need to configure the MOS Device before using Octopus with Aurora Playout.
1. In the Octopus application, go to
Admin | MOS | Devices
and double-click on the
device you want to use with Aurora Playout.
2. Configure the Basic tab as follows:
These values must match those set for the XMOS Server.
mosID
108
Aurora Playout User Guide
14 April 2010
Setting up your NCS for Aurora Playout