Disk controller board removal – Grass Valley K2 Summit 3G v.8.0 User Manual
Page 100
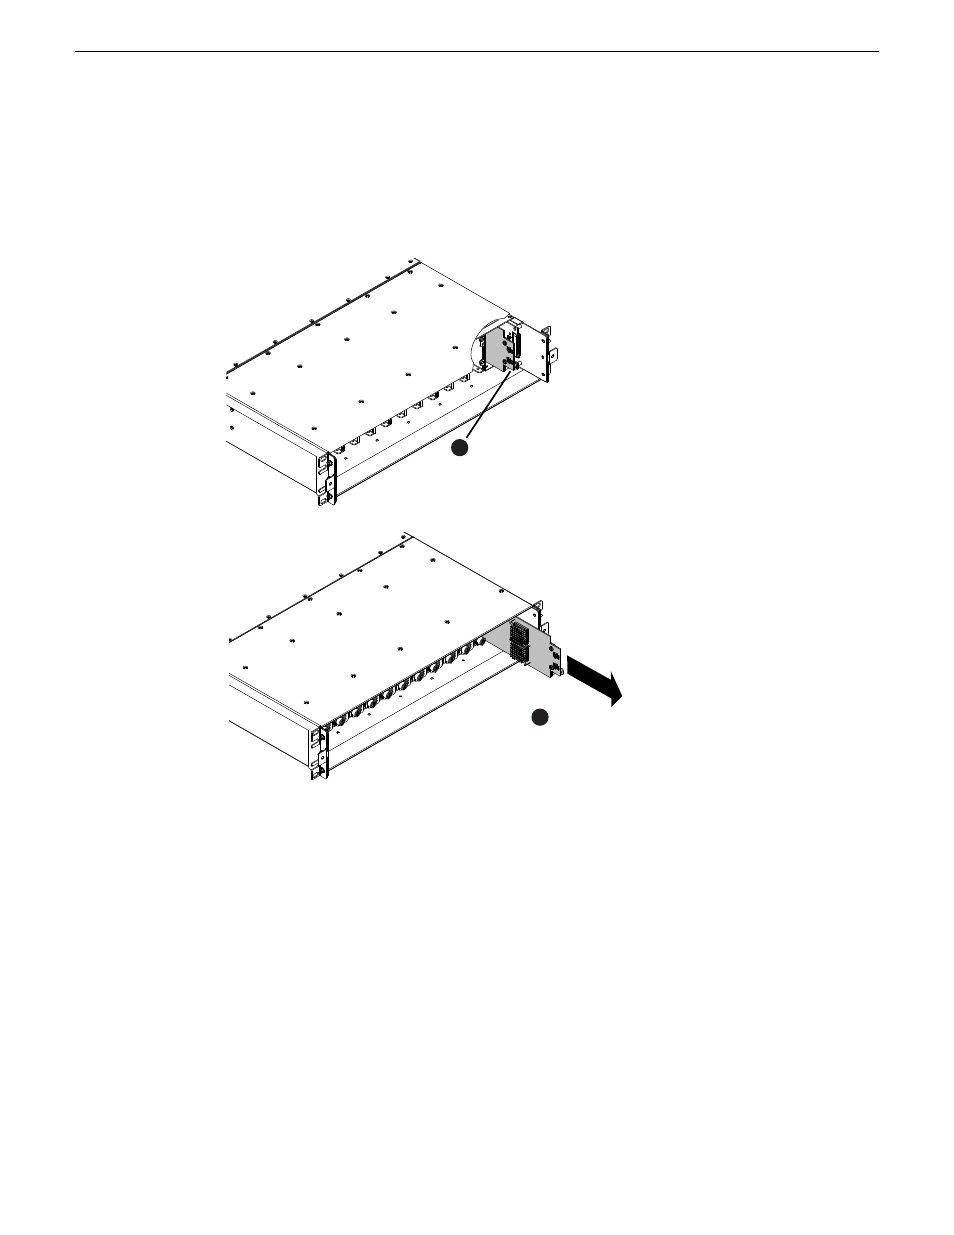
Disk controller board removal
Before doing this task, remove the front bezel assembly.
1. To remove the disk controller board, proceed as illustrated.
Remove screw
1
Slide out
2
2. When installing, do the following:
a) Make sure the board engages with the top and bottom guides.
b) Make sure the board engages with the connectors on the disk backplane and midplane board.
After replacing the disk controller board on a K2 Summit 3G system or on any system that has a
Type II (ADLINK) CPU carrier module, you must restore disk controller configuration. This includes
the first generation K2 Summit system, which can have a Type II CPU carrier module that was
installed in the factory or that was upgraded in the field.
Related Topics
Restoring disk controller configuration
on page 64
100
K2 Summit 3G Production Client Service Manual
02 February 2012
Removing and replacing FRUs