Task 1, Connecting kaleido-solo to a network, Task 1 – connecting kaleido-solo to a network – Grass Valley Kaleido-Solo Quick Start User Manual
Page 6
Kaleido-X Hardware
– Description and Installation
4 | Loudness Monitoring and Analysis using Kaleido-Solo and iControl Solo
Task 1 – Connecting Kaleido-Solo to a network
Prerequisites:
If you do not plan to use DHCP for your IP address, obtain the following information from your network administrator:
1. Static IP Address.
2. Net Mask.
3. Gateway.
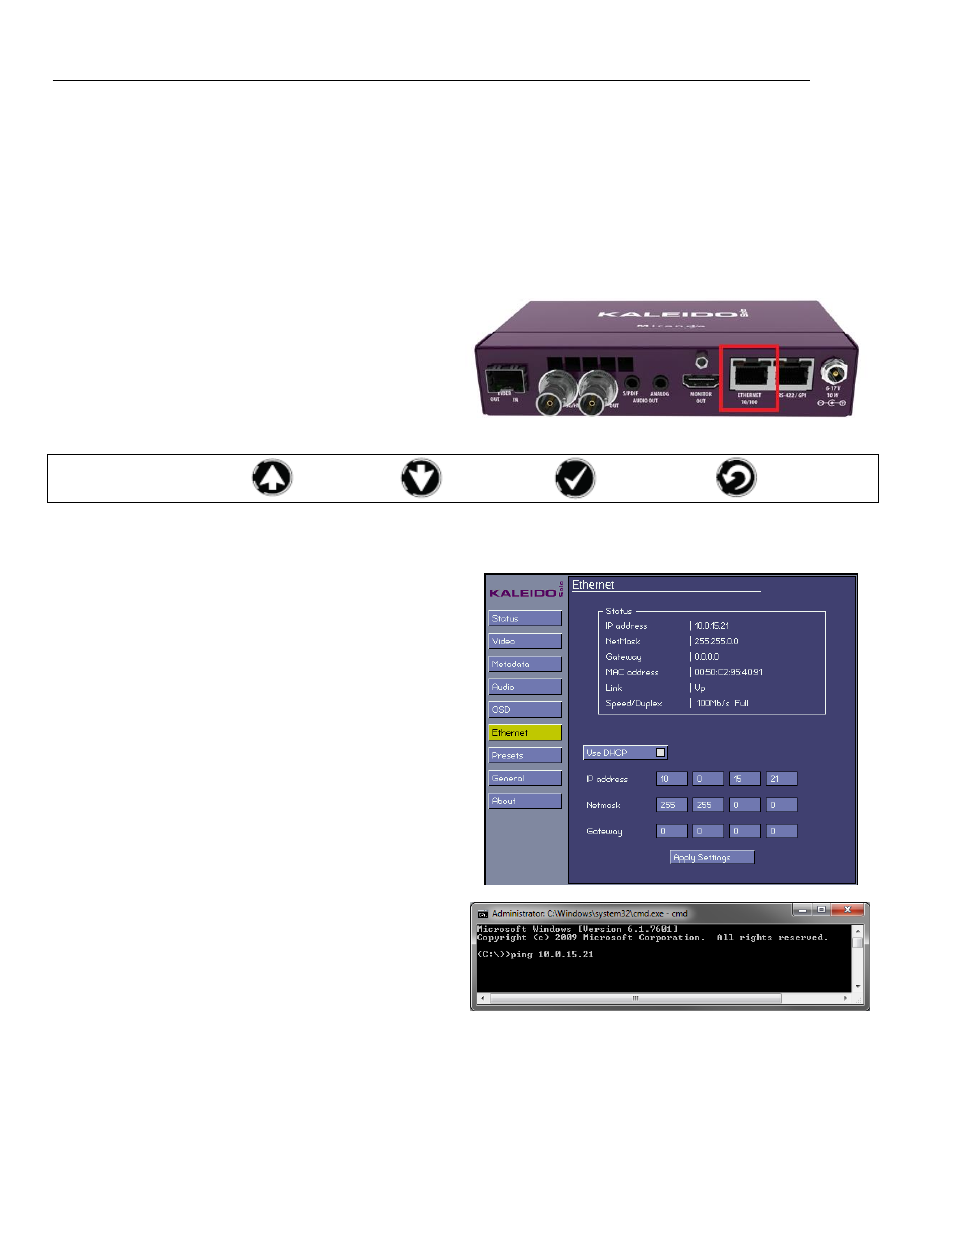
Connect your Ethernet cable to the rear-panel Ethernet
port.
A button refresher:
= UP;
= DOWN;
= ENTER
= ESCAPE
View the output of the Kaleido-Solo on a monitor, and press ENTER on the Kaleido-Solo front panel to open the menu
display.
1. Use UP and DOWN to navigate to the Ethernet
panel.
2. ENTER to move into the Ethernet setup page
3. Using the buttons, navigate to the IP address,
position the highlight on the address box you want to
modify and press ENTER.
4. Using the UP & DOWN buttons set the desired
value.
5. Press ENTER to confirm the value.
6. Repeat 3 to 5 until all values have been entered.
7.
Move to “Apply Settings” and press ENTER
From Windows Start Menu, click run, type cmd and
press <enter> on your keyboard or click OK in the Run
window.
In the DOS Command window type: “ping <your IP
Address>” and press <Enter>
If you receive a response from the Kaleido Solo, it
confirms that the IP address was correctly set, and
the command window can be closed.